A journal following the history, design, construction and operation of Bernard Kempinski's O Scale model railroad depicting the U. S. Military Railroad (USMRR) Aquia-Falmouth line in 1863, and other model railroad projects.
©Bernard Kempinski All text and images, except as noted, on this blog are copyrighted by the author and may not be used without permission.
-----------------------------------------------------------------------------------------------------------------------------------------------------------------

June 9, 2025

News Update: US Army 250th Anniversary and New Location for the D-Day Exhibit

 US Army 250th Anniversary

I am steadily working on the Engine House and Machine shop. I have the windows built and am now adding the exterior planks. I hope to debut the model at the US Army 250th Anniversary Celebration at Joint Base Langley- Eustis on June 13th, 2025.  I will also have other civil war railroad models on display. 

The event is open to the public. You can find more information here.  The Military Railroad Society will be there with prototype and model train exhibits. The Army will have tours of their water vessels, other equipment of display, and lots of things for kids to do. 

Come check it out. 


D-Day Exhibit at 1st Infantry Division Museum 

The D-Day Exhibit with the dioramas we built, Keith Rooco's artwork and his collection of artifacts are now on exhibit at the First Division Museum in Wheaton, IL You can find more information at the link below.

https://www.fdmuseum.org/exhibit/d-day-omaha-beach/


June 6, 2025

Shafts, countershafts, pulleys, belts, and belt shifters

Side view of the machine shop


View looking through the machine shop. More weathering is required.

The boiler and steam engine were the final machines to add to the machine shop. The boiler is a kit from Crow River.  I used Vallejo Model Air Black Metallic paint on the boiler. It make a nice simulation of Russia Iron typically used on boiler shells.  

 The engine was a file I obtained from GrabCAD. That is a website oriented to engineers vice hobbyists. Still, there are lots of files on it that can be printed in a scale model application. 

I decided the steam engine needed a governor as that was a common feature in mill engines. The governor helps keep the steam engine at a constant speed as the load changes. That is key requirement  when cutting multiple machines are running at specified feed rates and powered from the same source. So I drew a governor, printed it, and added it to the machine.

I installed the boiler and steam engine in an extension to the left of the shop. That means the structure will no longer fit in the wye at Aquia Landing. So, Plan A is now out. 

With all the machines installed, I added the main shaft and countershafts. Some machines get power directly from the main shaft. Other machines use countershafts. 

Countershafts have to fulfill three functions. They may drive at one speed, or at two speeds, but in the same direction; or they may run at two speeds, one for driving, the other for reversal. There are different ways of effecting these movements. I opted for single-speed countershafts with machines that have stepped pulleys. I 3D printed stepped pulleys for these countershafts.

Looking through the roof at the machine shop

Typical belt shifter design


The belt shifters are essentially the on-off switches for the machines. To make them I soldered pieces of 0.032 inch phosphor bronze to the roughly correct shape. I curved the belt shifters slightly to follow the shape of the pulleys. I used extra hangers that I printed to install them except in a few locations where there wasn't room for the full hanger. In those cases I used blocks of wood.

The belt shifters don't spin in the hangers. They slide longitudinally to shift the belts from pulleys that are loose to pulleys that are firmly attached to the shaft.  Each belt shifter was a long, tapered wooden staff that extends about 6 feet above the shop floor.  Operators reach up to grab the wooden staff to engage the belt shifter. I cut those staffs using 1/32nd in birch plywood on my laser cutter. The linkage for the staffs required that I solder a short section of rod at 90˙ to the direction of the belt shifters. I used 1/8 inch square sections of strip wood to hold the belt shifters to the joists.

Belt shifter.

All the shafts, countershafts, pulleys, belts, and belt shifters create a nice complex look. Installing them was almost as tricky as rigging a sail ship model. The view looking down the length of the machine shop is really cool.


June 1, 2025

Machine Shop Progress


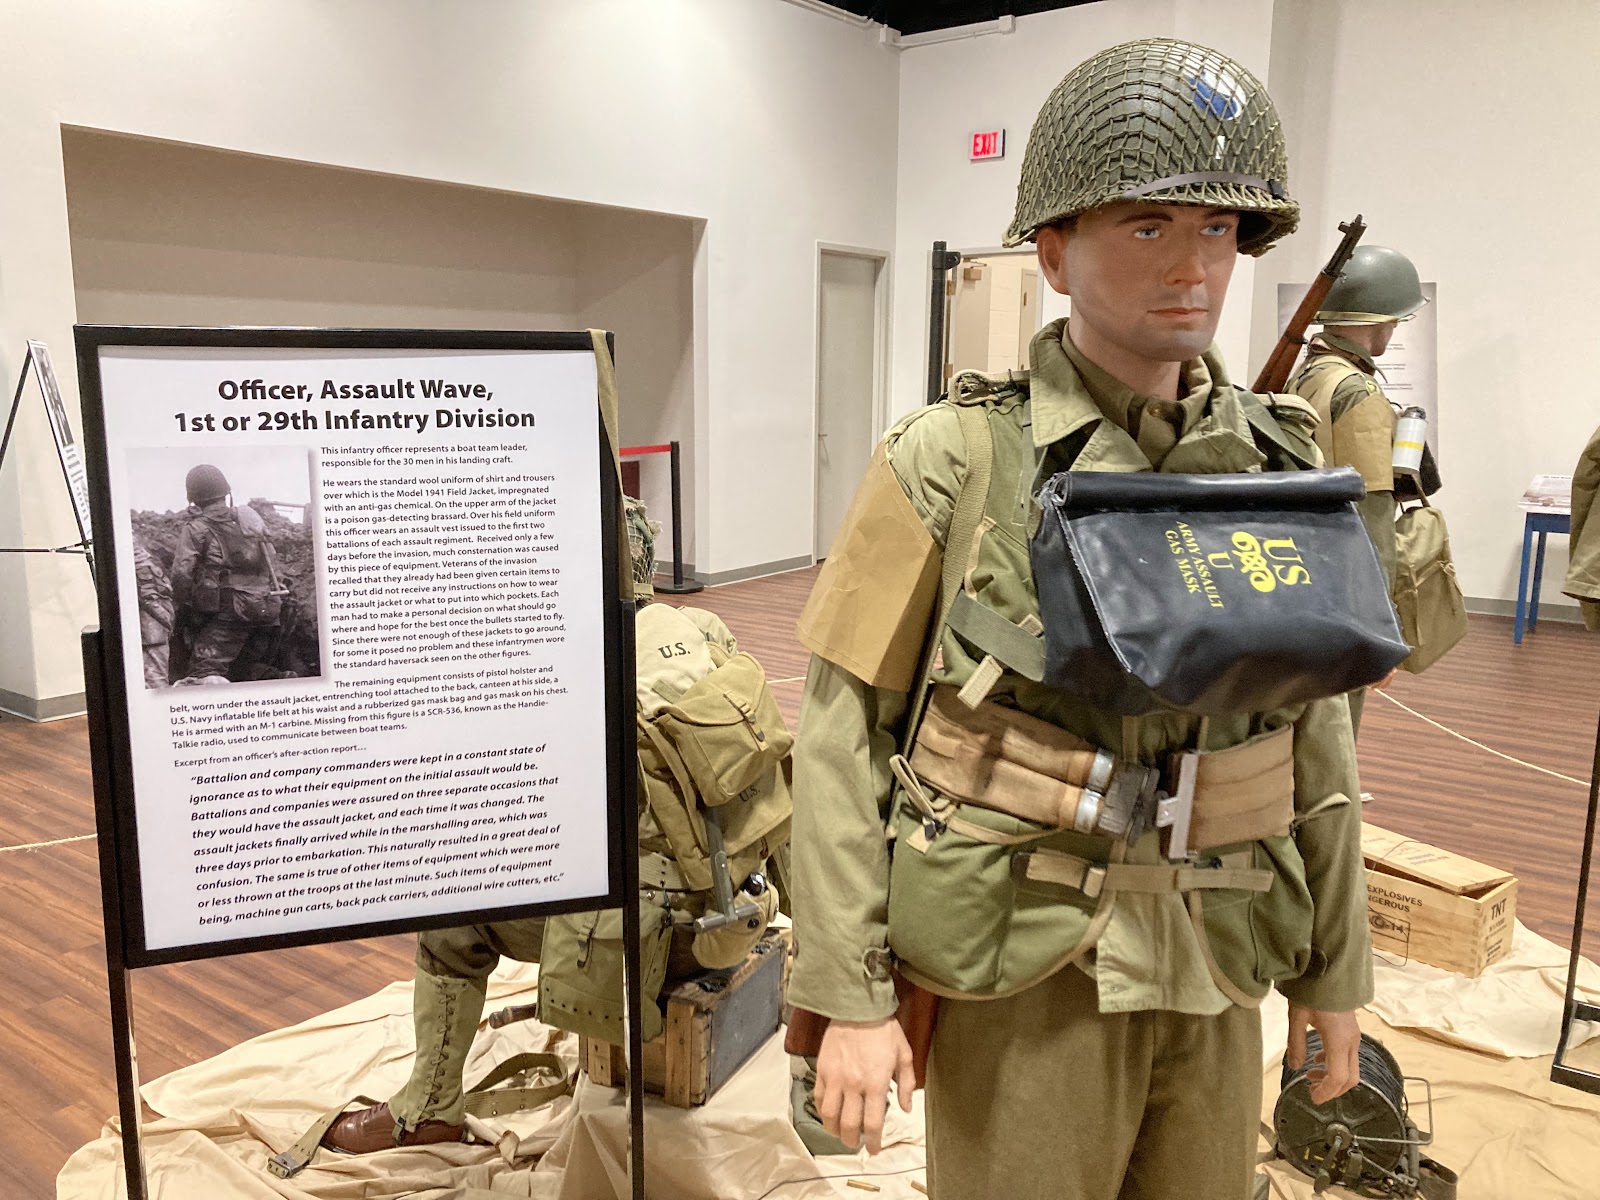
Machine shop at the EBT Railroad. It is amazing how many machines they crammed into those old shops.

I finished building most of the models of the  machines I will use in the shop. I have only finished painting and installing the wheel press. The rest need final painting and weathering.  Here is a list with status.

Planer 1    Wildwest kit     
A nice, but expensive, model based a planer in the Sierra Railroad shops. 


Planer 2
    3D print 
from artwork that I modified from a file drawn by dansfoundry at printable.com.  

This model was based on a New Haven planer restored by Vintage Machinery on YouTube. 


Engine lathe  Wildwest kit 

This is the newer version with 3D printed parts


Bench lathe  Wildwest kit Not built yet.


Slotting machine
 3D print from my artwork. 

I only had one view of the machine, so I had to make a lot of assumptions about the how it all works and fits together. 


Wheel press  
 3D print from my artwork. Thanks to Marty McGuirk for finding a set of plans from a book on the Sierra Railroad.

This one had the most fiddly parts as there is a very delicate saddle to hold the wheels set in place while pressing it and a chain hoist to help lift the axles.  

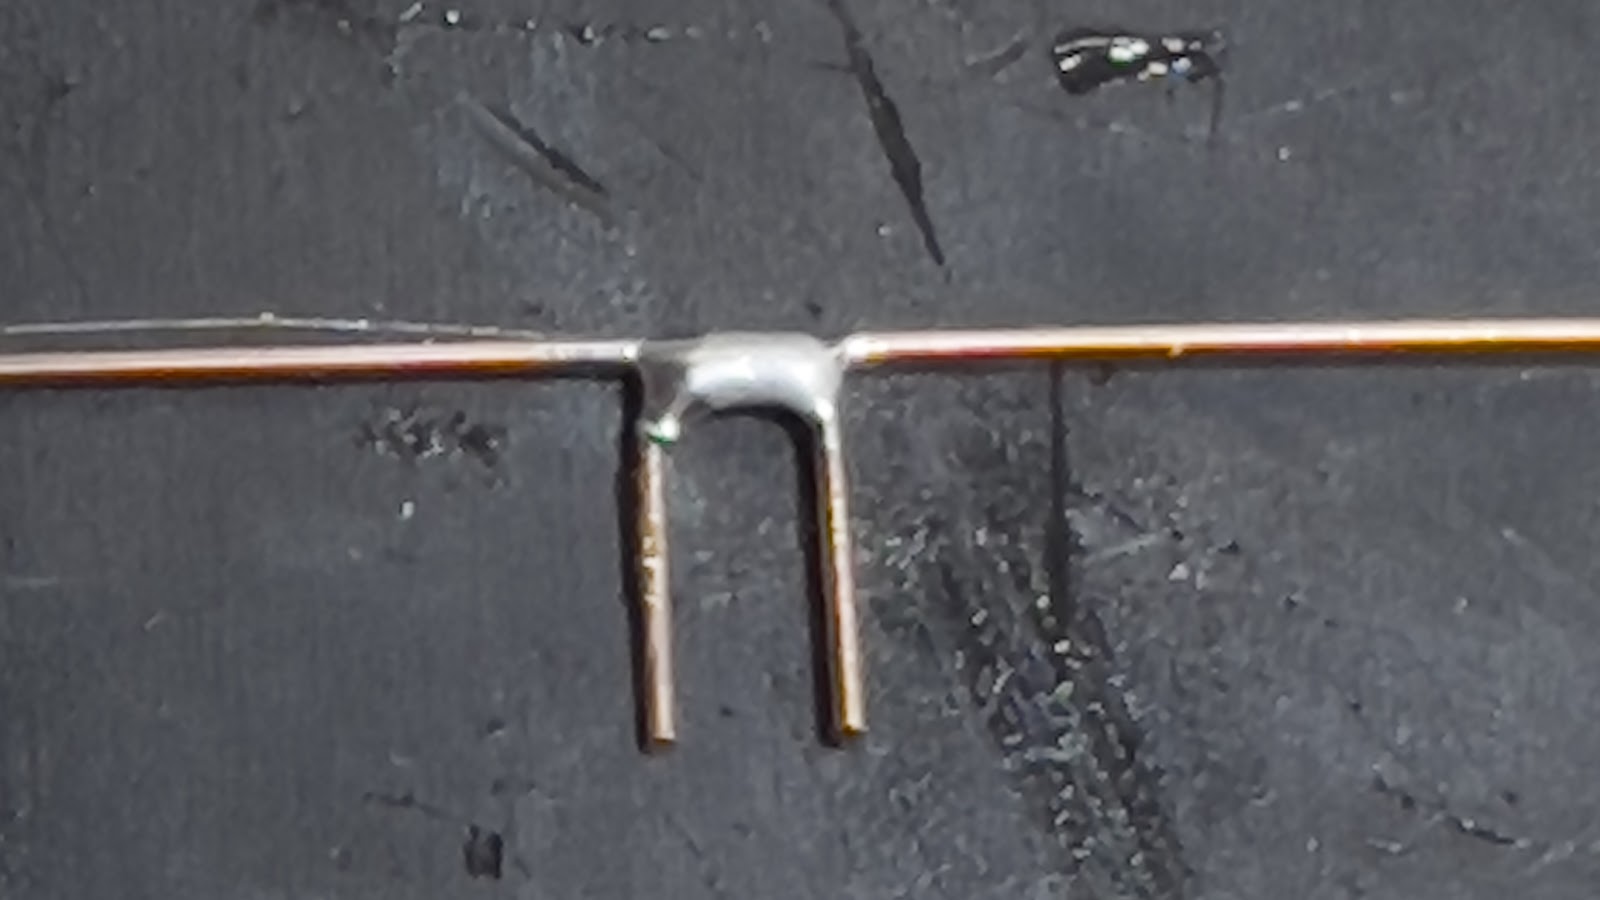
I decided to print a wheel set with  33 inch railroad wheels with the cooling fins on the back. I found a drawing of this type of wheel used by the UP. Those wheels were lightweight and discontinued as material gots better and trains got heavier.

While I was at it, I printed extra finned wheels to use as clutter around the shop. 

33" Finned wheel set based on a UP drawing


Dill press small Wildwest kit. This will be mounted on one of the posts in the shop.

Pedestal Grinder  Wildwest kit. A small grinder that can be used for general shop tasks.

Radial Drill Press  
3D print from my artwork.  

I based this on the machine that Iron Jonesy is restoring on his Youtube channel. He provided enough information about the machine that I could make a pretty good model of it. The only issue was that he never provided dimensions, so I printed it in two sizes to see which worked better.


This is the artwork of the machine.
I had to thicken up some of the parts to survive  3D printing.


The wheel press is the first tool I installed. It will be in the middle of the shop. I plan to work out from it. 

I should have left some of the beams of the structure off to allow me to fit my hands inside more easily. But this should work.


 I decided to attach the belts to the machines first. Then I will install the line shafts once all the machines are in place and secure the belts to the pulleys on the line shafts. 


I am using 0.010 inch thick resin impregnated board for the belts. It is a bit stiffer than paper and is the right color.


I also printed a bunch of hanger and pulleys that I drew. I am not sure exact ly how many I will need as it depends of how many counter shafts I install.