A journal following the history, design, construction and operation of Bernard Kempinski's O Scale model railroad depicting the U. S. Military Railroad (USMRR) Aquia-Falmouth line in 1863, and other model railroad projects.
Brion Boyles delivered the completed model of the schooner today. This model started out as the Smuggler Kit by Bluejacket Ship Crafters in Maine. The kit comes with a carved solid hull. My brother Rob cut it on his bandsaw to convert it to a waterline model.
It sat for several years as I worked on other parts of the layout. About 18 months ago, I asked Brion Boyles if he was interested in building the kit as a commission. He said yes. He worked on the kit on and off for the next 18 months. He made some modifications to make it into a cargo vice fishing schooner. I really liked how he did the sails. They are much more accurate than the other schooner model I have. He rigged one of the booms so that it can be used to unload cargo. I need to add that cargo detail. I also need to make a name plate. I plan to name it after my granddaughter, so it will be Miss Merritt or Lady Merritt.
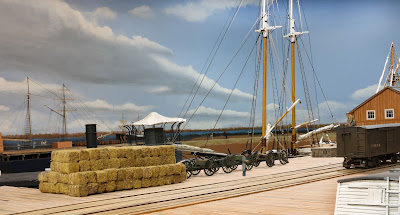
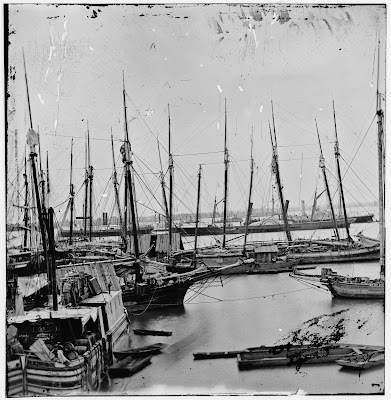
I would like to populate the harbor with several ships to create the forest of masts and smoke stacks you see in the prototype photos. This will include more ship models and others painted on the backdrop.
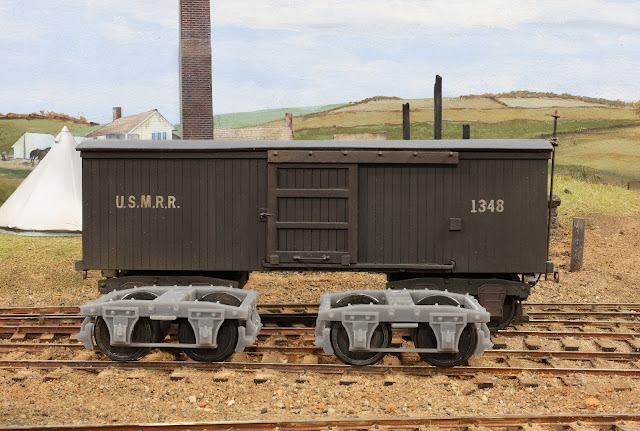
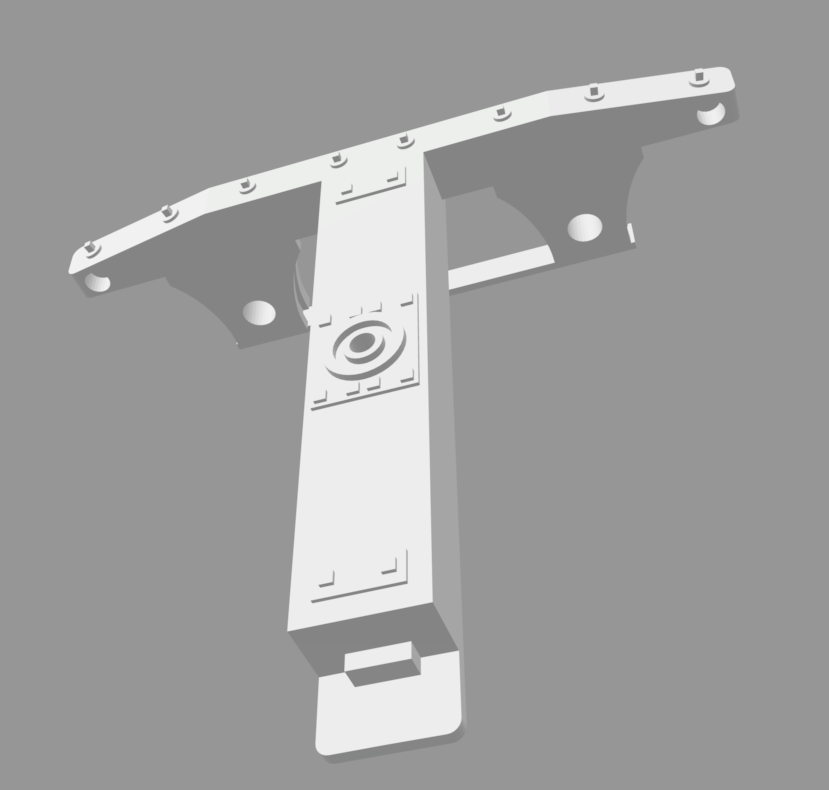
The expansion of the layout has resulted in a need for me to have more freight cars on the railroad. I haven't built any new cars for the layout for several years. I probably need to make some new flat cars, but I would also like to try some new styles of box cars. Regardless of what I build, I will need some new trucks. I decided to make them using my 3D printer.
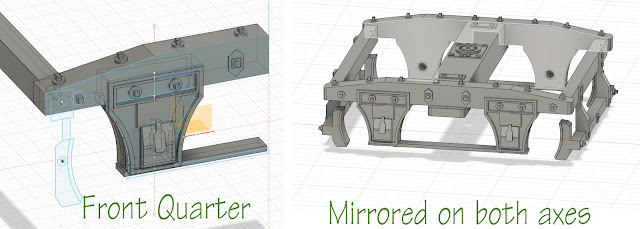
I started by just drawing one quarter of the truck since it is symmetrical about the longitudinal and lateral axes. Once I had the quarter section fully fleshed out in the drawing, I used the mirror feature in Fusions 360 to complete the truck.
These trucks are designed to accept NWSL 8248-4, O scale Wheelsets 33"/145,1/8"x1.730" shouldered axles. I have 5 sets of these on hand. Plus I have a few of my cast metal trucks that I plan to replace. I don't know if I can still get these wheelsets. If I cannot, I have a lot of Intermountain O scale wheel sets on hand. I would have to adjust the drawing to accept those wheelsets. However, I prefer the NMSL wheelsets as they have thinner treads.
I had to design the truck in parts that must be assembled. The printed resin is too stiff to allow assembly by flexing the truck like you can do with N or HO scale plastic trucks. To ease assembly, I printed the bolster and one truck frame as single piece. Thus each truck has only 4 parts. Once the wheelsets are inserted in the holes on the truck frame, and the second side frame attached, the truck aligns itself. I apply some CAA and use a small clamp to hold the parts. While the glue is setting I insert the brake beams. On trucks without brakes, I glue those beams in place. But for trucks with brakes the beams are not glued.
You can see how the brakes beams can pivot
I made the brake beams on pins so that they can rotate. That allows me the option to make the brakes work using my photo etched parts if desired.
I designed the bolster and brake beams to fit in slots or holes in the truck side frame. I learned that if you want to do this, you have to make the slots or holes larger than the corresponding pins by a fair amount. In this case I had to enlarge the 0.065 inch holes for the brake beams by about 25%. I had to reduce the bolster locating pin by about 50% to make them fit. I am not sure why, but holes and slots in materials print smaller than the design dimension by significant amounts.
I was very pleasantly surprised to see how smoothly these trucks roll. They have a lot less friction than my earlier versions. Printing 3D trucks will simplify my freight car construction as in the past it took me about 4 hours to build a set of trucks using my laser cut parts. These trucks also have more realistic detail, particularly in the journal cover area.
This weekend I also worked on a wargame project with John Drye. I helped him build a map for a game he plans to run at Fall In 2022. The maps depicts the area near Eindhoven and Son during the 1944 Operation Market Garden. The map is a 6' by 6' piece of felt that we painted and flocked. The graphics are designed especially for the new game called Breakthrough that Frank Chadwick is developing, and John is play testing. However, the map could be used for other game systems with a little modification. It was a fun project that came out better than we expected.
We used aerial photos as a guide but the terrain is stylized to suit the game system. I painted all of the fields, canals, and roads with spray can colors using soft masks. Then we embellished the edges of the fields with acrylic paints to show tree breaks.
John is painting some details to help delineate the fields and roads.
I recently returned from a road trip to Kentucky to help my son and daughter-in-law get their house ready for the arrival of their baby next month. We worked on kitchen remodeling projects.
On my way out there I stopped at Marty McGuirk's house to take a look at his proposed HO scale paper mill. I will be helping him build the structures for that.
Next, I stopped at Bon Weinheimer's layout near Charleston, WV. He was hosting an op-to-you-drop session for a group from Kentucky. The group included Fred Soward, who is the president of the Louisville NMRA division and is married to Barbara, my wife's second cousin.
I had a chance to do a little rail fanning and landscape photo safari while in Lexington, KY. I stopped by RJ Corman's HQ and got some photos and video of their operation.
I also headed west to the Kentucky River area to try to get some photos of autumn color in the Kentucky horse country. That area is among the prettiest in the USA. The white fences are disappearing as the horse farms are transitioning to black fences for reduced maintenance costs.
I also got some nice bird shots in Chase and Mizuki's backyard.
Jessie Smith built this HO scale model of a C&O railroad car ferry
Whew! What a weekend! MARPM 2022 is over and it was great. We had more people and models than we expected. We plan to do it again next year. Make plans to be there.
Dave Vaughn had this famous model on display
There were about 350 HO scale models on display including a 5 foot long HO Scale C&O railroad car ferry built by Jessie Smith.
There were about 50 N scale models including an N Scale coke works by Scott Wahl and an urban yard module by John Steitz. Dave Vaughn and his crew set up a 36-ft long O Scale layout that was originally built by Tony Koester but modified and extended by them.
NYCRRHS recruiting members
There were 33 clinics on various subjects. We had about a dozen layouts open for inspection too.
On Sunday I hosted an open house. I had about 25 people show up.
Mike Hart's wonderful palm trees
Brion Boyles also stopped by the open house to show his work-in-progress on the schooner he is building for my layout. It looks really impressive. It should be done is a week or so.
Seeing the schooner that Brion is building is getting me psyched to finish the paddle wheel steamer and other ships too. Aquia Landing will be the highlight of the layout.
I made three yellow pines tonight using preserved Caspia and static grass. I used prototype photos for guidance and added more branches than I have in the past. I gave them heavy coats of static grass secured with matte mod podge. I think these are the best I have made yet. I will make some more, but I will need a lot of deciduous trees for the forest by Mueller's Creek.
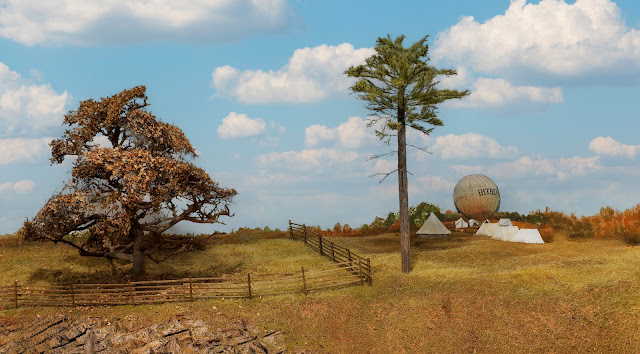
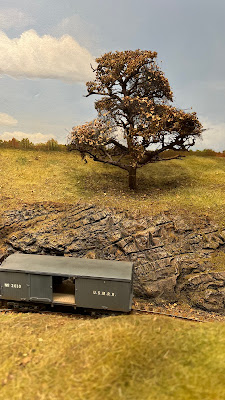
I decided the model balloon I was building was too big for the layout. So I had to make a smaller one. I quickly realized that with a small balloon, I really didn't need an actual model. A cut out against the backdrop would suffice. So I looked for a photo of the balloon that might work. I found a color photo of a replica balloon. I used it to create a small composite image. I printed it on card stock, cut out the sky, and then curved it across the corner of the layout. This was a lot easier than building the balloon model.
Here is what it looks like without a replacement sky. I plan to add a few more trees in the foreground to help break up the view of the sky in the corner. The tents are not glued down and sceniced yet.
Next, I took a crack at making another lone pine for Falmouth. I was not happy with the first one I made a few weeks ago. I had ordered several batches of preserved caspia from a vendor in Utah. They finally arrived, so I made a new tree using a pine dowel, caspia twigs and static grass. It was much faster to make and looks a lot better. I plan to us this technique for more yellow pine trees in this section.
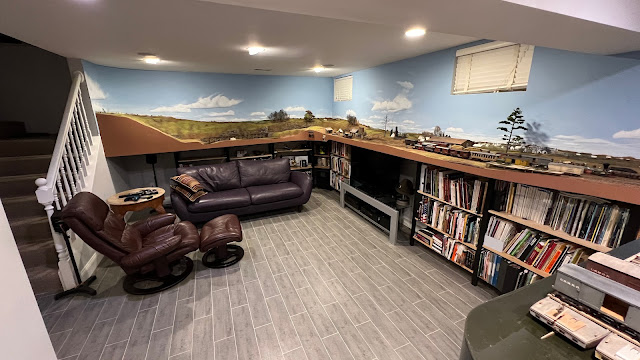
Finally, I rearranged the furniture in the room. I placed the couch alongside shelves under the bridge scene. This opens up the center of the room. The couch doesn't interfere with operations as there is no need to work the train as it comes out of the tunnel and across the bridge.
Eight members of the ACWRRHS, Thom Radice, Charlie Taylor, Phil Reuhl, Marty Vaughn, DC Cebula, Ken Starcher, John Bopp, and David Bjorkman, visited the Aquia Line today. We concluded a successful day of operating the railroad in morning and afternoon sessions. Everyone seemed to have a great time. The railroad ran well. I spent about an hour the night before giving all the track a thorough cleaning. That helped with the DCC engines like Haupt. The new battery in Whiton worked well. Fury also ran well.
I was concerned about the number of cars being insufficient, but everything seemed to worth well. The sidings were not so choked with cars that might cause delays. We ran trains ranging from 10 cars to an engine leaving Falmouth light but making pickups along the way.
Everyone agreed that the new Falmouth is a big improvement to the layout. This railroad is simple in design, but relatively complex in operations when you consider the link and pins, proper whistle signals, using the telegraph, maintaining the paperwork, and deciding how to do the switching moves. The Time Table and Train Order aspect is fairly simple, but still has it nuances.
The infamous 10-minute rule came up for discussion again as many trains were running late.
"No Train having the right to the Road must leave any station or passing place, where by the schedule it should pass a train, until Ten Minutes after its own time per schedule; and this ten minutes (allowed for variation of watches) must be observed at every succeeding station until it shall have passed the expected train; and no portion of the ten minutes allowed for variation of watches must be used by Trains running in either direction. "
Phil suggested that the first phrase means the rule applies to the priority direction, which is southbound i.e. loaded. So we now interpret this phrase to mean that southbound trains in the superior direction can pass a planned meeting point if the inferior train they were supposed to meet is more than 10 minutes late.
I love how operators find new ways to operate the layout, ways that I did not think about.
We did detect some problems.
Whiton was shorting intermittently in the tender trucks. We could see sparks. Because it was battery powered, it kept right on chugging, but I need to fix the problem. Charlie suggest insulating washers.
One turnout switch stand broke as I did not properly clear the ballast and glue from it. Luckily it was not in a critical spot and we could operate by had.
The telegraph signal from Falmouth was at times weak. I don't understand how that can be as there is a power supply in the telegraph office to power the sounder. So why Falmouth was weak while the others were fine is a mystery to me.
Here is a short video of the guys working the railroad. Thom Radice looked quite dapper in his period attire. Thanks to everyone for attending. Now I look forward to a long nap. The last few nights were long and the mornings early!
I used one of the dead bonsai trees that Samir gave me to create a marcescent oak, in this case a pin oak. My brother suggested trimming the branches to give it to have a rounder crown. That worked. I used a combination of Silfor Plane Tree foliage autumn, 933-24, and furnace filter sprinkled with Hudson and Allen forest litter to make the oak leaves on the tree. This tree is broad, so it was tricky finding a spot that worked. The hillside by the balloon camp worked the best.
Then I made a set of background trees from Scenic Express Supertrees and pieces of a witch's broom. The witch's brooms are available for sale this time of year due to Halloween. This year the broom I purchased has a pumpkin spice scent. I hope that wears off as it is a bit much.
Finally I added a split rail fence and some goldenrod weeds from Sifor to embellish the scene.
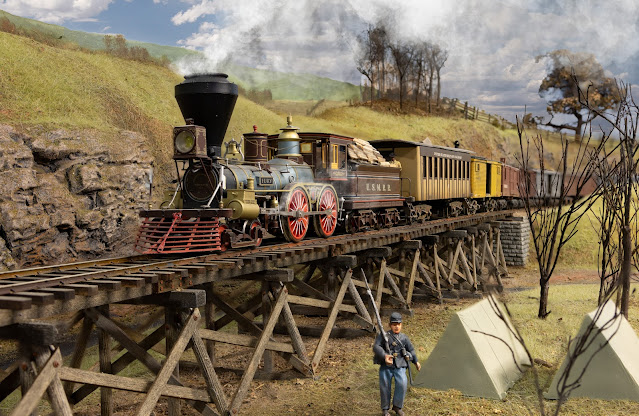
I am experimenting with trees or bushes in the foreground by the trestle. I added a few pup tents and a guard too. I don't want the trees to be too big as I don't want to interfere with long photos of trains on the trestle.
Those are probably the two most important equations I learned at US Army Engineer Officer Basic Course. The instructor told us to remember them when the Colonel wants to fix the mud in front of his tent. Don't add dirt, fix the drainage.
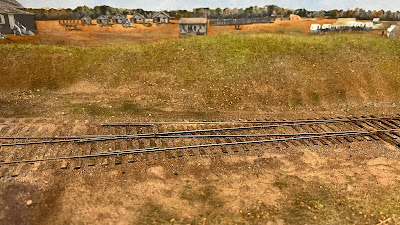
Tonight I put the first formula to good use as I finished ballasting and applying a base coat of scenery on the new Falmouth. I wanted to make it look like mud.
I made a secret concoction of 1/3 Amby's clay, 1/3 tile grout, and 1/3 Old Dirt from Scenic Express. I processed Amby's clay in my blender to get as rid of as many clumps as possible. The Old Dirt from Scenic Express is great as it doesn't have sparkly mica in it. Unfortunately, the new bottles of dirt I purchased from them do have mica.
I applied the secret formula to the layout. Then I hit it with wet water and then dilute glue. I used rubbing alcohol as a wetting agent. It has the benefit of drying faster too. The tile grout helps lock all the dirt and clay into a solid layer.
It's nice to be finished. Tomorrow I will be cleaning track and testing everything for post ballasting problems.
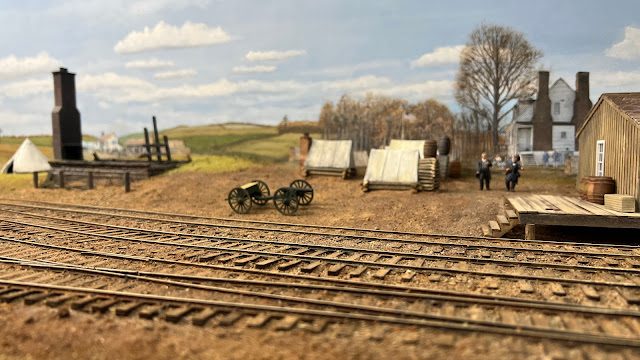
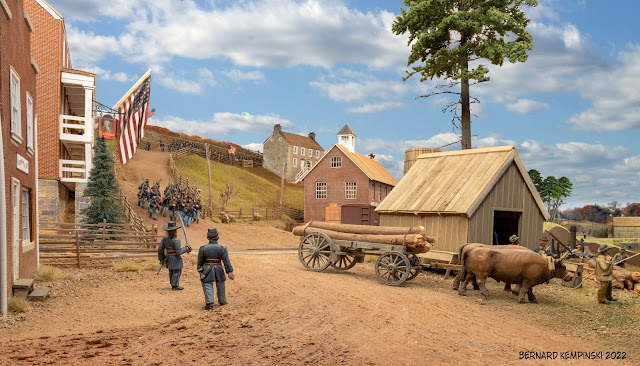
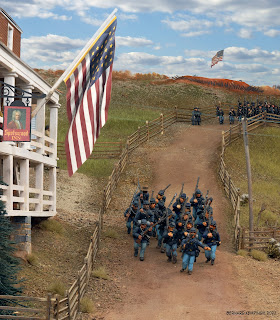
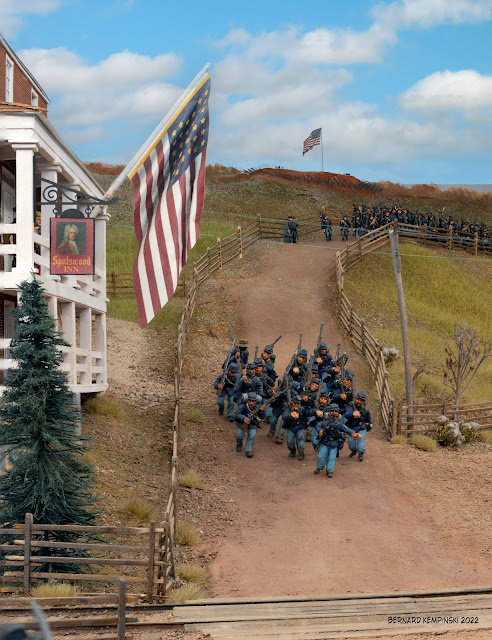
Jack Thompson painted some soldiers for me a few weeks ago. I installed them on the layout and took some pictures tonight. The left file of soldiers and the officer with the sword are the figures that Jack painted.
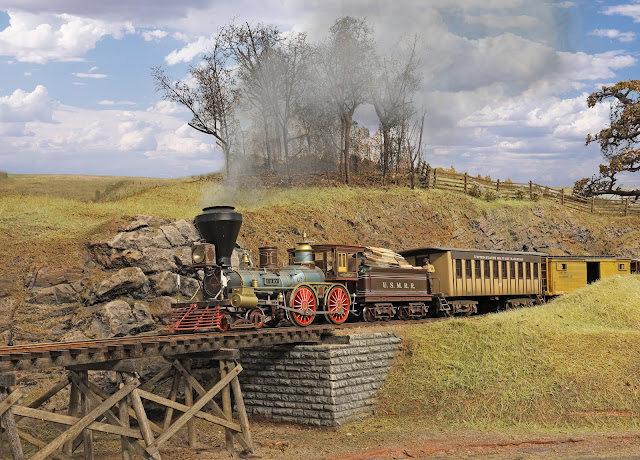
I used my new camera to try some new photo angles at Brooke. I like how the lead photo came out. The water mill at Accokeek Creek is visible in the far right distance. It's about 15 feet away from the camera. I used focus stacking and sky replacement to get the shot.
Meanwhile, I am making trees for the layout. They are quite time consuming to make.
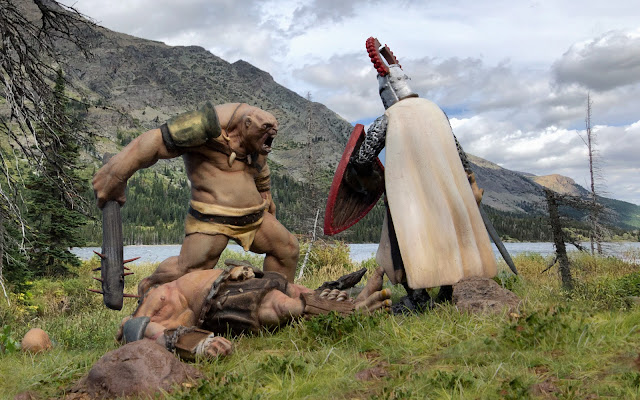
This diorama received a silver medal in the Fantasy Open Category
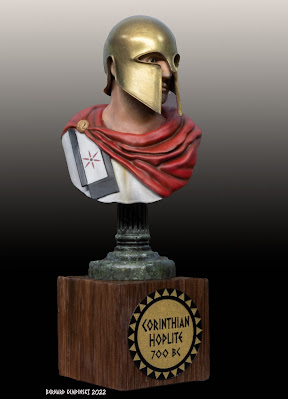
My Corinthian Hoplite received a silver medal
My brother, Rob, and I attended the National Capitol Model Soldier Society Show today. This was the annual show for the NCMSS. It's more than just model soldiers as they have entries in Sci Fi, Fantasy, Gundam, Dioramas categories in addition to historical model soldiers. Also attending as exhibitors were NVNTRAK with their TTrak layout, the Armor Modeling Society, IPMS, and the Washington Ship Modelers. There were also several vendors selling models, supplies and books.
I was judge for the historical painters category. There were a lot of wonderful figures.
All in all it was a very successful one day show. About 52 people entered models for judging with about 260 models being displayed. It was a fun time.
My brother picked up silver medals for his historical and fantasy figures.
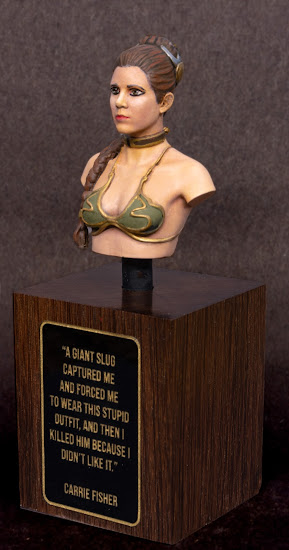
This bust of Princess Leia was the first bust I ever painted. It also received a silver medal.
I also received silver medals for historical and fantasy figures that I entered. The busts that I painted were very enjoyable projects. I especially enjoyed painting the faux marble on the base of the Corinthian Hoplite. I received a lot of comments on the helm that he was wearing and how I achieved the metallic finish. I stared with an airbrushed layer of AK Extreme Metallic paint. Then I brushed on some black and bronze acrylic to shade it. A final layer of AK True Metal metallic paint added the metallic luster. This a wax based paint that you apply with a cotton swab and then buff with a rag. It really looks like metal when applied on top of a metallic base Our joint project, Star Power, also received the Victory in Europe award for the figure, diorama or display that best celebrates the allied victory in Europe in World War II. That award came with a very nice 120mm figure vignette of US soldiers at D-Day by Jeffshiu's Miniatures. Rob volunteered to build that.
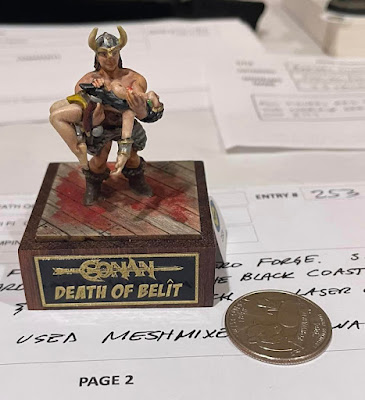
I was surprised to learn that a small 28mm vignette I made received a silver medal. It was a model of Conan holding the dead body of Belit, his lover and fellow pirate. It was based on the original story by R. E. Howard called "Queen of the Black Coast." I designed the figures using a website called Hero Forge. I used Meshmixer to combine the figures. While Hero Forge is an interesting way to sculpt a 3D figure, I really want to learn a better way to sculpt figures for 3D printing.