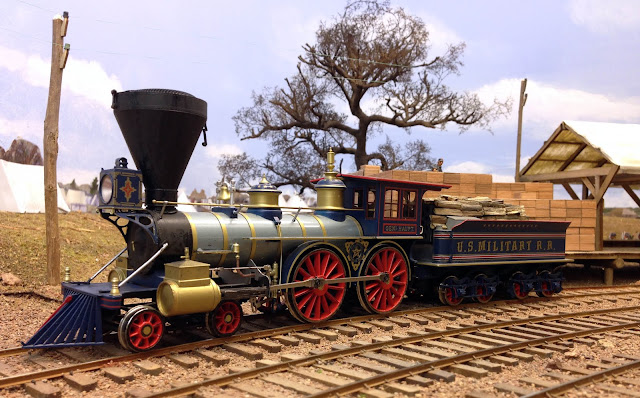
A journal following the history, design, construction and operation of Bernard Kempinski's O Scale model railroad depicting the U. S. Military Railroad (USMRR) Aquia-Falmouth line in 1863, and other model railroad projects.
©Bernard Kempinski All text and images, except as noted, on this blog are copyrighted by the author and may not be used without permission.
-----------------------------------------------------------------------------------------------------------------------------------------------------------------

January 30, 2017

New England Blitz

Mt Graylock, MA

In keeping with the upcoming Super Bowl, Marty, Stic and I did a blitz tour of New England layouts last weekend and took in the train show at the Big E. And we didn't even get tackled. I can report that New England is in a fever pitch and is ready for the big game, but for this weekend, we could care less as we saw and operated on some great layouts.

The weekend began with a fumble as American Airlines only realized they were short a pilot to fly our plane after they dragged all the passengers out to the aircraft on a shuttle. Marty volunteered to quarterback the flight, but since he's only ever piloted a Navy LST, the airline took a time out instead. The airline eventually got us to Hartford after one hour of booth review and we began the epic weekend.

Marty and Jim (l to r)
First down was Jim DuFour's Cheshire Branch layout in the far suburbs of Boston. It depicts a Boston and Maine branch line in the 1950s. It is a jewel of a layout, with heavy prototype basis. We got to run some engines and they performed flawlessly. Jim has some of the best sounding engines too. He and his technician helpers have been able to program the sound systems for very realistic sound effects. We met a bunch of neat folks at Jim's including George Corey, a 92 year old railfan that has amazingly vivid memories of the B&M steam operations, friends from Canada (who were captivated by the fact that Stic was once a professional hockey player) and the staff of MRH.


Marty, Chris and Stic (l to r) . Chris is showing us his New Haven
Library and artifact collection on the second floor of his home.
The layout fills the basement
After a few delightful hours with Jim,  we threw a deep bomb on second down and headed south to the Connecticut shores of the Long Island Sound to operate on Chris Adams's Valley Line. He models a New Haven branch line that happens to run about 50 yards behind his house, though now as a tourist line. The prototype railroad was not running, but we made up for it by running nearly a full set of downs on the layout. Chris's layout is strictly prototype based. It is still being sceniced in some areas, but the operations were great. Lot of switching and interplay between trains. I got a choice job - the Valley Local. I was lucky to have Pete as my conductor while I handled the throttle. Pete was very capable and we had a great time. The little 2-8-0 we ran was flawless. We also had a great time meeting his regular crew, several of whom said they are readers of the blog. Thanks guys. Leave a comment every and now and then to say, "hi".

We were exhausted when we arrived at the hotel in Springfield  just before midnight. We punted and went to bed.

Tom Piccirillo (O scale modeler) and Hal Miller at MR Booth. (l to r)
The next day was the train show at the Big E. It was a huge show spread across 5 buildings. My objectives were to buy needed supplies for the Aquia Line and other projects. I was very successful, even though I did not get to see everything at the show. It was fun to see some old friends, like Tom Piccirillo, and meet a lot of new people, including Hal Miller, editor of Model Railroader magazine. That night we had diner in a restored dinning car at the Steaming Tender Restaurant in Palmer, Massachusetts.


Jason's lift our section using linear actuators. There are actually
three actuators, one is not visible in this photo.
On Sunday we visited Jason Fountain and Neil Schofield's layouts in Charlton, Massachusetts. Both were outstanding layouts. Jason models the Southern New England, one of my personal favorite railroads even though it never existed. His layout includes dozens of craftsman structures arrayed in a very realistic manner. It creates a very believable impression of a New England town and countryside  in the steam to diesel transition era. He has a lift-out section that uses three linear actuators that is very impressive and clever.


Jason, Marty, and Stic (l to r)


Fantastic Mill on Jason's layout

Photo line of model railfan at Neil's layout. That's Don James in the
foreground with the tripod. In addition to being a retired locomotive engineer,
a fantastic modeler, and an Alkem Scale Models customer, Don is
 one of Stic's biggest fans.


Neil's layout is set in the 1980s on CP trunk line in northern Vermont from Wells River to Sherbrooke. After two years of work his layout is about 1/3rd complete, but what he has finished is utterly outstanding. It is hyper-realistic scenery essentially on a narrow shelf. He showed us his layout plans and it looks like it will be an amazing design. I look forward to going back and operating it as it gets further along.


Shot showing some of Neil's realistic scenery


On Monday we headed northwest from Springfield through some gorgeous Berkshire scenery (see first photo above) to visit Dick Elwell's Hoosac Valley layout. Dick has essentially completed the layout and it is gorgeous.  He has hundreds of contest quality craftsman structures on the layout. They are skillfully arranged in a realistic manner and have no whiff of caricature that frequently accompanies these structures. When you stand in the basement you feel like you are in rural New England on a brisk fall day.  Thelayout also features  operational signals, CTC, sound, and it runs great. Seeing this layout was a real treat. I have to rank it as one of the top layouts I have ever visited.
Stic, Dick and Marty (l to r)

We returned home safe and sound. All in all a great weekend. Thanks to all our hosts for their hospitality and friendship. We model railroaders are so fortunate to have friends around the world that so generously share their time and hobby with us.

BTW this was post 800 to this blog. There have been over 1.2 million visits.


January 26, 2017

Springfield Bound

Marty McGuirk, Stic Harris and I are heading up to Amherst Model railroad Society Annual Train Show in Springfield, Mass this weekend.  Perhaps we'll see you there, though the odds are low as it is such a huge event. I will be stocking up on supplies for a new project. But we'll talk more about that later. We also plan to see and operate some layouts.


Meanwhile John Steitz stopped by tonight to pick up some detail parts for his N Scale steel mill modules. John is a member of NVNTRAK. I used to be very active in that modular group, but had to cut back as other projects took up too much time.


Some goodies arrived today. First, the wharf kit arrived. By wharf kit I really mean a really big box of strip and sheet basswood  and lite plywood. I will start building the wharf after the Springfield Show.

Also, I received new BPS circuits from Neil Stanton. These circuits will allow the Stanton decoders to run from rail power while also charging the batteries. So the batteries essentially become keep alive circuits. I will retro fit Whiton and Fury with these soon.

On a down side, the TCS WOW decoder in my PHL engine 66 is acting up. I have to remove it and send it in for repairs.


Tight gauge, kinks, and other assorted maladies

I have spent a few hours the past nights adding more spikes and  test running a typical train. I found a few tight gauge spots and a kink at the easement to the first turnout to Aquia Landing yard. I resolved these.

Most cars are working well, but I did notice a pair of cars that were consistently misbehaving. As they encountered certain curves, their links would jam in the couplers and lift the wheels off the track. They would run fine on their own or if they were not coupled. The problem was in mismatched coupler heights between the two cars. I have also encountered some other problems when pushing, such as bumpers interfering on tight curves, but those was not the problem tonight.

To resolve this issue I need to do a complete coupler height check on all my rolling stock. Over the years I have tried several different truck designs and freight car builds. I was not very careful in ensuring that they had matching couple height. But with my tight curves and link and pin couplers, I need to tune all the cars and engine to the same couple height.

For a break from the drudgery of spiking and tuning cars, I took a photo of an Osceola on the engine house lead track before I put the rails in. The track is long enough to hold two engines.  I think it looks good. It will be fun to finish this scene.


January 23, 2017

Almost Halfway there!


I installed three more turnouts today. That makes 5 so far - almost halfway there!  I also used up the first bag of 1,000 spikes.
This switch stand had to be mounted away from the points
due to lack of clearance between the tracks,

These are key turnouts as they feed the yard tracks to the wharf and wye.   So far they run smooth. I need to cut gaps before running trains through.

I decided to add an additional stub track off the nearest yard track. That will serve the bakery. This track is nearly long enough to hold a 7 car train, so it can also be used as slough track when switching the yard if the bakery spots are empty. That's why finishing 5 turnouts is not quite halfway. I now have 11 in Aquia Landing.


January 21, 2017

Piney Branch Mill Revisited

The water wheel and race are long gone. The building received new siding in 1963


I took my mom for a drive today to Manassas to work on Marty McGuirk's backdrop. He said he would be blogging about that on his Central Vermont RR blog. 

On the way out there we took a "short cut" along Pope's Head Road in Fairfax County. That took us past the mill at Piney Branch. This mill served as the prototype inspiration for the mill on my layout.

Here are some photos I took of the prototype mill and my finished model of it.

Meanwhile work continues on track laying at Aquia Landing. I glued down a bunch of ties for the complex east end of the yard. There are five turnouts that are adjacent to each other here.


January 18, 2017

Two down.... eight to go.

I installed the second turnout in Aquia Landing tonight. I didn't install the guard rails yet, but it works pretty well without them.  Below is a short video showing the operation. (Note the Safari web browser may not show the video)


Plans for the Wharves

As I am laying the track in Aquia Landing, I realized that the wharves have to be installed before I can put track on them.  Project managers would say the wharves are on, or are getting near to, the critical path. Depending on the ordering time to get materials, they are on the critical path. So tonight I spent a few hours designing the framing and decking for the wharves. From these I generated a bill of materials to order from my supplier. It's a lot of wood- too bad I don't have a table saw to rip my own.


I plan to build the wharves stick-by-stick. I will do this because it is prototypical and it allows me some flexibility in making changes as I install it.  For example, the curved track leading to Burnside's wharf will probably resemble a trestle more that a dock.

I plan to laser cut all the piles to exact length. That should allow me to build the piles and pile cap assemblies on the bench using a jig. Then I will install them on the painted water surface. I will add the water later using Magic Water, a lot of Magic Water.
Note tracks coming from the left appear to be on a trestle as they approach Burnside's Wharf. It looks like the workers
are adding a wagon approach access on the lower right.


January 17, 2017

First turnout in Aquia Landing

I completed the first turnout in Aquia Landing tonight. One down, nine to go!

The work went pretty smoothly. I am still not sure about pre ballasting the track before laying the rails.

 I was able to find all the track laying tools after a couple years of storage.  I am using switch stands that I recycled from McCooks Landing. That saved a bit of time.


I didn't power the frog yet, but I did wire feeders to the rest of the track.


I test ran the first train into and out of Aquia Landing. It  ran pretty well. Some tweaking will help smooth things out. Here is a quick video of the action.

With just few more turnouts I could run test op sessions using the three track  yard at Aquia landing as a staging yard. I am eagerly anticipating that.


January 16, 2017

Aquia Landing Concept Sketch

For those of you that don't recall, here is a early artist concept I drew for Aquia Landing on my layout back in November 2010. The key is to have easy access to the tracks on the wharf. That is why the tracks on the right side of the wharf are so close to the aisle.
I am following this early concept fairly closely, though the benchwork is more a
rounded rectangle that the oval end shown in the sketch.

I am currently laying track in Aquia Landing. I tried ballasting some of the track before spiking the rail. But I think I prefer to do the ballasting after the rail is in. Seems like it will be easier to change things that way if I find I need to make adjustments.  Film at 11.


On Sunday, I took my mom for a visit to the Lyceum to see the Alexandria Waterfront Diorama on display. She enjoyed the visit.  The diorama has a single primary light directly above and slightly to the rear. That makes the front of the buildings in shadow. It looks good in person, but the back lighting makes taking a photo difficult.


January 15, 2017

Back on the Track Gang

Alicia poses by the wharf. She was helping me test reach to the tracks.
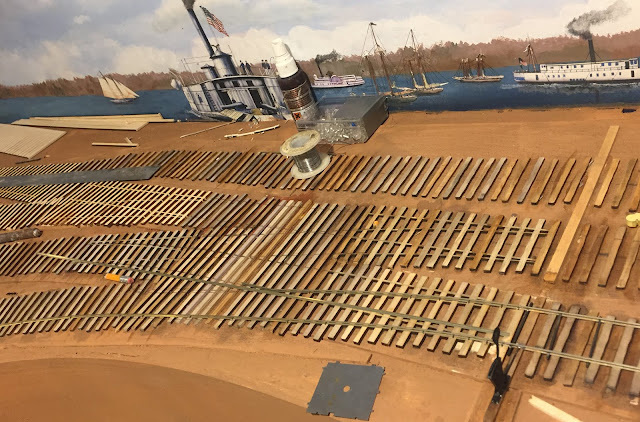
Wow, after seven years delay, I am finally starting to lay the track in Aquia Landing.
I started with a mock-up of the wharf to refresh my memory of how major components fit. I concluded that there is room to include the Passiac ironclad as well as the Mt Washington paddle wheel steamer. If I put the ironclad on the north side of the wharf then operators will have to access the tracks on the wharf by reaching over the Passaic. That task is not that bad because of the low freeboard and deck of the ironclad. Alternatively, the Passaic could be tied up alongside the steamer. To do that I would rotate the wharf to the north to make more berth space on the south side of the wharf. I could just omit the ironclad. It could be made removable and taken off for op sessions. Lots of options.

The engine house is recycled from McCooks Landing layout
I starting laying the road bed and glueing down ties. I am using 1/8 inch lightweight plywood for the road bed. For ties I am using basswood.

I plan to put the engine shed from the McCooks Landing layout  inside the wye. The mockup at the left shows there will be room for storing two engines. Some of the other McCook's Landing buildings will also be recycled into this layout.

Now that I am glueing down ties, I need to finalize the track plan. I decided to add a third yard track in Aquia Landing. That will make the yard work much more efficiently.

The first ties are glued down
I am really looking forward to bringing the first train across these tracks.


View across the wye and toward the south-west.

January 11, 2017

New Smoke Generator on Haupt


I've been experimenting with a new smoke unit from Cogswell Cogs Inc. It is DCC controlled. You load it with tiny little logs, add a little kindling from shaved pine bark, turn it on and and it takes over. It seems to work pretty well, but it keeps setting off the smoke detector in the basement.

For those that are interested, this is a hand held iPhone shot. I took multiple images and used focus stacking. Then I did just a little post processing in Photoshop.

If you want a full resolution copy of this image you can download from this dropbox link. It might not be there long as Dropbox is closing soon, so get it while you can.


January 8, 2017

The week of DCC Comes to an End

The week of DCC comes to an end with the creation of a separate easy DCC zone for PoLA. I had ordered a separate Easy DCC Zone Master a few weeks ago, but finally got to install it today. The most difficult aspect of the job was running the bus wires from the central distribution panel under the bench work. The rest of the hook-up was pretty straight forward. Once I connected the wires and double checked everything, I flipped on the master power. Fortunately,  there were no sparks or smoke.  Everything seems to be working.

This concludes the to-do list of DCC items I wanted to finish. I still plan to add a third booster for Aquia Landing. That will be relatively easy, as I had previously installed the bus wires under the benchwork as I built it. I also have some wiring to do when I lay the Aquia Landing track, but that will be done incrementally as I work on the track.  All the steam locomotives have functioning DCC and sound. All but one have either batteries or current keepers.

Brad is watching Margaret operate PoLA
Earlier in the day Brad and Margaret Trenkamp visited the layout. They are new neighbors of ours as they recently moved into a striking modern townhouse in the Del Ray area of Alexandria, a mile from my house. Brad is building a Florida theme switching layout in a spare room of the house in the style of Lance Mindheim. It is great to have another model railroader near by. Lance was also scheduled to visit today, but the snowy roads caused him to abort.

Margaret got a chance to run a train on PoLA. She said it was the first time she ever got to run model train. She did a great job as she carefully listened and followed the guidance I gave her on operations. If only my normal operators were so meticulous.  Later Brad got to take Osceola on a run over the USMRR with 5 cars in tow. One of the cars derailed on a turnout in Brooke. But Osceola ran and sounded great. Afterwards, Brad and I discussed the next step in the layout plans.

After they left I checked the turnout and the wheel sets of the offending car. For once it was a wheel set with a wobbly wheel that was partially out of gauge and not my track work that caused the problem. Our the past two weeks I have been tweaking and tuning problems on the Aquia Line as I discover them. Things I have done included, adjusting some stub points to prevent interference. Humidity changes seem to affect them. I also fixed a few switch stands that had minor issues. I cleaned the track and wheel sets on the locos. That is the first time I have done that in probably two years.   The layout is operating better as a result. I did some dusting too, but the layout should probably get a thorough vacuuming. Another remaining task is to check all the cars for consistent coupler height.

I am running out of excuses to avoid layout track in Aquia.

I also did a bit of editing of the Osceola Silent Film Check it out if you have time.


January 7, 2017

Back at the Dexter Lake DCC Club

Tonight I swapped the battery decoder in Osceola (with the incongruous diesel sound system) for a Tsunami T-1000 steam decoder with a current keeper. I also swapped the large speaker with a tiny sugar cube speaker. This had the effect of reducing dead weight in the tender as the battery and speaker did weigh a few ounces. In accordance with Dave Schneider's suggestion (he is the manufacturer of the locomotive model), I removed all the weights I added to the engine. He suggested Bullfrog Snot for traction tires too, but I had already added traction tires to the port side drivers.

Soundtraxx Sugar Cube speaker
 It is now running very nicely. The current keeper prevents any electrical stalls and sound drops. The natural balance of the engine is good and it doesn't suffer from curve drag as much as when it was loaded with the extra weights. It still has some trouble with the grades, but that is OK. It can run the mainline with 5 cars, with a running start on the grades. It should be able to handle 6 cars on the flats. It is not necessarily a bad thing to have engines on the roster with different tractive effort. It will keep the yard and engine masters on their toes.

Wood piles compared
 The sugar cube speaker sounds quite good too, almost as good as the QSI HB speaker in Haupt. With the tiny sugar cube speaker and the smaller decoder hidden in the walls of the tender, the installation in Osceola is practically invisible. No need for a huge wood pile to hide electronics.

 All in all I am glad I added Osceola to the roster. It's great looking model and it does run very well. We O scalers are lucky that SMR produced these locos.

 I also put a second T1300 throttle in service. Just a few more DCC tasks to add some boosters to zones and I'll be back to laying track.

January 5, 2017

Testing Liquid Traction Tires on Osceola

I did some testing of Osceola tonight after the Bullfrog Snot traction tires cured overnight. I also added about 4 ounces of lead weight evenly distributed over the drivers with half in the cab and half in the boiler.

 The good news is that the pulling power did increase. It was able to pull 7 cars on the level track. It may even be able to do 8. However, curve drag and grades still take their toll. Curve drag especially seems to have an effect.

An effective working train length for this engine over  the whole layout would be more like 4 cars. Note that the overall design train length is 7 cars due to siding lengths. If I relegate Osceola to Aquia Landing as a yard switcher, it might be able to do the job switching 6 or 7 cars on the flat lands.

I made a short video in a silent film style. Since the locomotive still has a diesel decoder, there was no sense listening to that.

What do you think? It is a neat looking locomotive. Watch the valve gear "operate" as it moves.


On a whim I tried to double head it with another engine and I learned that doesn't work. I forgot that these are brass engines. The tender frames have opposite electrical polarity from the engines. So using the metal front link causes a short.

I will test again when the new decoder, speaker and tungsten weights arrive.


January 3, 2017

Bullfrog Snot

When I took delivery of the Osceola, I noted the box that the engine came in contained a bottle of Bullfrog Snot, a liquid traction tire product. I don't recall if there were any directions with the locomotive suggesting that I use it, so I set it aside and forgot about it.

Tonight, I recalled that I had it. I applied it to the port side drivers of the Osceola. These drivers don't pick-up track power, so having a insulted traction tire would not hurt performance.

After letting it cure for a couple hours, I did a test. The loco does pull much better. I was able to pull 6 cars in a brief test. I will let the rubber material cure overnight before doing more thorough tests.

I also ordered a set of tungsten weights. There is room in the boiler and firebox for several ounces of weight. Hopefully that will help too.

While I was in a spending mood I ordered a steam decoder for Osceola, some Soundtraxx Current Keepers and speakers. I will retrofit a  Current Keeper to Haupt. I also plan to swap the Stanton Battery in Osceola for a Tsunami T1000 with a Current Keeper. This will reduce the dead weight in the tender, which may help with pulling power. I will keep the Stanton parts as spares.

Finally, I tinkered with track plan version 13. In this version I added a peninsula between Falmouth and Stonemans. This addition adds about 16 feet of main line run at the expense of losing my crew lounge. It would create a better isolation of Falmouth from the rest of the layout and add some open country running, but I think the loss of the crew lounge is too much. I know CINCHOUSE would not like this.


January 2, 2017

A Tale of Two Locos


Tsunami installed with speaker before I cut down tender 
Today I added a Tsunami T1000 sound decoder to engine Haupt. It previously had a cheap Digitrax decoder without sound. So it was a fairly simple matter to swap the decoder. The trick was finding space for the speaker. I liked the sound of the QSI 1.06 inch HB speaker I had on hand. To fit it in the tender, I cut away part of the brass front wall of the tender. Then I made a styrene enclosure for the wood pile core.  I drilled out a series of holes in the front and top of the box to enhance sound transmission. Then I painted it black.

New wood pile core
Once it was installed on the tender with the speaker snugly fit inside, I added small pieces of cut twigs to build a wood pile. The wood pile is a bit big, but I need the box to cover the entire DCC assembly.   With the decoder Haupt can easily pull 10 cars. But the design train length for now is 6 cars due to the sidings at Falmouth. I could run more, but the curved turnout at Falmouth is just not reliable enough to use in op sessions with longer trains. I actually plan to get rid of it.

With the Haupt conversion to sound, all five locos are now equipped with  DCC and sound, though one is a diesel! I am not sure it's worth fixing that one. Maybe once it gets a steam decoder it will stop being a confused little snowflake and start pulling some cars. Oh well.
Adding wood to the painted core

While I was testing the locos, I also did a little tweaking of track and switch stands. The humidity changes usually causes problems and it takes a bit of tweaking to get it to operate reliably.

I made a short video summarizing the installs. I should note that in the video I stated that Haupt had a stock pick-up. That is not correct. Several years ago I added all wheel pick up to the tender. I forgot I did that even though I also documented the process in this blog post.  Tonight I saw the pickups while working on the tender.  That helps it run better, with just an occasional stall. But it really sounds good, at least to my hard of hearing ears. I ordered a Soundtraxx "Current Keeper" to prevent stalls. It looks like an easy retrofit. I'll post results when I get it installed.

Now it's on to track and freight cars.

January 1, 2017

Osceola has a split personality

The complete Aquia Line locomotive fleet - soon to be all sound and DCC equipped.


The new year is starting with a wimper. Alicia and I are still suffering from nasty colds. This has been day 15 for me. In order to salvage something from the day, I decided to install a Stanton Battery DCC system in engine Osceola. This is the newest SMR locomotive I have. It is the only one in my fleet that has the motor and gear box in the boiler. It is also a very small locomotive. 

Planning the installation
If you recall, the Stanton Battery System has 5 main pieces. The first is the decoder, a standard Tsunami decoder that has been modified by NWSL (the Stanton distributor) to include a radio receiver. The two systems are housed in a single piece of heat shrink insulation. This is too wide for the boiler

There is also a LiPo battery and an additional circuit card for the Battery Power Supply (BPS). The BPS takes care of charging the battery safely and providing clean power to the decoder. The final component is a speaker. 

Since the boiler tube on this loco is too small to house the decoder and radio subassembly, I decided to put all the electronics in the tender. The battery just fit in the back of the tender. The BPS and radio/decoder will go in the opening for the wood pile. I'll put the speaker in the wood pile also. Unfortunately, I don't have a small speaker on hand, so I will use a temporary speaker for now. 

This loco was a bit tricky to disassemble, but after about an hour I had it sufficiently apart to start the installation. I removed the existing wiring harness and created a new one. There is one pick-up wire from the port side pilot truck. The starboard side of the loco is shorted to the frame and the wheels on that side are the starboard pick ups. 

All wires connected
The tender has pickups on the port side only and they short  to the tender frame. This means if the metal drawbar touches the tender frame, the loco shorts. All of the SMR locos I have do this. It can be a problem is the insulation on the tender drawbar post comes loose, which it often does when handling the locos. I use glue to hold the insulation in place, but a plastic drawbar would also solve the issue.

Once I had the track power wires routed to the tender, I ran two output wires from the decoder to the motor. I also ran two wires to the headlight.  These go though black heat shrink insulation to create a protective harness. I did not use plugs. The plugs are a pain in the petunias when you handle the locos. This loco will be hard wired.

I then used electrical tape to wrap the remaining wires into bundles and got it all crammed into the tender.  The BPS and radio/decoder are in the wood pile opening  and are easily accessible for maintenance. This is going to prove very useful in a few paragraphs.

Then I got the loco reassembled. I had to solder back some of the fine detail that broke during disassembly. But the nice thing about brass is that it is usually easy to fix and repairs can be strong. 
A quick test run without a speaker showed that all was wired correctly and it ran. The radio location creates a strong reception. I can control the loco from the far side of the basement.

I hooked up a spare speaker I had on hand and was surprised to hear the sounds of a diesel. I checked the paper work that came with the decoder, and sure enough it was a Tsunami T1000 Diesel decoder. Then I recalled, I got this decoder in a trade. I never verified that it was a steamer.  So now I have a steam engine that thinks its a diesel. This sounds like an episode of Thomas the Tank engine.

Nonetheless, the engine runs very smoothly with  nice slow speed and a bright headlight. So that was encouraging. However, it doesn't have a lot of pulling capacity. Three-five cars is fine on the flat, but up a grade or around a sharp curve it has trouble with three cars. Adding weight helps, but it will need some more tuning to work out.

In the meantime, I am going to order a Stanton steam decoder and new BPS.  Since I last got a Stanton system, they have improved the BPS design. It can now take the power off the rails and route directly to the decoder if the rail power is of sufficient voltage. If the rail power drops out, the battery takes over. Meantime the system is keeping the battery charged up. Essentially, it becomes a keep  alive with a massive battery. It is possible to retrofit the current BPS with two diodes. But I plan to leave well enough alone on my other locos for now.

So until the new decoder arrives, Osceola is one very confused, wimpy, but fine running loco.