A journal following the history, design, construction and operation of Bernard Kempinski's O Scale model railroad depicting the U. S. Military Railroad (USMRR) Aquia-Falmouth line in 1863, and other model railroad projects.
©Bernard Kempinski All text and images, except as noted, on this blog are copyrighted by the author and may not be used without permission.
-----------------------------------------------------------------------------------------------------------------------------------------------------------------

February 26, 2024

More D-Day Diorama Progress


I'm back from Florida and chugging away on the D-Day diorama. While in Florida I painted about 70 infantry, and two DD Sherman tanks that my brother printed. I also printed another LCM on his printer. 

When I got home, I printed a couple of German anti tank guns for the bunkers and a French APX turret for a German Tobruk. I made the bunkers with layers of laser cut MDF.   They are not to any particular scale. Keith coined a good phrase, "optical scale." We are selectively compressing the German positions to look good from the normal viewers perspective. Thus, this is not an exact scale model. It is more of an interpretive display with a focus on certain story elements. 

Keith applying gloss to the waves


On Saturday, Keith Rocco visited to work on the diorama. He first focused on painting the shore line and shingle beach. I thought we needed to make the beach look more realistic with portions of wet sand, pools of water, and receding waves. Keith agreed and did a great job painting it. It  looks great.

Next, Keith stated applying gloss polyurethane to the water surface. He managed to get two coats down (later that night I added one more coat. It will need about 8-10 coats in total.) Then he started prepping some of the painted figures by removing their bases before he had to leave.

Meanwhile, I was working on finishing the bunkers and trenches for WN61, the resistance nest on the east side. 

Mark Franke stopped by to drop off the tanks and boats he has been working on over the past week. As usual he did a fantastic job. One of the tanks is shown wading in the surf. The crews tried to use the water for cover as it helped reduce their exposed area to enemy fire. 


Mark Franke did a nice job painting a detailing the wading tank


I installed some trenches in WN61. I had to simplify the trench layout a bit due to the selective compression of the scene. I cut a slot in the foam to make the basic trench. They I prepared some tooth picks and scribed wood siding to make the trench revetments. Installing them was more tedious than I expected. I think I will try a different technique on the next set of trenches. Perhaps I will print some trench sections that I can install.

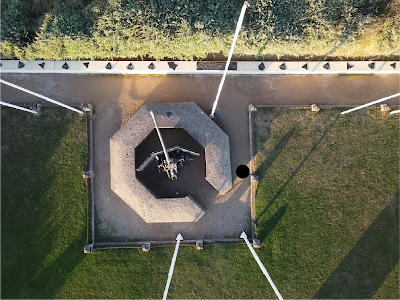
This aerial photo was perfect for making the
1694 Ringstand and 50mm gun..
The bunkers were a bit tricky to design and build. I used plans and photos to guide me, but I had to pick a scale to build them that looked about right. They are approximately 1:150 scale. The ground scale is about 1:500. That means that they take up more ground area than they should.  But it all looks OK and supports the story Keith wants to tell. 


50mm ATG in a Ringstand at WN61

The concrete parts of the bunkers are laser cut MDF. The guns are 3D prints that I made from files I bought off the web. I painted the bunkers with various shades to look like relatively new concrete. The guns are dunkel gelb with some dunkel grun camouflage. The R677 casement bunker with the Pak 43 88mm ATG  has some chipped concrete that was damaged by US fire as can be seen in prototype photos. I have some camouflage netting that I will add to these later. 


I applied a wash of dark brown paint to ground areas that would have vegetation. I used lighter paint to lay out some trails and roads. 

Next I used Durhams water putty to shape the tank ditches. I checked with Mike and he suggested that the ditches were just sand without revetments. There are some photos showing ditches like that in the modeled area (see left image.) So that is how I shaped them. 

Finally, I added a base coat of some ground foam to the hill area near WN61. This is just the base coat but it does hint at the final appearance. 

Keith mocked up some figures and a tank. We do plan to add LED lights to the burning LCMs.


February 17, 2024

JAXCON 2024


Some of the figures in the busts category. In the front row my Castiga (l) got silver, Medusa (Center) and Demophilus (right with blue and white crest) got gold.


Rob and I attended the JAXCON 2024 IPMS meet today in Jacksonville, FL. This is the third year I have attended this meet. It is one of the premier IPMS meets in Florida. The meet was a great success despite some rainy weather. Gil Hodges runs the event and does a great job. I enjoyed meeting many of the people from previous years. Everyone is very friendly and low key. 

This airplane model caught my eye. Very nice, detailed work
There was some excellent work on display. I estimated that there over 500 models entered by about 110 builders. There were also many vendors with model kits and supplies. 

I helped with judging and that kept me very busy. I and my partner Rich were responsible for judging all the figures, all the dioramas, and about half of the ship models. As a result, I didn't get to see many of the armor, cars, or planes. But what I did see was top notch. For example, the float plane at the left looked really nice to me. I also like the red Porsche 917 LeMans winner below.

I liked this Porsche 917 LeMans winner with excellent details and presentation.

I was pleased that I received 4 gold and 1 silver medals.  It is interesting that my figure I liked the best got a silver, while the others got gold.  You ever know about model contests. I made an effort to provide feedback forms for all the models I judged so that the builders know what we found. However, there were no feedback forms for my models, so I don't know what the judges found. 

Rob's HIMARS model got a silver 


Rob received 1 gold, 2 silver, and 2 bronze medals. 

Our buddy, Dan Pierce, received a bronze medal for a 1/72 German Kreigslok locomotive. I thought the model was extremely well done, but the judges found a seam that was not perfectly finished.  That model will become a component in a joint build that several of us are working on. Stay tuned for that.

Dan's Kreigslok in 1/72nd scale


February 10, 2024

Painting Party 2


L-R. Jeff Hammer, John Kephart, John Drye, Keith Rocco, Mark Franke, Tom Karstens

The crew was reinforced today with two more workers for another successful painting party.  John Kephart continued with land infantry. John Drye loaded the boat people into LCVPs in accordance with Keith's design. Mark Franke painted and applied decals on two  Sherman Deep Water Fording tanks, Tom Karstens began painting another group of land infantry. Jeff Hammer worked on weathering the steel hedgehogs. 

Jeff is new to our group. He has experience with painting figures, mostly Sci Fi and Fantasy. Welcome aboard Jeff.

At first, Keith Rocco and I did some planning on where everything will go.  Keith approved the colors of the sand and water. Everyone liked the TP waves. So, we moved on to other work.

I dug the antitank ditch. Keith provided a photo that shows the anti-tank ditch was lined with wooden log revetments. So I painted a bunch of toothpicks to use for those.

Capsized LCVP in primer

Next, I modified a LCVP to be capsized. John Kephart made a good point about the LCVP sinking aft down because that is where the engine is. So that is how I cut it. This kind of synergy is making the project better. 
Command Villa after laser cutting


Then I drew the plans for the command villa and cut it on my laser.  The villa is reduced in scale as it will be farther from the normal viewing position and we didn't want it to dominate the hill. All of the German soldiers and weapons will be in 1/150th scale (10mm). 

Keith improving the surf 


Keith improved the surf by painting the thin layer of water that the receding waves leave on the beach. He also worked on the white caps a bit. Those simple additions really helped bring the water to life.  The next step will be to add some gloss layers.  It was a treat to see Keith in action painting. 

All in all a great day with some excellent chili and wings for lunch.


The water is looking good.


The LCVP isn't finished, but this shows the look we are trying to get. 


February 7, 2024

Please don't squeeze the Charmin


It was time to hit the beach on the D-Day diorama. 

The first step was to shape the surf zone and the ocean with my Rotex power sander. I tried to create a gentle slope to the beach and broad undulating wave-like shapes in the water.  I also used the Rolex to shape the fascia to depict the same swells. The Rolex is very aggressive and it left some gouges in the soft foam. So, I added a skim coat of lightweight spackle to fill  those. 

I applied a coat of white gesso and then dark blue paint to the water area to seal it and get a feel for how it looked. I did some light sanding to get it smooth. 

Using large brush to
shape waves.


Next I added the wave texture to the ocean using  papier-mâché.  I opted to use the papier-mâché technique as it is very forgiving. It will allow us to make corrections as needed. Plus we can cut through the papier-mâché  to embed the boats and tanks to depict rocking boats and partially submerged tanks.  We will add wakes from the boats using clear caulk.

 I used toilet tissue and dilute white glue to create the wave texture. We had Charmin in the house so, that is what I used. It has a fine texture imprinted on the paper so it takes a little bit of effort to remove that. 

I applied 4-5 layers of TP to each section. Then using a large, sharp brush, I repeatedly poked the tissue to form small  ripple texture. Then I went back over the tissue with the same brush to form the larger waves. This involved using the brush to push the TP into larger crests to create waves. I also used my finger to help shape them.  The long shore current at Normandy was to the east, so that is how I angled the waves. I consulted numerous photos to get the right look.

It took two full rolls of TP to form the waves. 

The waves take fairly long time to dry. So, I proceeded to paint the ground area. I used a mix of pale pink latex paint, desert yellow craft acrylic paint, some water and dark brown tile grout. I thoroughly mixed this into a slurry and painted the ground area. In some places, I applied it too thick, so it cracked as it dried. I added a second thin coat to fill in those cracks.   The color is still a bit pink, so we may have to adjust it with acrylic paint after it is thoroughly dried. 

The TP/White glue need to dry thoroughly before painting.

Much of the ground will be covered with ground foam vegetation and static grass, but the beach area will be visible.

 I purchased some play sand from Home Depot. I'll use that to create the layer of shingle stones that caused so much trouble for the invading tanks. 

 Stand by to see how it looks when painted. Keith is planning on visiting soon to advise us on final colors.


February 3, 2024

A Painting Party

The crew

We had a very successful painting party today to prepare models and figures for the Rocco D-Day diorama. The crew included John Drye, Mark Franke, John Kephart, Tom Karsten and myself.


JD and Tom worked on the “boat people” aka soldiers.  They finished all of them- about 150 total figures including a few I did.  We filled up one boat with 32 infantry and 3 crew. We think it looks pretty good.  The plan is to proceed with 4 more boats full of ”boat people.” 

John K. worked on the US infantry on land. He will have about 50 done in a week. Some of those are casualty figures. We expect we will need 300. Mark Fastoso and his crew will also be contributing figures. 


Mark Franke painted the 2 DWF Shermans, and several boat hulls.  They are not finished but are looking good. 

I finished painting all the boat hulls after Mark left. JD stuck around to about 10PM finish all the boat people. Devotion above and beyond!

I also primed 75 hedgehogs with rust color. We probably only need about half of them for this scene. Still need the other obstacles.

Down in Florida, Rob is painting the Sherman DD. I'll get it when I go down there in 11 days.

I had previously trimmed out the diorama with a ¼ inch hardboard trim. I also added bolts with tee nuts to make assembling the diorama easier.

We made a lot of progress today. Scenery and structures on tap for next week. There are lots of details and additional items to add.


We also started planning for the next diorama which feature the 29th Infantry and Rangers at Vierville.