A journal following the history, design, construction and operation of Bernard Kempinski's O Scale model railroad depicting the U. S. Military Railroad (USMRR) Aquia-Falmouth line in 1863, and other model projects.
©Bernard Kempinski All text and images, except as noted, on this blog are copyrighted by the author and may not be used without permission.
-----------------------------------------------------------------------------------------------------------------------------------------------------------------
Showing posts with label Layout Construction. Show all posts

March 13, 2021

Benchwork Completed for Layout Expansion

 I completed the benchwork for the layout expansion this evening. I thought I would do a video update so as to better show the extent of the completed section.

After I filmed the video, I put some cars and structures on the benchwork to get a feel for how the scene will look.


February 5, 2021

Layout Expansion - Phase 2 begins - and other news

 After several months of delay due to floods, hip surgery, and my mom's passing, I finally started Phase 2 of the expansion of the Aquia Line. Over the past few days I have been installing the benchwork for the new section. I decided to go with less ambitious plan of adding just Falmouth and not modifying Aquia Landing. This will allow me to get the railroad back in operation sooner. It leaves open the possibility of expanding the railroad later if I still feel the urge to build. I needed to reprioritize the timeline of the expansion over other projects, such as the locomotive build, as I have a dead line for an article coming up and I need to have some of this expansion done. 
Speaking of articles, please check out my latest piece in Model Railroad Planning 2021. In that article I discuss some ideas to designing backdrops for model railroads.


Back to the expansion, as you can see in the photos, the benchwork is very similar to what I built for the POLA layout. I ended up using only 12-inch deep Ikea IVAR shelves  under the layout as opposed to the deeper 19-inch ones I had under parts of POLA.


The second photo shows the expanded area available for new location for Falmouth. This new area is about double the length and wider than the old Falmouth. I wanted the area above the TV to be deep enough so that my operators would not bang their legs against the glass shelf of the TV stand below the benchwork. The wider layout space space also gives me more room for structures and scenery at Falmouth. 

One of my main concerns was the grade of the track coming out from under the stair landing. At a minimum, the tracks need to climb up to the top of the IVAR shelves. That requires an elevation gain of about 1 inch over 13 feet, less than one percent, to an elevation of 49 inches.

I wondered if I should make the height of the track at Falmouth the same as at Burnside Landing, which is 51 inches. The only reasons to do that are, first,  if I wanted to make a continuous run, which I don't, the tracks needed to be at the same level. The second reason is more subtle and relates to the prototype geography. The track at Falmouth should be higher than the track at Aquia Landing since Aquia Landing is at river level and Falmouth is higher on the ridge.  But, if I placed Falmouth 51 or higher inches, it would require climbing at least another 2 inches, resulting in about a 2.5% grade coming out of the closet. I was concerned that my engines would not be able to pull the design length trains up that grade.  So I opted to minimize the grade. Thus Falmouth will be about 2 inches lower than Brunside's Wharf and Aquia Landing.  The difference is hard to detect when you are standing at the layout.  We will have to chalk up this discontinuity in space-time continuum to the effects of traveling under a stair landing. Perhaps we can blame Harry Potter.

I am also reconsidering the scenic treatment of the section behind the couch. I designed a long low trestle in that spot. But I now think I would be better off breaking up that stretch of track into two discrete scenes. I think that might make the distance traveled seem longer if one can not see the whole train at one time. 

So I am looking at some combinations of bridges, cuts and fills in this area. Also, because of the book shelves under the layout, I don't have a lot of depth to exploit. One idea that appeals to me is to install a through truss bridge over a creek in this area (see photo below) . I built one several years ago for the road show layout, but Gerry has that now. I still have the laser drawings for it, so making another one would not be hard. That kind of bridge looks good in a low clearance application.


Today I presented a talk to the Osher Lifelong Learning Institute at American University about railroads of the Civil War. The talk seemed to have been well received. We have tentatively scheduled an open house so the OLLI members can visit my railroad and perhaps some other civil war sites in Alexandria.


July 21, 2020

Still Waiting

We are still waiting for the contractors to return to our house to finish the repairs to the basement. Last week they tore out the baseboards and drilled some holes in the sheet rock to dry them. But they won't be back until next week to finish up the repairs and clean up. Thus my basement has been left in a state of disarray. 

Since my model building shop and most of my Aquia Line expansion is not accessible right now for construction work, I decided to do some benchwork building in the garage for the HO layout that will reside in my office.


I built two 58-inch long by 30-inch wide frames with a 10 inch wide section that is recessed for  water front to hold the ship models.  These frames started out as game tables.  I converted then to my module frames. They don't have legs as they will sit on some IKEA shelves that I have in my office. 

Ten out of 30 inches might seem like a lot of real estate to devote to the ships that could be used for track. But displaying my ship models is one of the prime objectives of this mini layout/module. It will also be a show case for Alkem Scale Models products.  And reaching in 30 inches to uncouple cars is not good. So the track will be along the front with the ships in the rear. 

I had an idea to put a staging yard off the to the left. But now I am not so sure I will bother.  I need to come up with a track plan that is more self contained.  The track plan below shows  what I was thinking.

One issue I will have is maintaining access to the electrical panel.  In fact, I have had several foundation water contractors look at my house in the past few days to get quotes on how to reduce the flooding in the basement. Several have suggested the need for a separate circuit for an additional water sump pump That means my main panel will need to be expanded. Last year I added a secondary panel in my garage with 220V and 60 amps. That secondary panel used the last open spaces in my main panel. 

I also want to add a whole house surge protector as we have had problems with lightning damaging the capacitor on on air conditioner.   

The bottom line is the HO layout will need to be removable or at least not interfere with access to the panel. So no coved backdrop in the corner of this layout. I'll probably go with a hand painted sky and some cut outs. 

m

June 9, 2020

The Man that Shot Bernie's Valance

Who really shot Bernie's valance?
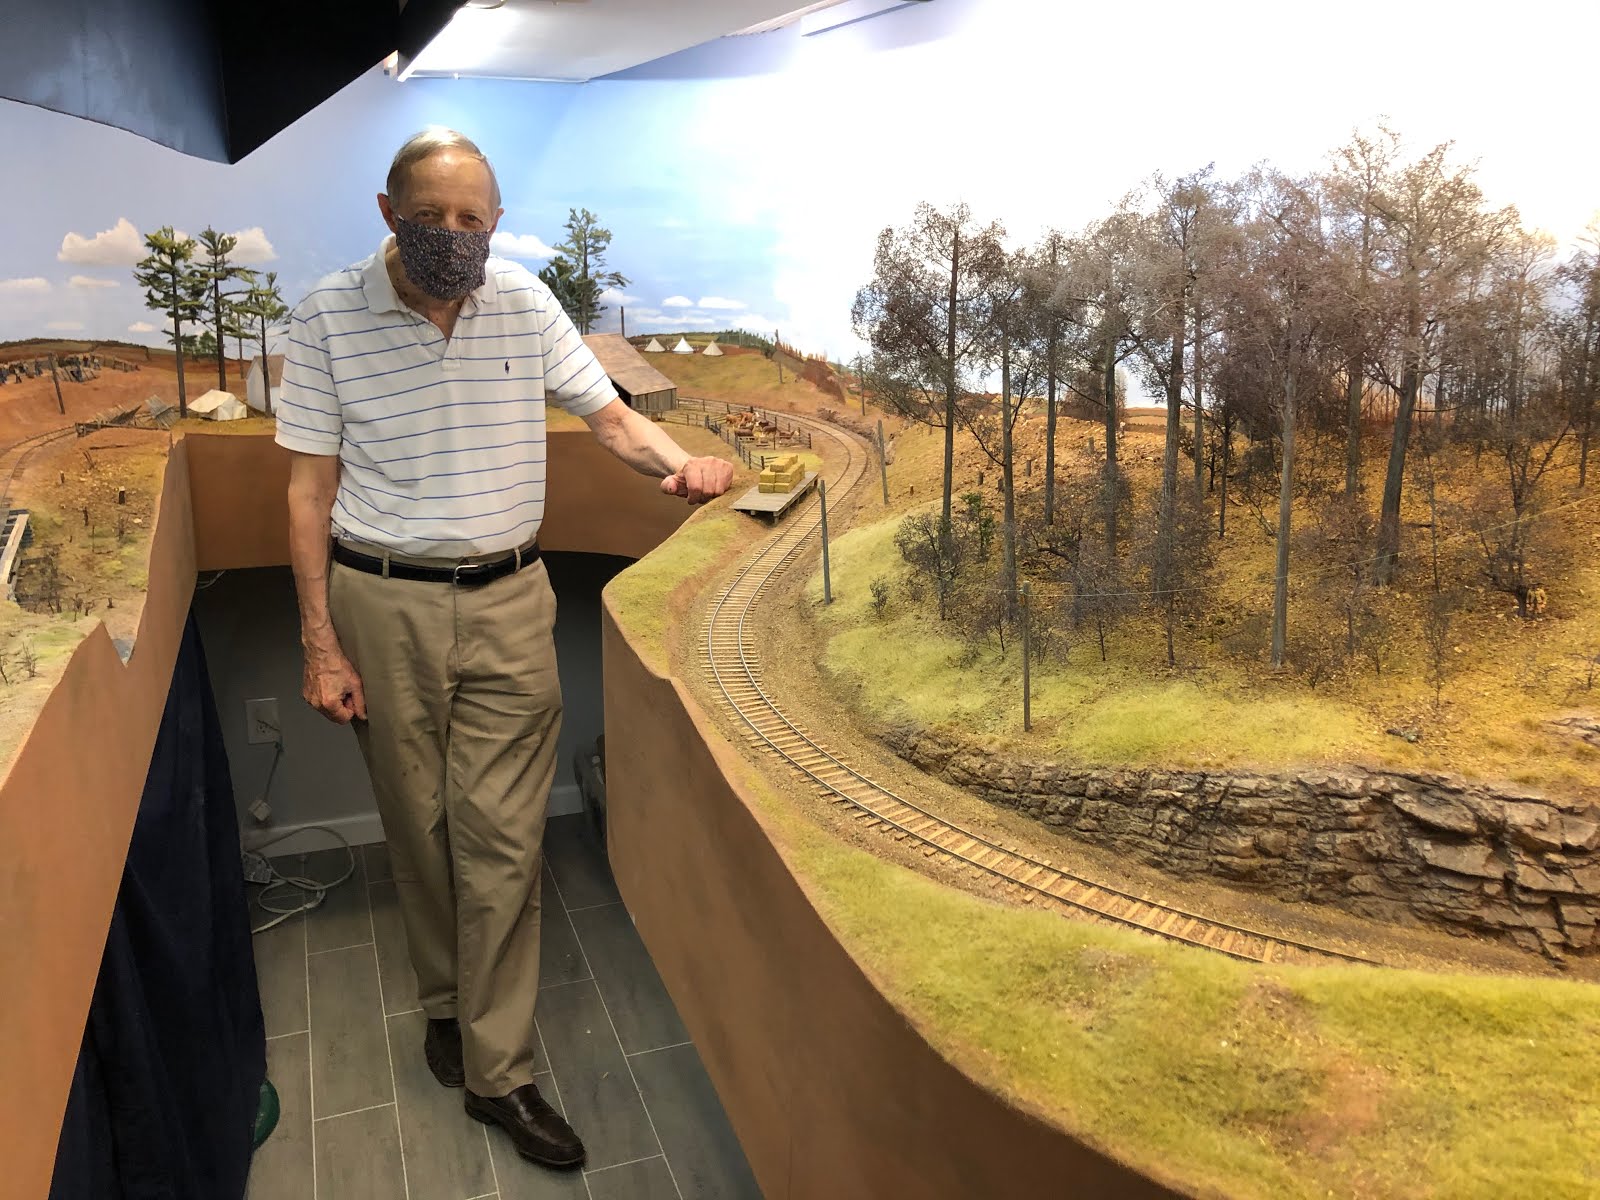
Paul visiting the new section with COVID mask
Today marks the first time since lockdown I had a visitor to the Aquia Line. Up to now, any social visits we hosted took place on our front porch with appropriate distances maintained.  But, today Paul Dolkos stopped by to borrow some scenery items and to check on the layout progress. Our COVID Response Coordinator,  Alicia, AKA CINCHOUSE, deemed it acceptable that Paul could enter the house if we were all masked and did not get too close.


Paul got a chance to look at the new stuff, run some trains, and comment on additional planned expansion.  But, the big question of the day was about an extension of a valance above Stare's Tunnel.   On the left  is the view I am trying to restrict.  When folks enter the door to the front room, if they look right, they see the bright lights over the new part of the layout. This is something that always bugged me, even before the expansion.

I took a few photos of the mocked up valance and showed my friends via text. They were of mixed opinions. Brian Brendel in particular voted down the idea.  Alicia initially liked it, then changed her mind and then swapped back to her original opinion. So Paul's opinion would be the deciding vote. He said, "do it."  So Bernie's valance will survive the bullet wound. I mounted it by tension only, so if I need to, I can easily remove it.
New valance section painted and installed. It restricts the view of the lights above Stares tunnel as you enter the room, but opens up as you walk in.  I'd like to say the curve was carefully calculated, but I just eyeballed it.

View of the valance from inside the layout room is unobtrusive. 


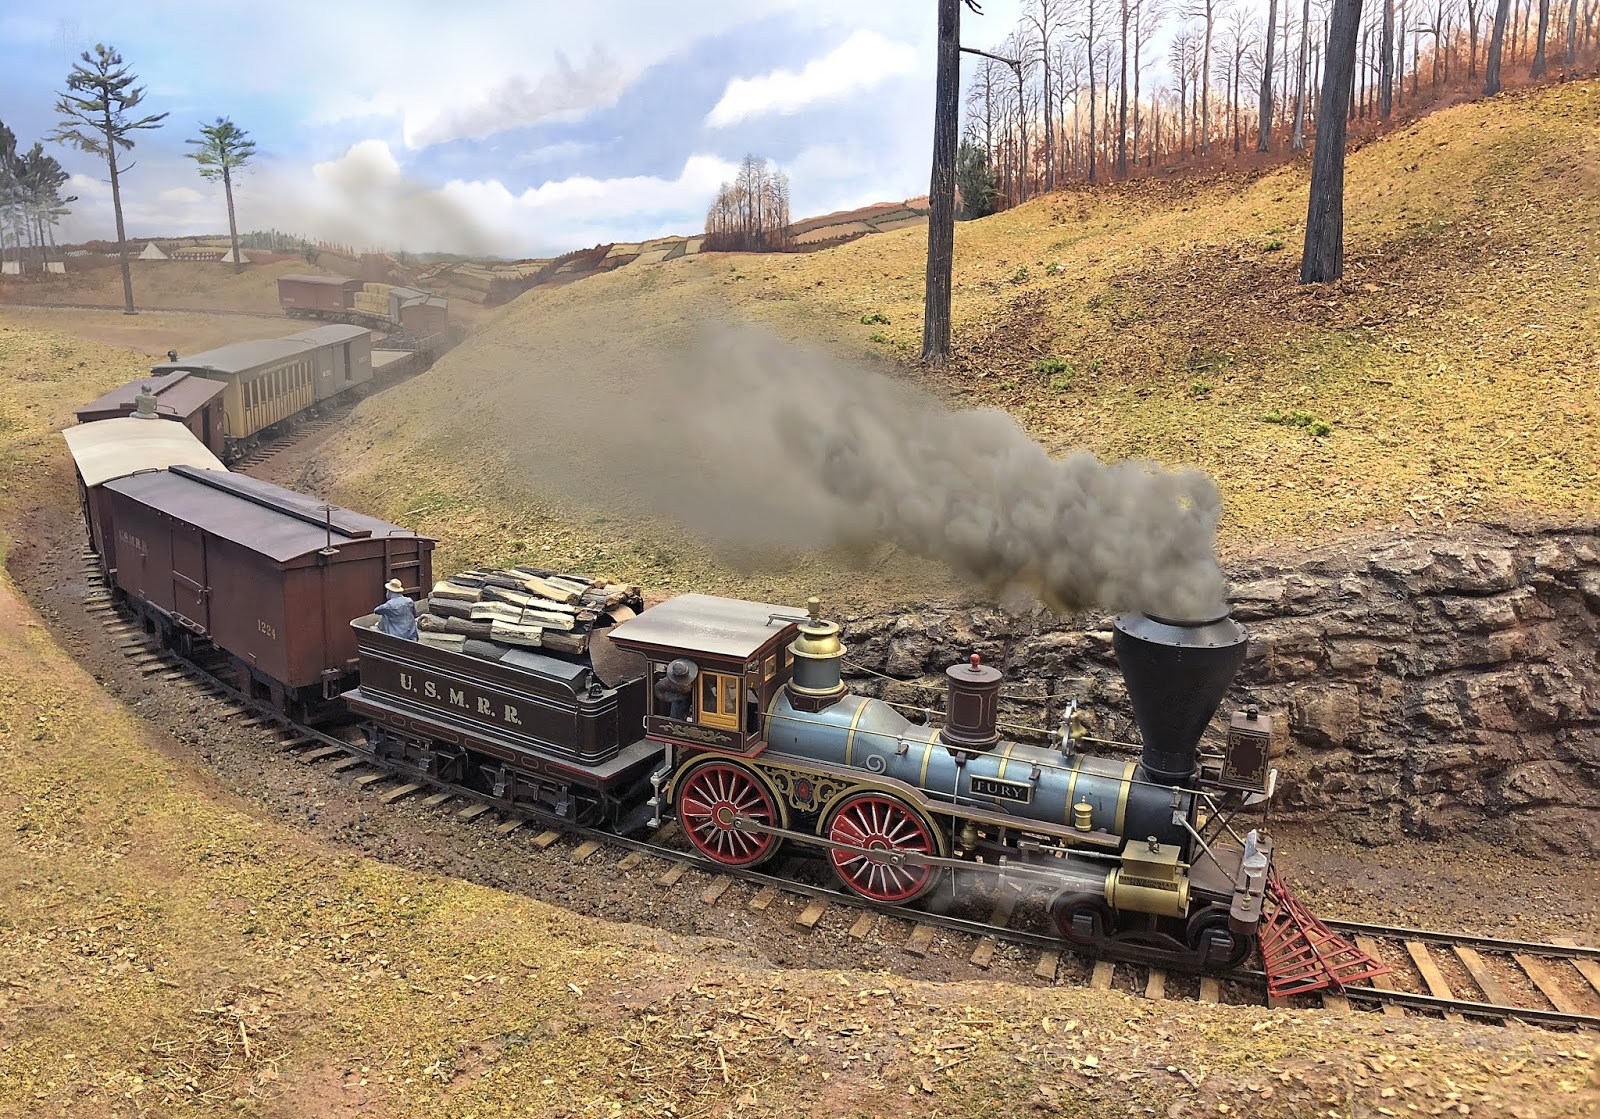
One thing I am noticing on the layout is that I need to do a thorough cleaning. My track and wheels are dirty. Not surprising as it has been at least 9 months since I ran the layout. Even the scenery seems to have a fine coat of dust. I think the dust source was either the new plaster scenery, or the disk sander in the work shop or both. I have a dust evacuator for the sander, but sometimes I am too lazy to hook it up and put on hearing protection. The dust evacuator isn't too loud, but the air whistling through the disk sander is very loud. I cleaned the wheels of Haupt and Fury, but a complete maintenance session is needed.  I probably should wait until all the building is done though.


May 18, 2020

Phase I-B complete


I am naming this area Drye's Curve because he has been admiring it as it developed.
I finished the basic scenery and backdrop painting for Little Chain Ring Ridge and Stares Tunnel.  I got a start on Phase I-C by making several trees. I will need about 6-10 more big trees. Then there are details including stumps, fences, tents, etc.  The forested area on the ridge will help break up the line of sight from the room entrance to Belle Air farm. The basic idea is to prevent a visitor from  seeing all the layout from any one spot.  Camp Pitcher and Belle Air Farm need to be installed and detailed.

I started adding some static grass. The first location was above Stares Tunnel. There is a lot more scenery detailing to finish this scene.


May 13, 2020

Base Coat Scenery Finished

Test photo of base scenery and new backdrop


Base coat of ground cover, ballast,  and rock painting done
The base coat of scenery is applied. The humidity was very low the past two days, so the base coat dried very quickly. I'll let it dry completely overnight and see how it looks.

 Tomorrow I will touch up the backdrop and paint a new distant ridge, something like you see in the test image above.

I also mocked up some of the structures and trees to see how the scenery will look.  I need to refurbish  the trees I removed and build some new ones.

The buildings do a good job of hiding the train in the backgound
Lots of details to go, but the scene is presentable.


Mock up of Belle Air Farm

May 11, 2020

Phase 1 Rock Carving Complete

The long endure of carving rocks from the northern portal of Stares Tunnel to  Belle Air Farm and Battery Schaefer is complete. I swept up some of the loose chips and gave the scenery a base coat. It's amazing what a coat of paint on the fascia will do to improve the appearance. I need more paint to finish the base scenery.

I do have a dilema. I used Adirondack Bark color of Ralph Lauren River Rock texture paint for my fascia and base terrain color. It is code RL83. I like the paint because it has a subtle texture. As I worked on the layout in the past I purchased two gallons of that rather expensive paint. The last gallon I purchased was in 2012. In 2017, Ralph Lauren decided to get out of the paint business. Specialty companies have popped up that will match most of the former Ralph Lauren paints, but not for the textured paints.  Here is the message one of them sent to me.

Thanks for contacting MyPerfectColor.
While MyPerfectColor can match any standard Ralph Lauren paint colors, unfortunately we don't have matches of any Ralph Lauren specialty finishes such as Suede, River Rock, Metallic or Venetian plaster finishes nor do we know anywhere that does. At this point I believe all Ralph Lauren paint is long gone. I think you will likely just have to repaint it.

All is not lost. I have enough paint to finish the fascia in the front room. I will get a fresh can of non-textured paint for the Falmouth extension. I can add some fine N Scale ballast to the paint if necessary. The only drawback is that will require me to go to the Home Depot to get the paint matched. I'd rather stay out of those stores for the time being.


May 5, 2020

Let the carving begin


I got the hill covered with plaster cloth. It sure is messy, but fun,  and it went pretty fast. Two layers of plaster cloth on the cardboard web is surprisingly strong.

Since I still had some time, I started carving some rocks on the various outcrops that will be visible in this scene.  The rocks will take a few days to get all carved.


May 4, 2020

Ready for Mud

Panorama of the new terrain by Stares Tunnel
By mud, I mean plaster cloth to cover the terrain and Durhams Water Putty for rock carving.

I used pink foam to create the terrain by Belle Air since it was largely a flat area.  I used hot glue and Liquid Nails Foam Adhesive to secure the foam to the benchwork and backdrop. The Liquid Nails Foam Adhesive needs 24 hours to dry.

Battery Schaefer recycled from previous version of layout
I was able to recycle the Battery Schaefer redoubt from the previous version. It wasn't too difficult to shape the contours to fit.  This will save a fair amount of work in scenicing the area.

BG Whipple's Headquarters

This is the side that faces the aisle. The blank wall next to the door is curious.
View of the back wall without weathering of the roof. The symmetrical facade
is actually more pleasing than the front.
 I am just about done with the Belle Air house. Adding the shingles can be tedious, but this building wasn't too bad. I used laser cut red cedar shingles that I made. They had self adhesive backing, so they are easy to apply neatly.

I decided to leave the door shut as it was very hard to see the interior and  the door has some nice detail too. Any  detail inside would be largely invisible. Too many other projects to do to spend time on that.


Orthorectified photo - note the peeling paint on the siding and the
gap in the siding to the left of the door.
One detail that I missed is a gap in the siding between the door and the blank wall. In the prototype photo one can see that the siding is slightly different and that a seam is visible. It appears that this part of the house is an extension or was remodeled.  I experimented with trying to cut a slot in a test piece of siding with various techniques to see if I could replicate the look without a complete tear out, but nothing looked convincing. So I decided to leave the model alone. Maybe some paint and chalk dust can convey the look. We'll see. 

You'll note that the borders of this prototype photo look odd. That is because I used the perspective warp feature of Photoshop to help orthorectify the structure. This is a relatively new feature of Photoshop that helps automate rectifying buildings that have been distorted by perspective when the image was taken.  It's not a true orthophoto as the side walls are still in some perspective, but the front wall is now flat, square, and in relative scale. 

General Whipple
 This house will be the HQ of BG Whipple. He had an interesting career, as a military engineer he did a lot of mapping of the western territories before the war. He was the commander of the newly formed balloon reconnaissance corps early in the war.  He had just assumed command of a division in III Corps and participated  in the Battle of Fredericksburg.  Unfortunately, he was killed a few weeks later at the Battle of Chancellorsville. So his name remains relatively unknown. But he received an official state funeral that President Lincoln attended.  He was a friend of Lincoln. 

 A balloon camp near Falmouth is on my do list.


The next step is to finish the terrain forming so the house has a place to sit. I can also start covering up  the hill with plaster cloth and paper soaked in Durhams water putty. Then on to rock carving. 

April 29, 2020

Master Blaster?

Well, not quite, I only had 6 jumps as a US Army paratrooper. But a master of a different sort. Today I learned that the NMRA has accepted my Master Model Railroader (MMR)Statement of Qualifications. Mat Thompson, who mentored me through the process, sent me a note that they updated their website with my name on the list on MMRs. Given the quarantine, my certificate and other official paraphernalia will come at a later date.


My MMR number is 654, which is divisible by 2, 3 and 109.   Only 3 factors since 109 is prime.  It is the Pantone code for a dark navy blue, appropriate for a Union railroad. 654 is also the pill code for an antihistamine based sleep aid. Somehow that seems appropriate too.  So, all in all a good number.

Meanwhile, I continued work on the Belle Air farm house. My plan is to build a core with laser cut 1/16th inch MDF (see the photo) and then cover the exterior walls with basswood scribed clapboard siding.

The chimney was a little tricky as the stepped bricks required some trim and putty to get right. The building will need two chimneys, but only one is fully visible on the exterior.

I want the farm to act as a view block for the turn back curve at the far end of the layout. This test photo shows that it will work pretty well in this regard. Once I detail the rest of the scene with trees and hedges, it should work out nicely.

April 25, 2020

It's Deja Vu All Over Again

The passenger car is the biggest car I have, so I use it to check clearances.


I started building the terrain leading up to the north portal of Stares Tunnel. I don't have a name for this hill yet, but by the end of this post I might.

I started by using my trim router to put a 45 degree bevel on the edge of the plywood roadbed. In the future, I will cut these bevels on the road bed sections in the wood shop on the router table before assembling. That will be much easier. Still, the trim router did a nice job except for places where the tool couldn't fit. In those spots I used my utility knife to trim the bevels.

Next I started building up the terrain using a combination of sheet foam and cardboard webbing.   One objective was to disguise the turn back loop into the tunnel. The high hill and fascia do a good job of hiding the curve, especially as one enters the room and looks to the right.  Some trees on the top of the hill will help enhance the view block and help isolate the scene even more. 


One can never have too many clamps


Tennessee Pass Layout under construction


As I was building this hill, I started getting a strong sense of Deja Vu. Then, I realized, I had built a similar  hill in this spot once before. It was for my N scale Tennessee Pass layout. That time I used styrofoam sheets to build up the hill as it was not as tall as this O scale hill.  On the N Scale backdrop was Mt Elbert.  There will be no mountain on the backdrop in this new version.

Until I come up with a better name, I'll call this area  Deja View Ridge. 
Here are 600 of the 1200 trees I had on the Tennessee Pass layout 


April 23, 2020

Fascia Install Complete

I didn't  get too much done the past two days as I had to do taxes and order some hardboard from Home Depot.  The taxes are done but the on-line order with Home Depot didn't work.  So I went there with my face mask, track saw, and cutting section of foam. I bought two  4 by 8  sheets of 3/16th inch tempered hardboard. I used my track saw to  cut the sheets in the parking lot so they would fit in my car. Home Depot was much busier than I expected and they are operating with reduced staff.

I took down the bendy plywood fascia panel and replaced it with the tempered hardboard. I was not happy with the flimsiness of the bendy plywood, especially in the narrow aisle by the curve where people will be rubbing against the fascia as they walk by.

The hardboard works well. The tricky part is installing it when the piece is so wide. A second set of hands helps, but I was able to do it by clamping and holding it myself. I installed it and I am satisfied with how sturdy it is.

A nice fascia and a backdrop go a long way to making a layout look decent.

On to basic scenery tomorrow.


April 22, 2020

Two steps forward, one step back

I built the two tunnel portals using the stone design. These portals have the elliptical adits, which really convey the early rail theme.
South portal on straight track. 
The north portal is on a curve so I made the brick liner only 6 inches. The south portal is on a straight track, so the liner is 13 inches. The key is to make sure the closet is dark so the interior of the tunnel is also dark.


I tried installing the first section of fascia using the bendy plywood.  It does bend easily, but I didn't like how flimsy it is. I ordered some hardboard from Home Depot to use instead of the bendy plywood. I will use the bendy plywood for other uses such as roadbed and laser cutting stock. It cuts nicely on the laser.

Short video showing a train popping out of the tunnel.

April 20, 2020

Designing Stares Tunnel

First attempt at the tunnel. It has some issues. I will not use it.
I installed rest of the spikes, which were about 1500 total, the electrical feeders, painted the rail and re-stained the ties over the weekend (it's so hard to keep track of weekends now). So now it is time to start some basic terrain around the this area and tunnel. Terrain is needed to prevent cars that come off the track from falling to the floor. Also, some basic terrain and fascia will give the area a more presentable and finished appearance.

The first step in shaping the terrain is to site the tunnel. Then I can fill in the shape of the hill, and the approach cut around it

My original intent was to model the tunnel portal after Millboro Tunnel on the Virginia Central (then C&O-CSX-Buckingham Branch). I visited this tunnel in 2008 and liked its brick design. Unfortunately, my photos of the tunnel disappeared when Webphotos went away. So I worked off some low res images I found on line. But I was not sure about the brick patterns.

I asked the Facebook hive mind for advice and Jonathan Jones suggested that I did not have the brick patterns correct, especially on the pilasters. Turns out he was right.

It never occurred to me to search Facebook, but after Mike Spoor found a contemporary photo of Millboro Tunnel on Facebook, I did a search there too.  And sure enough, a man named Gary Smith had posted drawings of the original tunnel, which was a timber and rock design, and the brick portal that the C&O added in 1892.

So now I see that the brick portal is too modern for my railroad. Since this is a freelanced tunnel, I have some flexibility. But I prefer a tunnel that speaks more to ante-bellum technology styles and building techniques. So I will not use the brick tunnel. At least for my layout. I can offer the corrected version as a custom tunnel for Alkem Scale Models, so not time completely wasted.

I don't like the idea of a timber tunnel that the original Millboro tunnel used.  The RF&P did use substantial stone work on their bridges, so I am leaning more to a design like the Lick Run Tunnel in the drawing before. The elliptical shape of the arch and the stone material suggests ante-bellum RF&P to me. Unfortunately, I was unable to find any photos of the Lick Run Tunnel. It was built in 1872, so a little after the Civil War.

Back to the drawing board. Here is the new tunnel portal design.


April 18, 2020

The Gandy Dancers Have Been Busy

The rail and track arrived today, a few days later than normal. I think the USPS is getting slammed these days, so that might account for the delay. At least it made it through.

So after we had a on-line yoga lesson this morning that my daughter taught from her home in Alabama, I got to work on the track. I paid particular attention to the easements for the straight track that connects the two big curves. They came out nice and the trains roll smoothly thorough those curves.  Here is a short clip showing a train heading into the tunnel.


I think the rebuild is going to prove  worthwhile. The smoother operation,  longer run with longer trains is going to improve the operations experience on the layout.

I've been thinking about the plan for the next room. I like the idea of a trestle, but I don't want the benchwork to be too deep. So, I think a possible solution is a low trestle across a swampy area. The trestle I am thinking about would be something like this one on the City Point Line. We know there was a long, low trestle at Accokeek Creek, so this is not too far from the realm of possibility.


I had some folks ask about the access in the closet. As these photos show, the access is not bad. I can get past the wide point of the curve easily. The hardboard channels also  provide a nice smooth, protective surface if I rub it as I walk in and out.