A journal following the history, design, construction and operation of Bernard Kempinski's O Scale model railroad depicting the U. S. Military Railroad (USMRR) Aquia-Falmouth line in 1863, and other model railroad projects.
©Bernard Kempinski All text and images, except as noted, on this blog are copyrighted by the author and may not be used without permission.
-----------------------------------------------------------------------------------------------------------------------------------------------------------------
Showing posts with label Freight Cars. Show all posts

November 6, 2022

Pungy Fever

Replica pungy schooner in a race on the Chesapeake

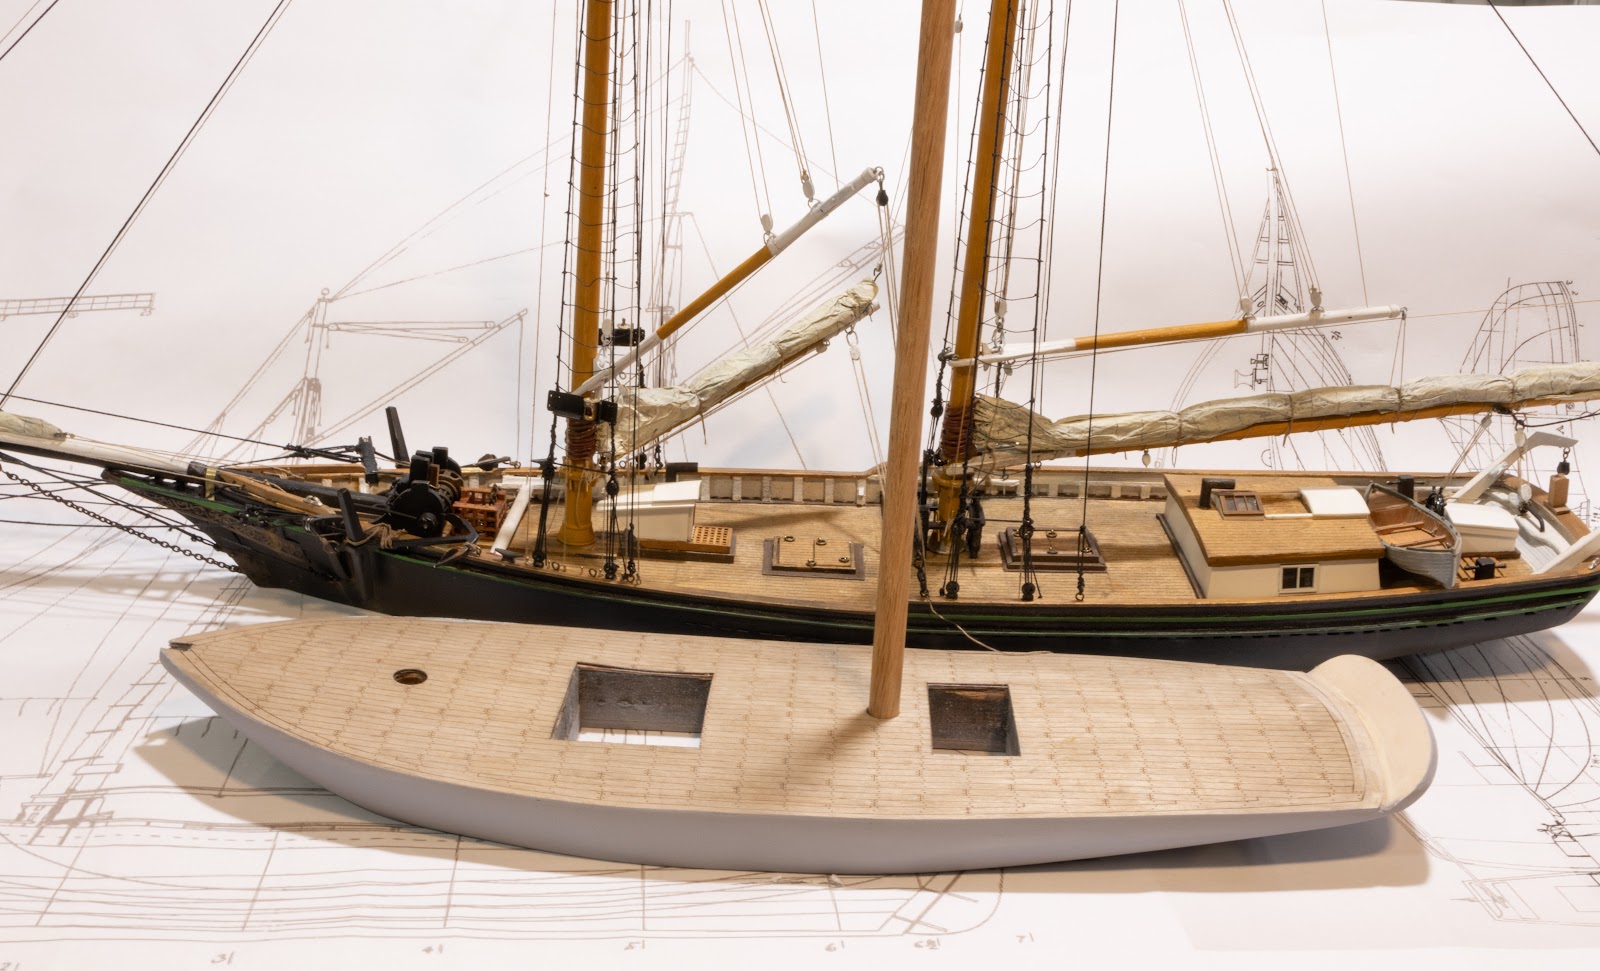
The delivery of the schooner Smuggler has got me psyched to start working on other ships for the layout.  I have a list of ships that I would like to have at Aquia Landing and Burnside Wharf. They are listed below in order of the state of completion of the model.


Wish List

  1. Railroad car ferry - complete
  2. Smuggler Schooner - complete built by Brian with some help from Rob. I will rename it Miss Merritt Marie
  3. Barges- 3 including one that has masts. Paul Dolkos built one for me. Two to go.
  4. Side Paddlewheeler - I have the Mt Washington kit and need to finish it.
  5. Pungy schooner - I started work on one - see below. 
  6. Pile Driver -  I am accumulating the necessary parts. I have some of the parts already.
  7. Swift Pilot Schooner   I have a kit 1/48th Swift Pilot ship. It is a simpler schooner but the kit is plank on frame. So converting to waterline could be tricky
  8. Tug boats- 2 each - one for the railroad ferry and another along side some of the barges.
  9. Steam transport -  I see several of these in prototype photos. They are like large versions of the tugs but with at least one sail mast. 
  10. Gun boat. A smaller gunboat like the USS Couer d'Lion would be better than the Passaic. 
  11. Baltimore clipper -  I see some of them in photos of Aquia Landing.  I ordered a kit for the 1/48th scale Harvey for this. That ship was built in 1847.  That is a complex sail boat with square and fore and aft rigged sails. It would take a lot of time to build but would be a wonderful addition. 
Note the ironclad Passaic is not on the final list. It is too big for the layout. I need to think of a better way to display it short of expanding the harbor scene. Nor is the Flying Fish schooner on the final list. I bought it from a custom model builder, but they got the scale wrong. I don't think it can be salvaged or converted. If anyone needs a 1/64 schooner, let me know. 


The Pungy

The arrow points to what appears to be a pungy schooner at Aquia Landing as it has the right shape and the traditional two toned paint scheme of pink and green.


N scale Pungy

A pungy is a type of schooner that was common on the Chesapeake Bay in the mid 19th century. I built a model of one in N Scale for the Lyceum Museum in January 2016. At that time I thought it would be a good ship to model in O scale for my layout.

I based the model on a set of plans I scanned from a book on Chesapeake schooners. The one I selected was built in 1863. I enlarged  a copy of the plans and then had Staples print 3 sets of them. 


O scale hull layers
I have the drawings for laser cutting the hull from the N scale model. So I was able to scale them up and use the laser to cut parts for the basic hull using the bread and butter technique. I glued and clamped those to make the basic hull shape. Then I used my Rotex sander to get the basic shape. It took about 2 hours to cut and shape the hull.  Then it needed several coats of filler and primer. Sanding the camber on the hull top was tricky. In the future I will make laser cut parts for the camber like I used on Passaic.


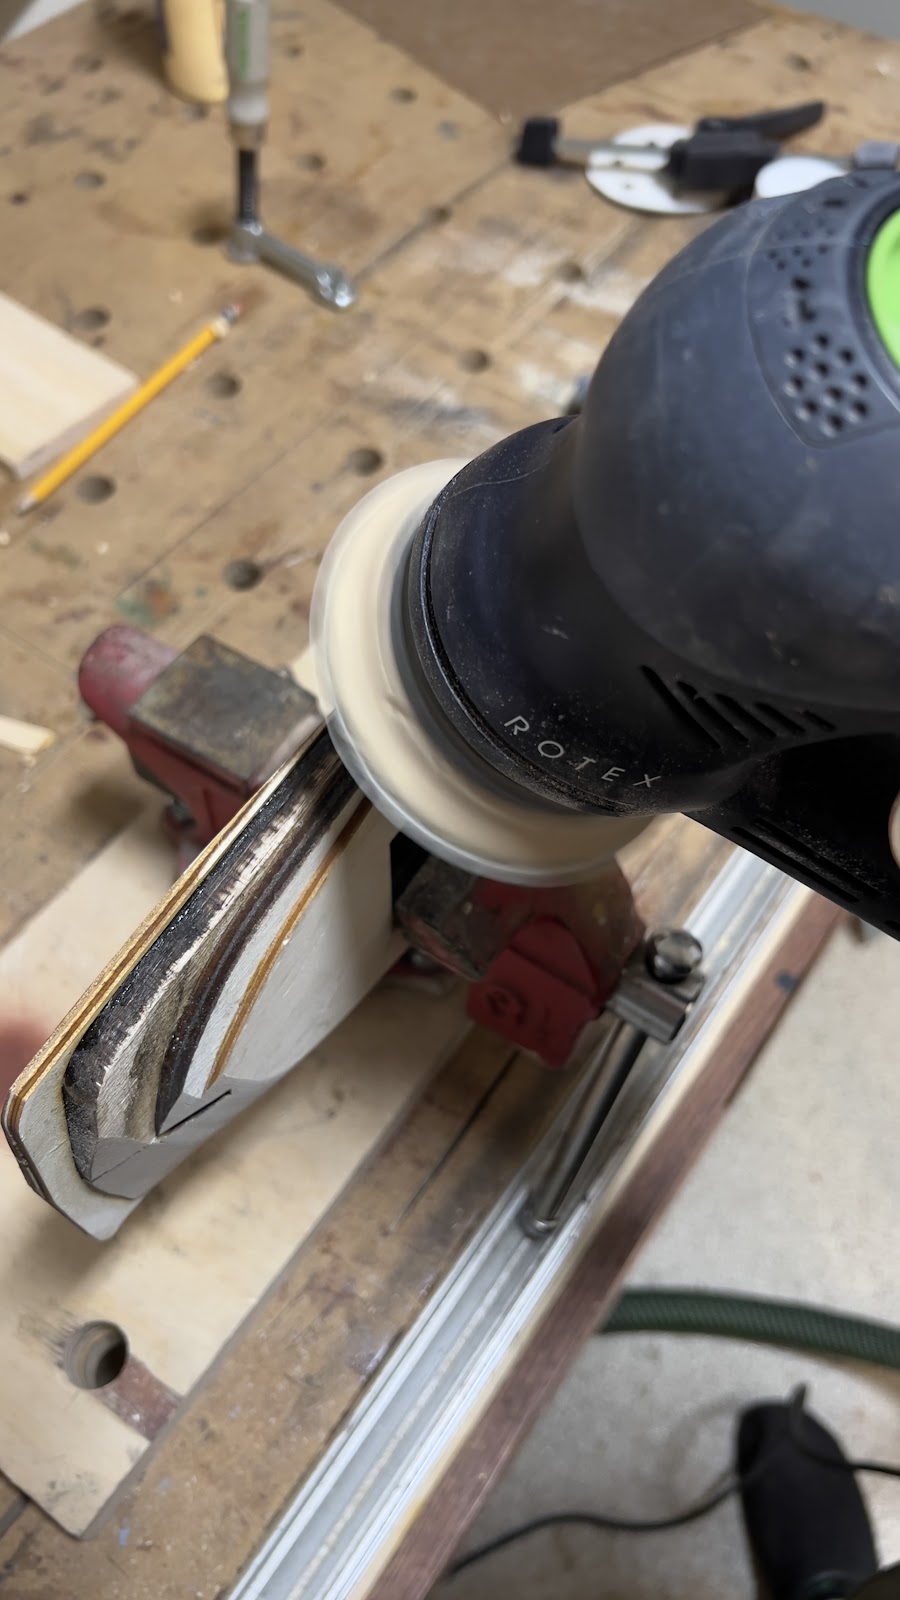
Once I had the basic hull shape I laser cut the deck planking. I used the laser to engrave the planks, the joggled planks around the perimeter, and  the treenails/wooden nail plugs. By the time of the ACW, ship builders used nails and wood plugs instead of treenails. But in scale, the wood plugs almost look like treenails. They are only 0.015 inches in diameter. So the engraver could handle them and allowed me to avoid a tedious task. 

Here is a shot showing the pungy next to the Miss Merritt Marie. Although not as long, the pungy's masts are nearly as tall as the bigger schooner.  Pungies were known for fast sailing partly due to the huge sails. 

Next I need to add the low railing around the hull. Pungies did not have a large bulwark. There was also monkey rail around the cockpit area, but it was not very tall. They must have been wet sailers in a rough sea.. 


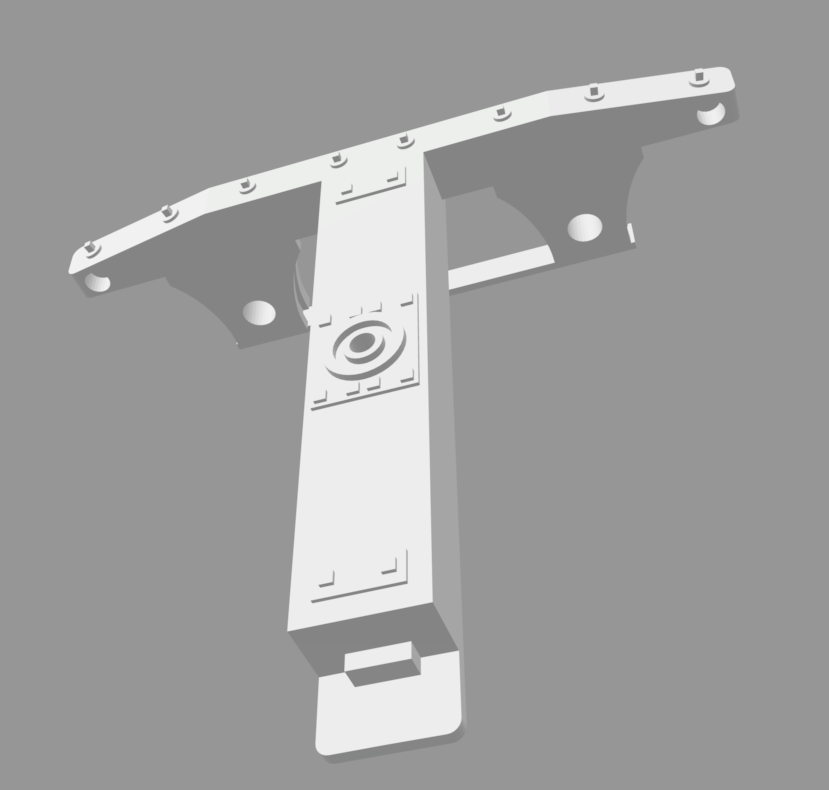
In other news, I replaced the trucks on box car 1344. It was intermittently derailing when running in a train. I suspected the cast metal trucks were the culprit. So I replaced them with the new 3D printed resin ones. We'll see if that fixed the issue. 


October 30, 2022

3D Printed Wooden Trucks


3D printed trucks

The expansion of the layout has resulted in a need for me to have more freight cars on the railroad. I haven't built any new cars for the layout for several years. I probably need to make some new flat cars, but I would also like to try some new styles of box cars. Regardless of what I build, I will need some new trucks. I decided to make them using my 3D printer.

I started by just drawing one quarter of the truck since it is symmetrical about the longitudinal and lateral axes. Once I had the quarter section fully fleshed out in the drawing, I used the mirror feature in Fusions 360 to complete the truck.


These trucks are designed to accept NWSL 8248-4,  O scale Wheelsets 33"/145,1/8"x1.730" shouldered axles. I have 5 sets of these on hand. Plus I have a few of my cast metal trucks that I plan to replace. I don't know if I can still get these wheelsets. If I cannot, I have a lot of Intermountain O scale wheel sets on hand. I would have to adjust the drawing to accept those wheelsets.  However, I prefer the NMSL wheelsets as they have thinner treads.


I had to design the truck in parts that must be assembled. The printed resin is too stiff to allow assembly by flexing the truck like you can do with N or HO scale plastic trucks. To ease assembly, I printed the bolster and one truck frame as single piece. Thus each truck has only 4 parts. Once the wheelsets are inserted in the holes on the truck frame, and the second side frame attached, the truck aligns itself. I apply some CAA and use a small clamp to hold the parts. While the glue is setting I insert the brake beams. On trucks without brakes, I glue those beams in place. But for trucks with brakes the beams are not glued. 


You can see how the brakes beams can pivot
I made the brake beams on pins so that they can rotate. That allows me the option to make the brakes work using my photo etched parts if desired.

I designed the bolster and brake beams to fit in slots or holes in the truck side frame. I learned that if you want to do this, you have to make the slots or holes larger than the corresponding pins by a fair amount. In this case I had to enlarge the 0.065 inch holes for the brake beams by about 25%. I had to reduce the bolster locating pin by about 50% to make them fit. I am not sure why, but holes and slots in materials print smaller than the design dimension by significant amounts. 


I was very pleasantly surprised to see how smoothly these trucks roll. They have a lot less friction than my earlier versions.  Printing 3D trucks will simplify my freight car construction as in the past it took me about 4 hours to build a set of trucks using my laser cut parts. These trucks also have more realistic detail, particularly in the journal cover area. 

This weekend I also worked on a wargame project with John Drye. I helped him build a map for a game he plans to run at Fall In 2022.  The maps depicts the area near Eindhoven and Son during the 1944 Operation Market Garden. The map is a 6' by 6' piece of felt that we painted and flocked. The graphics are designed especially for the new game called Breakthrough that Frank Chadwick is developing, and John is play testing. However, the map could be used for other game systems with a little modification. It was a fun project that came out better than we expected.

We used aerial photos as a guide but the terrain is stylized to suit the game system. I painted all of the fields, canals, and roads with spray can colors using soft masks. Then we embellished the edges of the fields with acrylic paints to show tree breaks. 

John is painting some details to help delineate the fields and roads.  


January 18, 2021

ACWRRHS Group Build

We recently announced this on the ACWRRHS. I am posting it here too for general information. Some folks have already started. 


For the first time ever the ACWRRHS is holding a group build event.  In this event, anyone that wishes to participate will build a model under a specific theme.  The theme for the premiere event is “Civil War Era Box Car.”

This is NOT a contest. It is a way to get us involved in building and sharing our work, even if you don’t have a layout.  All skill levels may participate. Any materials may be used. You could start with ready to run model and re-letter and weather it it. You could build one the the kits available from our vendors. Maybe you want to 3D print something, that’s fine. just about any idea you want to try is OK. Get creative. You can display the model on a plain background, ot show it in a diorama full of troops and supplies. 

So you like the history, but are not a modeler? Try it anyway. You might enjoy it. You’ll end up with a memento of the group to display in your office or den. If not, at least you’ll get to marvel at everyone else’s work. 

You only do computer modeling? Fine, make a box car in your computer.  

You like to use cereal box cardboard for construction material, go for it. 

All you have to do it decide to join in and make what you want as long as it somehow relates to a civil war era box car. 

Now, for the rules, such as they are.

Starting date:  January 15, 2021. 

Ending date:  April 30th,  2021, just in time for the spring campaign seasons

Allowed themes: Everything is allowed from every theater of the war, any railroad, any setting,  as long as it involves a Civil War Era box car. Again, be creative. If you are not sure wether or not your idea fits within the frame, ask the group.

How it works:  If you plan to join in you can start a message thread on groups.io with the following Subject, “ACWRRHS 2020 Group Build, <Your name here>”   The thread will be where you describe your project and show progress. You can post pictures as you go. Others can comment on it as they see fit. 

The last  hard rule:  it must be a new project you are starting. You shouldn’t use a model that you have previously built. 

At the end of the time period, the group moderators will do a consolidated message showing model photos and or videos of all the models, finished or not. There are no prizes or penalties. That’s it. 

We look forward to seeing your builds as they progress. 


May 27, 2019

Let's Get Dirty

Some of JD's new cars


Jake and Alex use prototype photos
as a guide to weather a flat car
In honor of Memorial Day today, Paul Dolkos, John Drye, Jake Brendel and Alexandra Cannole joined Alicia, Mom and I for a cookout. On the menu were grilled sausages with veggies, home made pierogis that mom and I made yesterday, fresh corn salad, grilled chicken wings, fruit, brownies and ice cream.

After the delightful dinner, we descended to the basement for a weathering session. The primary purpose was to jump start John Drye's conversion to HO scale by weathering a bunch of HO freight cars.  Jake and Alexandra offered to help. Paul Dolkos watched the festivities and got inspired to go home and do some of his own cars.

In a few hours we managed to weather about a dozen cars.  Probably my favorites were the covered cement hoppers that I weathered in part with a slurry of white chalk dust and water. When it dries it creates a most convincing look of dried dust.

Hopefully, this gave JD a good head start on his new layout.


Love these cement hoppers
Now that work on my layout is winding down, I am hoping to help my friends with their projects.   I do plan to expand the Aquia Line, but not until after we host Northeast Interchange next November. Also, Alicia and I are coming up on a busy travel period where we will be on the road about half of the time. So I won't be getting too much down on my layout.

Speaking of travel, we will be in Connecticut for the NERPM next weekend. I'll be presenting a clinic on Saturday evening. On Sunday, we plan to visit Mystic Seaport. I haven't been there in over 50 years.

JD posing by his new freight  cars

March 22, 2018

March Madness - a Snow Storm on the First Day of Spring

They say March comes in like a lion and goes out like a lamb. Well the lion got in a late roar and dumped abut 6 inches of heavy wet snow on our area. Late snow is unusual for Northern Virginia, but recall that there was a heavy snow storm storm when President Abraham Lincoln made his Easter visit to the Aquia Line in 1863, as well as several other storms that winter.

Of course the snow caused the local schools, many businesses, and the Federal Government offices to close down. With an unexpected day off, I tackled several miscellaneous tasks on the Aquia Line. Most of the tasks were in the maintenance and rebuilding category.

First, I tuned up several freight cars. Through test operation I found several cars that were derailing in various places. I discovered that some of my cast metal trucks did not have the king pin hole exactly on the center line. This caused the couplers to be offset too much on certain curves. The offset couplers then jam the links and caused derailments by lifting the car and wheels off the rails.

The off center problem  was due to the rubber mold wearing as I cast the metal parts for the trucks. To fix that problem, I cracked open  the offending trucks and replaced the bolster beam with new laser cut parts that had the king pin hole precisely centered. They also had consistent tabs to fit in the slots of the cast metal truck side frames. With these changes, those cars performed much better.

While I was doing freight cars, I also finished up the decals for a new box car. This is now the 28th car on the RR. I also built two more sets of trucks for cars 29 and 30.

But I still had some derailment trouble. All three turnouts to the wye at Aquia had problems. These are key turnouts and must work reliably. The easiest to fix was the switch on the Burnside Wharf side of the wye. My operators from last week reported that the stubs were not clearing the stock rails. Sure enough, one stock rail was too long. That was easy to trim.

The center wye switch had become tight in gauge after I ballasted the track, probably because I was too enthusiastic with dilute glue and wet-water  when I applied the ballast. The excess water caused some of the ties to wrap a little bit. However, I was able to salvage the turnout by slightly re-gauging the track without having to pull the ties and totally re-lay it.

New extended lead and switch stand WIP
The biggest problem was in the south end of the wye. The lead to the turnout was too sharp. While it worked most of the time, certain car-coupler combos still had trouble. The frog was ok, but the lead in the stock rails was the problem.

To fix it, I pulled up  the stock rails, added three inches  to the lead and and re-spiked the track. In the process, I was able to move the switch stand to the foreground, where is it much easier to access. It all works much better now.

One other niggling problem we had was that certain freight cars interfered with the transfer bridge on the car float. I was able to sand the transfer bridge post in the center that was causing the problem. Most cars now fit, except two flat cars with home made stake pockets. I was able to use my new Proxxon disk sander to take off about .040 inches off each side of the cars. They now fit and the cars still look fine.

I recently purchased the Proxxon sander. It has proven itself to be one of the most useful tools in my shop.  How I got along without it for so long is a mystery.  It's for sale direct from their website with feee shipping. And their price is lower than most discounters, like Amazon.

Finally, the USPS brought a package. I guess the, "Neither snow nor rain nor heat nor gloom of night stays these couriers from the swift completion of their appointed rounds" is true. Anyway, the package contained an O scale 2-8-0 2-rail locomotive that Jeremy Drummler purchased for me at the 2018 National O scale Show in Chicago last weekend. Thanks Jeremy!

It is shocking to feel how heavy this loco is and how much bigger it is compared to a ACW 4-4-0. The engine weighs 4.1 pounds and the tender is another.  Wow.  The loco is for a new layout project for my next book. More on that later.

February 12, 2018

Hay, let there be light

Say hay! Finally have some forage to haul.
I took a break from building warehouses for Aquia Landing to do some miscellaneous jobs on the layout. I have 5 new warehouse buildings in various states of assembly.

New light over Burnside's Wharf. Some of the new warehouses
are also visible in the image.
First odd job was to add a new light over the Burnside's wharf area. My operators have complained about that area being dark and hard to see when switching. For the light I used a new low profile, recessed LED light that only draws 15W but puts out 850 lumens. It was pretty easy to install and the results are great. It is much easier to see the link and pins there now. I also like how the backdrop is much more evenly lit now too.  It pays to listen to your operators. This has got me thinking about retrofitting the rest of the lights too.

I also added some ballast to the wye tracks. I find that doing a small section of ballast at a time makes for better results.

Hay warehouse in Alexandria, VA


Two  of the major scenic shortcomings of the layout are been the lack of forage and not enough supply wagons.   Modeling forge is important because it was the predominant cargo on the line. So tonight I made about 140 hay bales. That should be enough to create loads 4-5 cars. I'll probably need three times that many in total for car loads and scenery at the wharf and stations.

Flat car laced with forage at City Point
The mechanical hay press was invented about 10 years before the civil war according to this web site and documented in this booklet from 1842.

To make my bales, I used balsa blocks for the basic shape. I tried to add some variation in size and shape as hay bales in this era were not uniform, as you can see in the image at the left.  The bales were pretty big, about 300 pounds.  Mine are 0.9 inches long and half inch square cross section.

Then I painted them with a mixture of straw color acrylic paint and white glue. Then I sprinkled on a layer of static grass that was mixed with clippings from cheap bristle brushes. Once dry, I glued the blocks together and wrapped them with baling twine.

I used Woodland Scenics harvest gold static grass with some clippings from cheap bristle brushes. Hay comes in different types and colors.  I went with hay that is not quite so green, since I model the late-March time period, so the hay  would be a few months old.


Note the hay bales on the roof of the barge.

November 16, 2017

Coal and Caboose


A few weeks ago I sifted through the conductors reports that I copied at the National Archive several years earlier. One of the reports listed coal as a commodity being shipped to Falmouth. I am really not sure why they were shipping coal at this time. One possibility was to refuel steam boats that landed at Falmouth. But I don't believe the Union forces were sending steam boats up the Rappahannock to Falmouth at this time because the southern shore of the river was in rebel hands.  

As far as I know, no locomotive on the Aquia Line burned coal. I have message traffic that talks about locos getting wood and water.  The USMRR did have some coal burning locos in 1862 that they borrowed from the B&O in service on the O&A, but those locomotives did not make it to Aquia.

The amount of coal shipped on the Aquia line was small. So it was unlikely a major fuel source. However, they may have stockpiled coal at Aquia Landing to refuel ships, so some coal might have been available. Perhaps the coal shipped to Falmouth was for use in tent stoves, especially at Headquarters.

As I was wondering this, I found a flash news reel from the USMRR Aquia Line that explains the situation . I've included it below to allow the widest dissemination.

I made the coal load with a piece of foam painted black and covered with real crushed coal . Like all my loads, it is removable so the car can return empty.

To improve the tractive effort of Osceola I filled its firebox with cubes of tungsten. I was able to get about 3 ounces in firebox void. It does seem to improve the pulling power of the small loco.

I added another caboose to the inventory this week. During a typical op session we have two trains running at one time, so now each train will have their own conductors car, also known as a caboose.

November 5, 2017

More weathered cars for PoLA

I weathered 7 more cars for PoLA today, including some with hand painted graffiti. When I do graffiti on a model, I look at actual graffiti on cars to get ideas, but I don't copy it exactly. It's more fun that way. Here are 5 of the 7.


October 24, 2017

Mystery Freight Car

I found this image on an auction site by chance while doing a google image search. I have never seen or heard about this car before. Nor have I been able to find any additional information on it.

In the photo one can see the airbrakes hose, modern stenciling, a road name that didn't exist until 1870's, and a knuckle coupler. Thus we know that this is not a photo from the civil war. But, is the caption correct in that this was a civil war era car that had been salvaged from a river and then upgraded?

The consensus on the ACWRRHS forum is that the caption is not accurate. The car is listed on the 1890 OER, meaning that it would have been about 26 years old if it was a ACW era car. It is also unlikely to be steel, as steel was relatively rare until the 1866 time period when the Bessemer process started to be introduced into the United States.  Hooker was in Georgia with Sherman in 1864 until he was relieved. If anything the sides are sheets of iron, copper or tin.


October 8, 2017

Finished Conductor's Car

"Sherman, Haupt tells me this is our secret weapon."
"Doesn't look so secret to me."


This is before I evened out the weathering.
I finished the conductor car. Making the roof removable to allow people to see the interior made the task considerably tougher. The next two conductor cars will not have full interiors.

The doors slide and the hand brakes work.

All in all a fun car. Being a "non-revenue" car , it will help complicate the conductor's operations. At least he has a nice desk and chair to sit on inside the car.


Here is a short video showing a test run of the new car.


October 4, 2017

Building a Conductor's Car

Conductor's Car at Stoneman's Station
used as a telegraph shed
During the Civil War conductor's cars, also known as cabooses, way cars, cabin cars, and on some odd-ball railroads, vans, were not that common. According to John H. White, there were just a few  railroads with conductor cars prior to the war. During the war, the USMRR started using them more regularly. When the railroaders returned home after the war, they helped spread the idea.

I have no written record of  conductor cars on the Aquia Line, however, there is a photo of a conductor car off the rails and being used as a telegraph shed at Stoneman's. So there was at least one!

The are no plans available that I am aware of except for the drawing in Alexandrer's book. That plan has lots of mistakes, and is too big for my layout anyway. There are a few photos of USMRR conductor cars. So I decided to make my conductor's car as if it was a converted box car using the photos as guides.

I laser cut the frame and then planked the deck and sides with scale lumber.

I decided to add a full interior. Most everything is scratch built except the stove casting (though I did add a cranked chimney), the barrel and the tools. The chairs are laser cut.

Now I have to figure out how to make the roof removable.

Close up of the work table. Can you read the switch list?
The car sides are laser scribed, but engraved on two sides so the joint lines show inside and out.

The bed on the right is a 2-bunk bed.


September 29, 2017

Getting Ready for Op Session 2

Newest freight cars to join the Aquia Line fleet

Logo on new shirts
Like the Monitor arriving just in time to save the Union fleet at Hampton Roads, the new Aquia Line embroidered shirts have arrived just in time for the ACWRRHS Op Session and Open House. (BTW have you ever noticed how many ACW battles swung by the just in time arrival of a some unit - Johnson at First Bull Run, AP Hill at Antietam, Longstreet at Wilderness and Chickamauga, Buell at Shiloh,... I digress)
Actually they are on a UPS truck to my house  update- are on hand now.  These are special shirts reserved only for those that have helped build the layout.

The op session for the ACWRRHS starts at 1300 tomorrow. I expect a big group. Then at 1500 it switches to an open house for the ACWRRHS members that don't want to operate.


I had a busy week, despite catching a cold.

First, I tweaked track by test running both battery and DCC powered locos. I found a few spots that needed adjustments. I have learned that the most problematic aspect in my turnout construction is where the point rails bend at the frog. That bend has to be made very precisely. I have found that the portion of the point rail that is adjacent to the frog can be set a bit loose without hurting performance. But the guard rails opposite them on the stock rails must be spot on. They need to be set right to the gauge so that the trucks don't pick the frog, but not too tight that the pinch the wheels.

I also drove more spikes, so there is probably only 6 feet or so of track left to spike.

I finished building 6  more cars, 4 box cars and 2 flat cars, thanks to some pre-assembly work from JB Weilepp and Paul Dolkos  (see photo above). I painted these box cars medium gray, which looks good when paired with my other burgundy and tawny brown colored cars (sounds like a wine tasting, bring your own crackers). All these cars have home-made cast metal trucks, so their brakes do not operate. That makes 21 cars so far. I think 30 to 36 is a good target number. I have three more "kits" ready to build. Then I want to make some peaked roof box cars, which will require some new laser drawings.

I went on a coupler height adjustment campaign too.   When backing cars, coupler height is critical. When the couplers are mismatched height, the links jam and cars derail. As long as the couplers push face to face when backing, they run well.   I also swapped the factory installed couplers on the locos with my own photo etched versions, as mine work better when pushing.

I also cleaned the pickup wheels for my locos, ... but then, I swapped the battery power supply for Whiton with one of the new designs.  The new BPS uses track power to power both the motor and the battery recharger. The battery only kicks in when the track power is off.  In other words, it is the mother of all keep alive circuits.  I did a test and sure enough, the new BPS can run the decoder off track power even without a battery. With this BPS and the old battery, Whiton now has been running near perfectly.  With the new BPS system, one can use a smaller battery, which will make future installations much simpler. I am now seriously considering converting all the locos to the Stanton battery system.

Wait, didn't you just wire the whole layout for DCC? Why not just just DCC decoders with keep a-lives capacitors?  Haupt has such a keep alive circuit with regular DCC. For some unknown reason, it will stall every now and then. The Stanton battery locos don't stall. They even chug through the occasional short that happens when my brass locos  touch wheels to frames on my tight curves.  Yes, as much as I tweak the engines they do still happen.

A last item, I modified the timetable a bit to try to pack in a bit more action.  One of my testers from last week suggested I run fewer cars in the trains fro new operators, so we will try that.

Tomorrow should be an interesting day.


September 9, 2017

Holy Cow! Great Work Session

I'll get to the cow later, but today we had a very productive work session.  Eight members of the USMRR construction corps showed up to work.

Mat Thompson and Pete LaGuardia arrived first. They went to work installing the booster to the Aquia Landing section of the layout. I had previously run the main power buses to Aquia Landing, so just they needed to swap out the wires at the main junction panel. I thought this job would take a few hours, but Pete and Mat finished in less than an half hour. We even tested it by shorting a section, and as designed, the other sections continued to work.

Wooden joint bars
With the booster connected, Mat went to work installing wooden joint bars to the finished part of the layout, while Pete started drilling holes and adding feeders to the tracks at Aquia Landing.  Pete was the model of efficiency as he got all the feeders installed and soldered.

Next "Loco" Leonard White and John Salmons arrived. They immediately went to work spiking track at the wye in Aquia Landing. Over the past week I had finished all the spiking of the new track at Burnside's wharf. With Loco Len and John's work, there are only about 6 or 7 feet of spiking left to do. Whew!

Track spiked, painted, and with feeders. What
are those B&M cars doing there?
Next, John "I read the email and brought my Floquil Pen" Drye arrived. He went to work painting track. Unfortunately, his paint pen was dried up, as were all of mine. So he ended up painting with a brush and acrylic paint. Later I fired up the airbrush and got busy painting rails with Vallejo acrylic paint.

Next to arrive was John Barry (yes that is the third John if you are keeping score). He went to work with Mat adding joint bars. After about an hour or so they used all the joint bars I had prepared. I need to cut some more on my laser.

new freight cars in various states of assembly 
JB Weilepp (no one knows if the "J" in "JB" stands for John. If so, that makes 4 Johns) arrived. He had worked on a box car kit at home. Earlier in the week, Paul Dolkos also brought over a box car kit that he had worked on. With the one I built, and two more flat cars, we now have 5 more cars in various states of partial assembly. JB had to leave, but he took another kit home to work on.

Carrot cake break
Doug Gurin was the last to arrive. At about the same time my mom showed up with a delicious home-made carrot cake. It didn't take long for the work crew to desert their posts for dessert.

After a tasty snack, I managed to get the crew back to work. Doug took over rail painting duties as JD had to leave.

Planking in between the rails on the wharf
I worked on planking the area between the tracks on the wharf. John Barry helped.

By 5PM, we broke for dinner. Doug and John Barry stuck around for dinner. During the dinner conversation we learned that John Barry not only has a pet horse, which we knew about, but he also has a pet cow. The cow came with the house that he bought in rural Virginia. And to top it off, the cow got pregnant and now John has a calf. How the cow got pregnant when John does not have a bull is a story for another time, but not to worry, it was not an immaculate conception. Of course my mom immediately suggested eating John's pet calf. Even Doug seemed to favor the idea of eating fresh veal.  Geeze, tough crowd!

All in all a great work session. Thanks guys.


March 22, 2017

"Go big or go home" - Auto Racks Test

"Go big or go home," is a popular saying these days. It really doesn't make sense because who would n't want to go home? It is a nice place where the layout is. I like to go home.  So how about going big at home? That is exactly what is going on here. PoLA is going big. This photo shows a test run of a train of auto racks on PoLA.  I am looking at another expansion of PoLA, but before I proceeded, I needed to verify that auto racks will fit on the layout. The visible part of the layout is no problem. It's the 19 inch radius and 54 inch vertical clearance under the stairs that had we worried.

So I ordered up a batch of auto racks from Mainline Hobby, with the intent of doing the test. If it was a no go, I'd sell the cars on ebay. Less than 24 hours later the box with the models, a very large box, was waiting at my front door.  I opened the box and set the models on the layout. The Atlas articulated sets required some assembly. One of the screws was so tightly inserted that it stripped when I tried to unscrew it. So I drilled it out and replaced it with a screw from my stock.  When Alicia saw the cars on the layout she asked, "are those the same scale?"

Now the big test. Ta daa -- All cars made it through the staging track curve both backing and pulling. Pulling gives more clearance between cars as the couplers stretch out, but they can back through too, even though the inside ends of the cars touch.  So, we can proceed with the expansion plans. Whew!

Don't worry the Aquia Line is still here. The new PoLA expansion is basically 2x8 feet, but it will double tank car siding capacity and add a whole new industry with capacity for up to 14 89-foot auto racks.