A journal following the history, design, construction and operation of Bernard Kempinski's O Scale model railroad depicting the U. S. Military Railroad (USMRR) Aquia-Falmouth line in 1863, and other model railroad projects.
©Bernard Kempinski All text and images, except as noted, on this blog are copyrighted by the author and may not be used without permission.
-----------------------------------------------------------------------------------------------------------------------------------------------------------------
Showing posts with label Ships. Show all posts

May 28, 2024

Get to the Choppa!


The punch list on the diorama is shrinking. On Saturday, Jeff Hammer stopped by and installed most of the remaining barbed wire sections.

Meanwhile, I started scratch building the Landing Craft Tank Mk 5 (LCT) number 2227. 

I decided to use styrene parts applied to an acrylic base. I cut the acrylic base on my laser. I also used the laser to cut some of the larger styrene parts. However, the laser cannot cut small parts ins styrene, especially those with sharp angles. So, it was time to...

GET TO THE CHOPPA!

LCT almost ready for paint


It has been a while since I scratch built using styrene since most of the work on the Aquia Line I do with wood. I have an old NWSL Chopper that has seen better days. But it did a good enough job cutting the parts for this model. Styrene is easy to work using scribe and snap, model cement and putty. The chopper allows making repeat parts easy.

One of these days I need to upgrade to the Ultimation Slicer. It is a great tool. Some of my friends have the Slicer and say it very handy.

I have the Ulimation Sander and Repeater shown at the left. That is an excellent tool for working with styrene and wood. I use the Ultimation Sander to clean up cuts. The miter table is very precise. The gap between the sander and the disk is very small, making it easy to use on small parts.  You spin it by hand, so it doesn't melt plastic and it doesn't shoot dust everywhere.

I used to have a small Proxxon disk sander for modeling. It was cheaply built primarily with plastic.  It broke when it fell on my floor. The miter table it came with was toy like. It could not do small parts due to the gap in the table and the disk, and it was very loud with a shop vacuum attached. 

When using the laser to cut styrene it seems best to have the laser make slashing cuts that extend beyond the part you wish to cut. For example,  to make a right angle you would make a X-shaped cut instead of an L- shape. That seems to minimize the time the laser is in contact with the styrene at the vulnerable sharp corner, as the laser will speed by the spot where the corner will be, giving the plastic some time to cool 


thus minimizing melting. Or course, this technique doesn't work on parts with interior corners, like a window frame.  The other technique one can try on styrene is multiple light passes with a lower power setting that does't cut through fully. 

For the LCT model, I used some photo-etched stanchions and 0.015 inch phosphor bronze wire that I had on hand to make the hand rails. They are very sturdy with just CAA. I had a set of stairs and some plastic ladders in my spare box that worked.

I printed some additional parts such as the life raft, watertight doors, bollards, and vents. I added lots of punched styrene disks and other small plastic parts. 

The LCT lost its ramp during the fighting due to a mortar strike after the tanks unloaded. It became beached in the shallow water for quite a while. Its anchor also malfunctioned. While it was stranded,  it received numerous hits from small arms fire and fragments, some which created holes. But none of the crew were injured, as they stayed in the armored part of the hull until they could get moving again.


LCT 2227 loaded with trucks probably before D-Day

Nice color photo of a different LCT in Italy. It shows extensive weathering and provides some detailing ideas.

May 10, 2024

Down to the Sea in Trains - Ships for Model Railroads

 I'll be doing a virtual clinic for the Potomac Division of the NMRA on May 11th at 3:00PM. I believe the clinic will be posted to youtube after I present it if you are not a member of the NMRA.  Here is a brief video clip showing some of the material I will be covering.


April 12, 2023

Privateers - An inside Look


British sailors and marines get slaughtered as they attempt a "cutting out expedition" on the 
American Privateer, General Armstrong

Amanda Foreman's book, "The World on Fire" discusses Britian's balancing act in trying to remain neutral during the American Civil War. One of the reasons she offers, among several others, as to why Britian remained neutral was that they were concerned about the potential devastating impact Union privateers would have had on the British merchant fleet. The British recalled their exasperating experience with American privateers in the Revolution and even more so in the War of 1812. Furthermore, they could see the effect the few Confederate raiders were having on the vast Union merchant fleet. They did not want to risk their merchant fleet to that again,

If you are wondering, like I did, how privateers actually worked than this article by Joshua Smith, "General Armstrong: the Captain, the Ship, the Battle" might help. In it he illuminates how American privateers were financed, built, sailed, and fought in the war of 1812 by following the example of the Baltimore Clipper, General Armstrong.  It became a famous ship due to a tenacious captain and a bloody battle fought in neutral harbor. It is a fascinating read. You can find a copy of the article at the following link General Armstrong: the Captain, the Ship, the Battle

March 23, 2023

The Forest of Masts


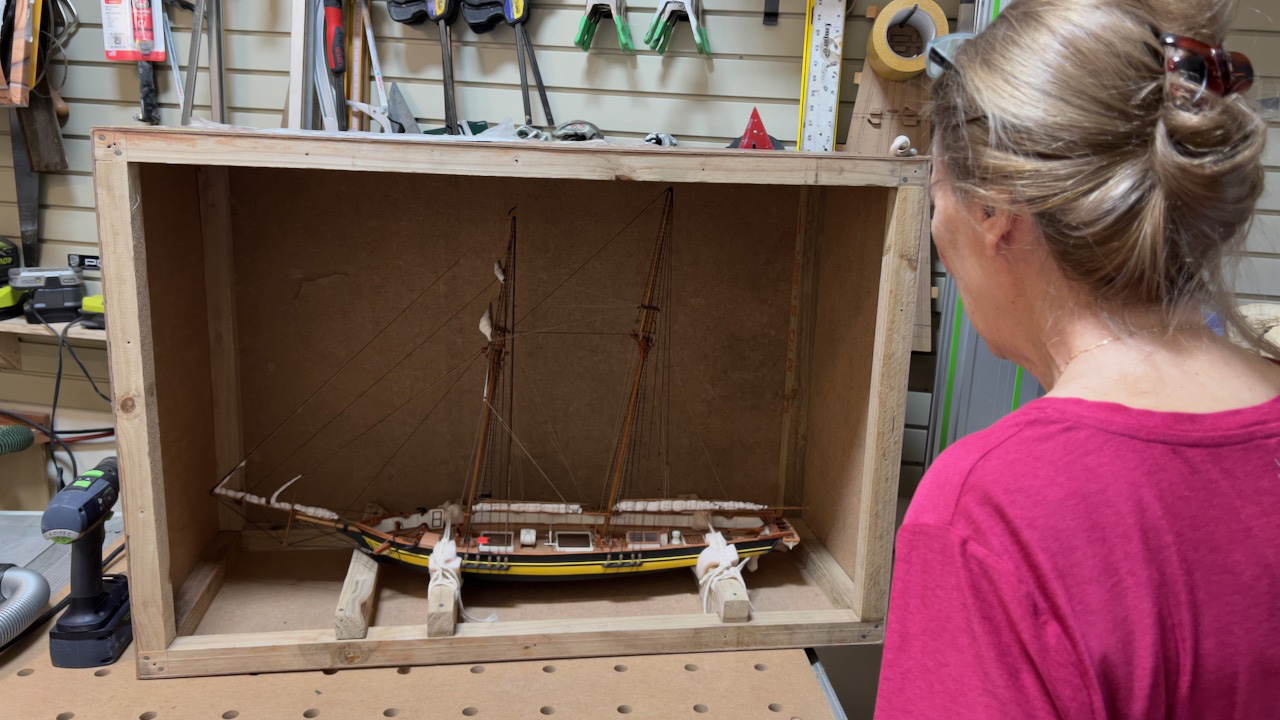
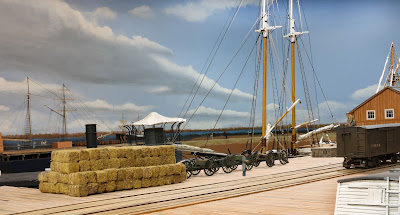
The forest of masts that we see in  many photos of civil war ports is taking shape on my version of the USMRR Aquia Line. Today, I took delivery of a 1/48th scale, waterline model of the Harvey, a Baltimore Clipper built in 1847. 


I contracted The Model Shipyard to build the model. They are the designers and builders of the museum quality sailing ship models. They are located in South Africa as part of the Mossel Bay Maritime Museum. If you look at their webpage you can get an idea of the high quality of their work. 

I ordered the model in December. I requested a 1/48th scale, waterline model of the Baltimore Clipper Harvey with the sails furled.

They sent me in-progress photos as the model was being built. With the model nearly complete, they sent photos for my approval. At that point I asked for them to set the furled sails differently based on the photos I had seen from Civil War era ports. They made the change without any complaint. 

The model arrived in a sturdy shipping crate. It is very well done. I am very pleased with it. It looks great at Aquia Landing on my layout.

 It seems a shame that I will weather it a bit.  


The Baltimore Clipper is a beautiful type of ship, and this model reflects that.  For example, look at the detail in the boat tied on to the stern.  The complex rigging, especially with the square-rigged masts, add to the allure.

Based on my experience with the Model Shipyard, I would highly recommend them. I am now thinking about what other ships they could build to add to my layout, as I have my hands full with all the other tasks.

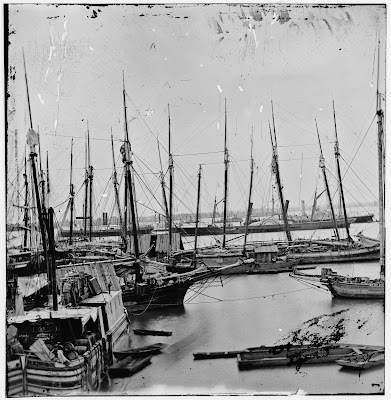
A note about Baltimore Clippers in the 1860s. Naval historians in the audience will realize that by the time of the Civil War, Baltimore Clippers were being phased out. Yet there were still some in service, especially for light weight, high value cargo. There are photos of top sail schooners in the civil war era ports, so a Baltimore Clipper is not completely unlikely.  At least one Baltimore Clipper survived into the 1920s.   


December 9, 2022

Money Shot - Another Expansion?


 This photo composition will be the money shot when Aquia Landing if (is- a freudian slip???) finished. The ships, and dockside detail will bring the scene to life. But there's a problem. I can't take this photo. Not with out a lot of photoshop work.

This image shows some of the trickery I have to use to digitally extend the waterfront in the foreground. I didn't leave enough room for adequate water scenery in the foreground of the railroad barge. To place the tug boat in this area requires a temporary extension that I made from some scrap lumber. I covered it with black (looks more dark gray in the image) construction paper. 

With the image in Photoshop I added water to the foreground using an actual photo of the Potomac that I took before. That also meant I had to create the reflections of the tug and wharf in the water. It's a time consuming task. It would be much easier if there was water in that area in the actual model. 

To extend the water, I would have to build an extension of the fascia, build a new flat area to fit and then pour resin to fill in. It's doable.

So then, why stop there? What not extend it by a 12-18 inches and make room for even more ships? The mind boggles.

BTW here is a B&W antiqued version of the image as requested by John Drye.


USMRR Tug Atlantic Complete


The harbor is stating to look like I envisioned.

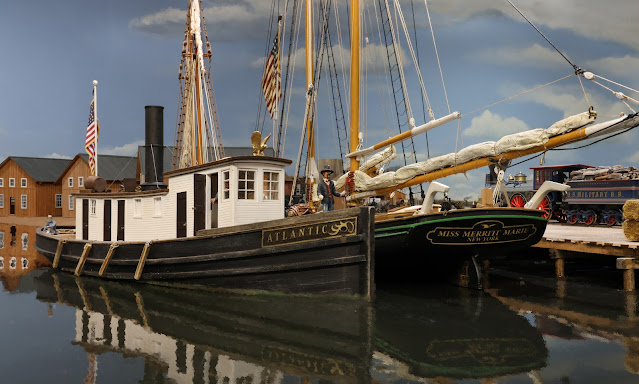
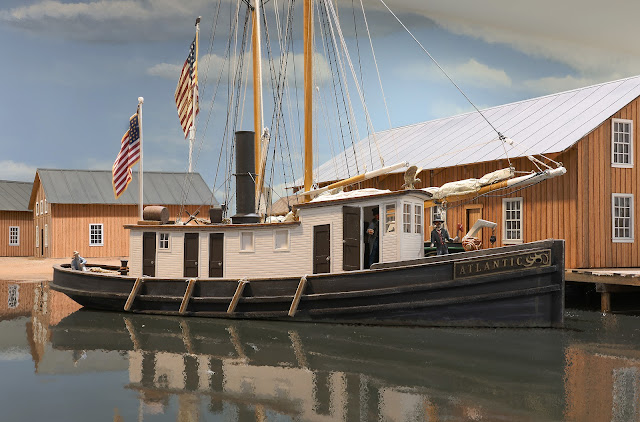
Here is the completed model. I made the flag by printing it on paper and attaching to the lanyard. The flag pole is a brass rod with a craft bead on top. The guy wires for the stack are lycra string. I made eye bolts 0.032 inch thick using laser board. The eagle is a 3D print from a file I downloaded. The fenders are scraps of wood. I could not tell from the photos how they were tied onto the tug, so I drilled small holes in the bulwark. I added other details that I could see in the photos including a grappling hook, a chair and several barrels. The name plate is laser engraved and cut.

I decided not to add the number decal to the stack. I may do that later. 


USMRR Tug Atlantic

Almost finished tug boat model

We're back from the abyss....actually, we were lucky that it wasn't that bad. But my wife and I are both feeling better. We still have to wear masks for a few more days, but other than that, all good. I was able to sneak in some work on the tug boat in between naps. The tug is almost finished. I need to do some touch up, add a decal to the stack,  and finish the weathering. 

I chose the name, "Atlantic," because that was the name of one of the USMRR tugs that worked the car ferry from Alexandria to Aquia Landing. The other tug that they list as also working this route was the "Kirkman." I liked the sound of "Atlantic" better.


December 2, 2022

Notes from Quarantine


Last Saturday, we got back from a nice trip to Alabama to visit family over Thanksgiving. Then on Sunday, my son and daughter in Kentucky had a baby girl, Ruka Kotone Foster Kempinski. That makes our second grand daughter. All are doing fine.

I spent the first part of the week getting my new band saw set up. Unfortunately, I got sick yesterday and tested positive for COVID this morning. So far it's not too bad, but I am taking things easy. I have been staying in the basement and hope to get back to work on the layout.  

The Tug Boat 

I wanted to test out the new bandsaw. So I started building a 1860's era tug before finishing the Pungy. I figured the Pungy and its rigging will take some time, so I wanted to do a simpler boat in the meantime.  

The lead photo shows a group of three tugs in the James River. These appear to be typical screw propelled tugs from the era. One of the key features of those tugs versus later tugs is the squared-off deck and pilot house. Unfortunately, I have been unable to find any plans for that style tug. There is a photo of Tug No. 6 in the James River that is nearly a broadside view. So I using that to generate plans. 

I made the hull from two pieces of basswood glued together. Basswood is a great material for modeling due to its very tight grain. The band saw is necessary to cut the sheer line across the beam of the model. That was the first cut I made. Then I trimmed the over head view to create the overall shape.


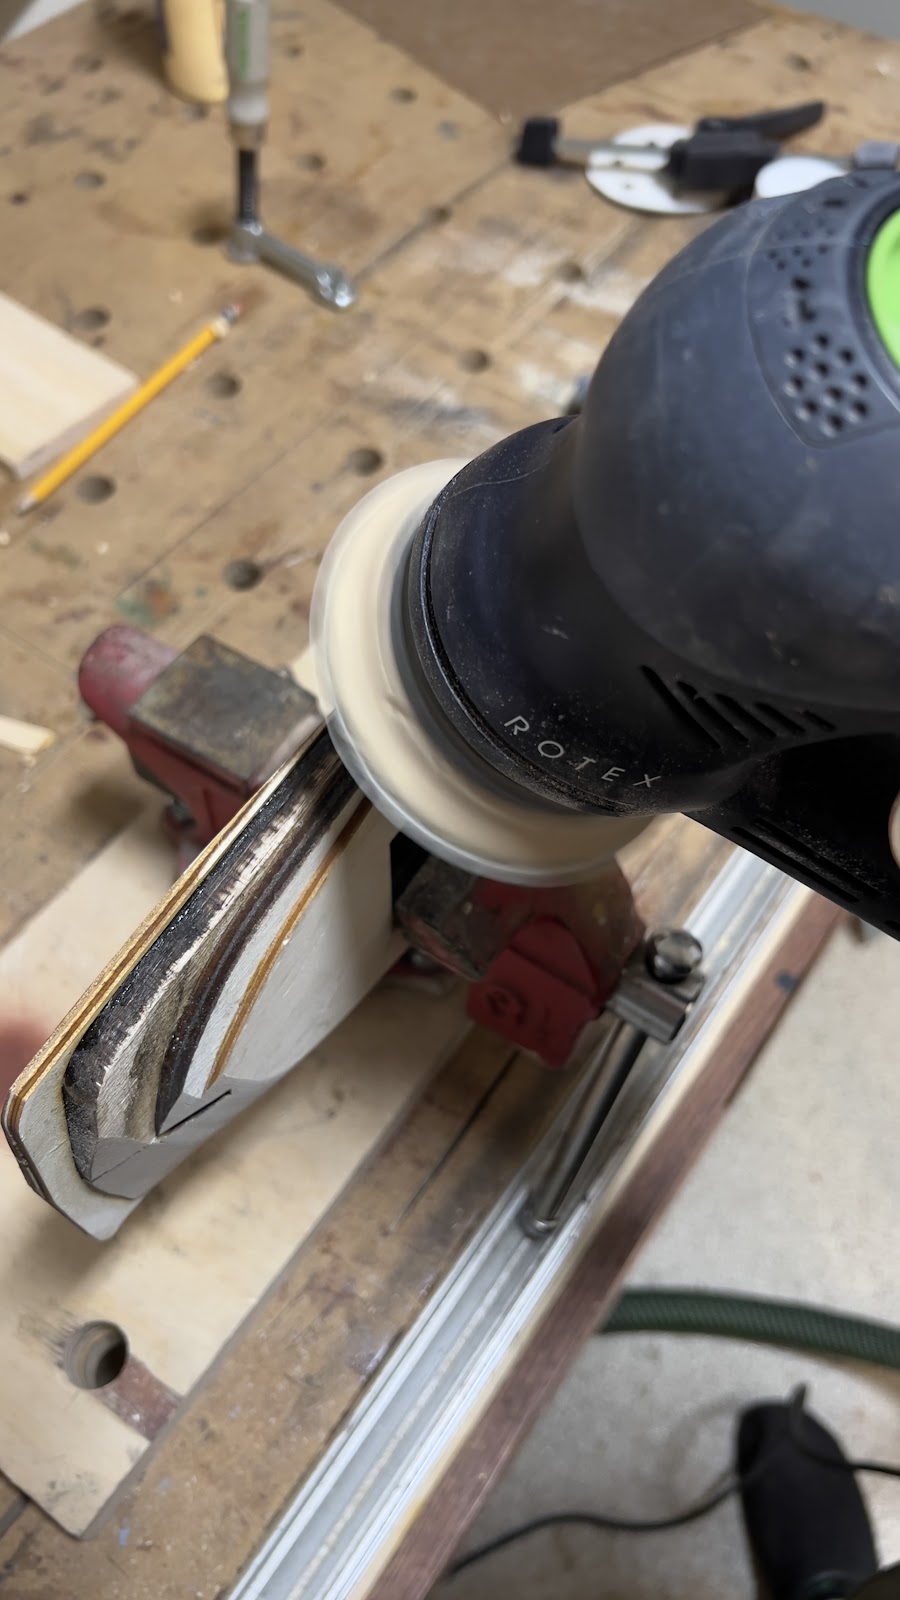
I used my Rotex sander to shape the stern and bow.  The waterline model of the tug has a fairly simple shape. All the complex curves are under water and will not be visible in my model. Just a portion of the rudder is visible. 


Next I added laser cut pieces to the top of the deck to create the camber of the deck. I planked these with individual pieces of 2 ply maple veneer that I cut on the laser. If I do this again, I will make a thin template to glue to the deck. That would have slots to precisely locate all the camber pieces.


I stained the maple pieces with dark teak colored stain before glueing them on the hull.


The next step was to cut the bulwarks. I made them about 1/8th inch taller than it needed to be. I used that extra height to glue it to the hull.  Then I added the waterway and bulwark frames. In the future, I think I can integrate those frames into the camber pieces. That would make it easier to glue the bulwarks on.

I primed and painted the hull. Then I glued on the rub rail as I thought it would remain a natural color. So I used pins and PVA to glue then to the hull. However, I now plan to paint them the same color as the hull, and then weather them heavily. I cut the grating on the rear from basswood in a couple thicknesses. I like how that came out.

Next is the deck and pilot house. The pilot house appears to be an extension of the deck house, so that is how I made it. 

Hopefully, I will feel well enough to finish it during my quarantine time.


Records of the Alexandria Railroad Wharf at the Archives

I was rereading a copy of the Records of the Alexandria Railroad Wharf I found at the National Archives in 2010. As I have stated in the past, there was generally one car ferry a day from Alexandria to Aquia Landing. Most of the time in the month of May they were transporting supplies for the railroad. But this one caught my eye, on May 2, at 5:20PM, they shipped 6 pairs of Shad Belly Trusses on cars 46, 140, 217, 158, 240, and 245. All of those are flat cars. I have never seen any proof that these bridges were actually used, but that they were a cargo on the USMRR line, means that I need to make some as  flat car loads.

In June they started the evacuation. They hauled all many of supplies to Alexandria from Aquia Creek. That is in accordance with Haupt's statement in his book that they evacuated all that they could have versus destroying it all like happened in October 1862 under Burnside's orders. For example,  On June 15, 1863 they hauled two locomotives, Gouvernment and General Burnsides, and tenders plus three more cars with tents, baggage and lumber. Most of the return trips were empty. 

If I get time, I need to transcribe this document as it is very interesting to me. 


November 6, 2022

Pungy Fever

Replica pungy schooner in a race on the Chesapeake

The delivery of the schooner Smuggler has got me psyched to start working on other ships for the layout.  I have a list of ships that I would like to have at Aquia Landing and Burnside Wharf. They are listed below in order of the state of completion of the model.


Wish List

  1. Railroad car ferry - complete
  2. Smuggler Schooner - complete built by Brian with some help from Rob. I will rename it Miss Merritt Marie
  3. Barges- 3 including one that has masts. Paul Dolkos built one for me. Two to go.
  4. Side Paddlewheeler - I have the Mt Washington kit and need to finish it.
  5. Pungy schooner - I started work on one - see below. 
  6. Pile Driver -  I am accumulating the necessary parts. I have some of the parts already.
  7. Swift Pilot Schooner   I have a kit 1/48th Swift Pilot ship. It is a simpler schooner but the kit is plank on frame. So converting to waterline could be tricky
  8. Tug boats- 2 each - one for the railroad ferry and another along side some of the barges.
  9. Steam transport -  I see several of these in prototype photos. They are like large versions of the tugs but with at least one sail mast. 
  10. Gun boat. A smaller gunboat like the USS Couer d'Lion would be better than the Passaic. 
  11. Baltimore clipper -  I see some of them in photos of Aquia Landing.  I ordered a kit for the 1/48th scale Harvey for this. That ship was built in 1847.  That is a complex sail boat with square and fore and aft rigged sails. It would take a lot of time to build but would be a wonderful addition. 
Note the ironclad Passaic is not on the final list. It is too big for the layout. I need to think of a better way to display it short of expanding the harbor scene. Nor is the Flying Fish schooner on the final list. I bought it from a custom model builder, but they got the scale wrong. I don't think it can be salvaged or converted. If anyone needs a 1/64 schooner, let me know. 


The Pungy

The arrow points to what appears to be a pungy schooner at Aquia Landing as it has the right shape and the traditional two toned paint scheme of pink and green.


N scale Pungy

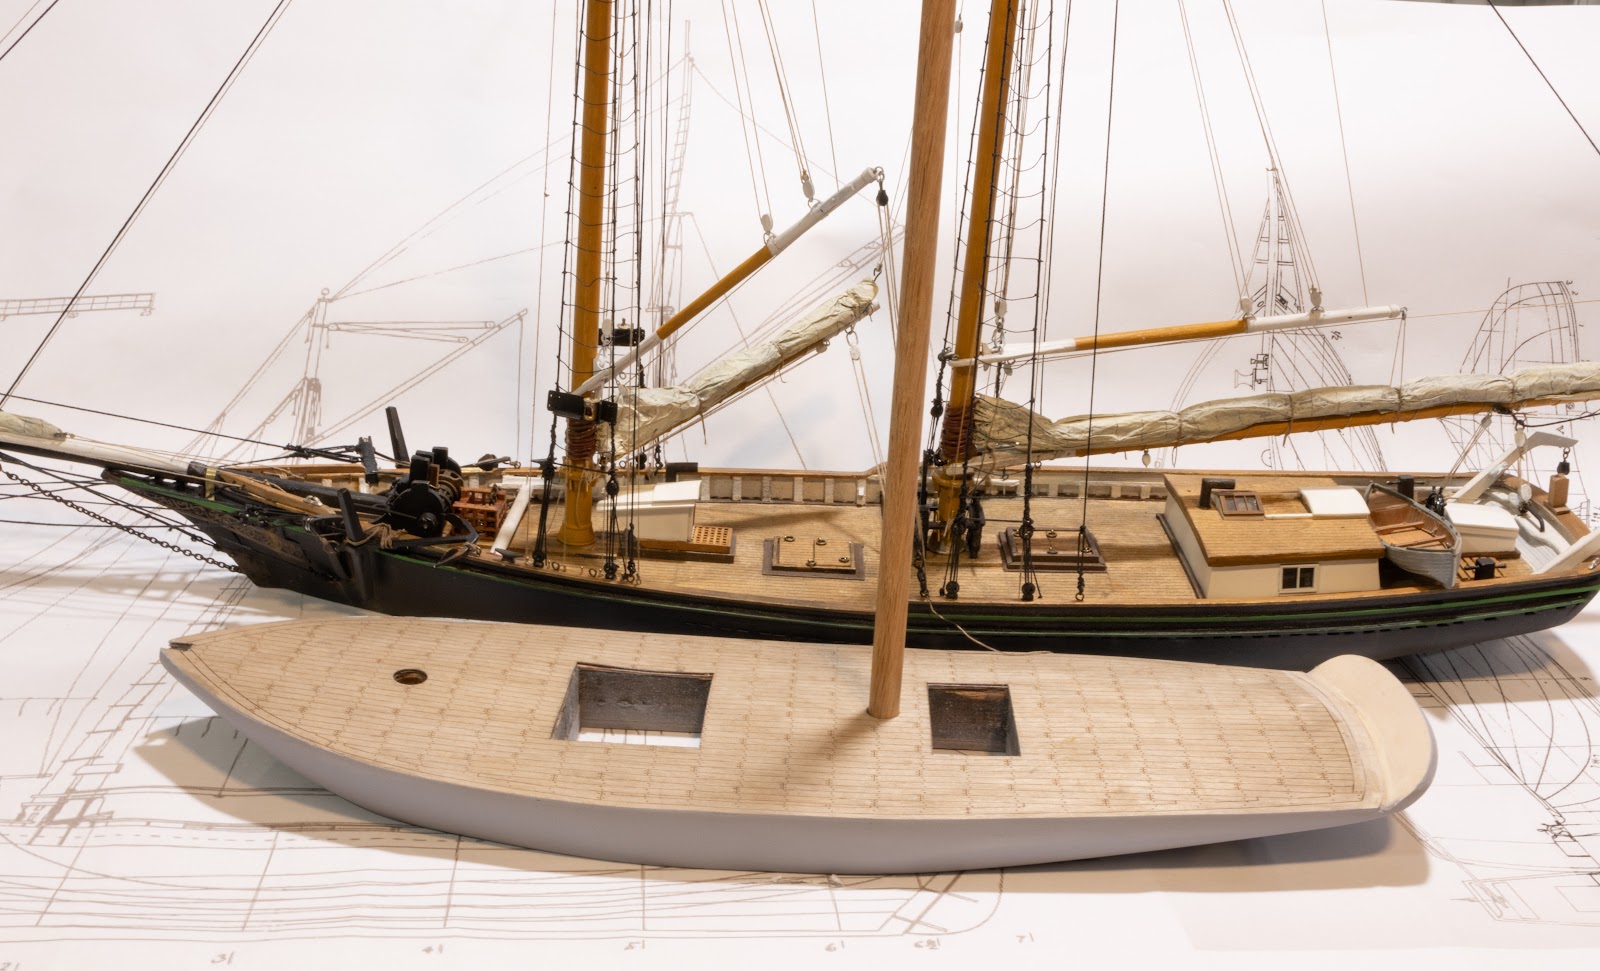
A pungy is a type of schooner that was common on the Chesapeake Bay in the mid 19th century. I built a model of one in N Scale for the Lyceum Museum in January 2016. At that time I thought it would be a good ship to model in O scale for my layout.

I based the model on a set of plans I scanned from a book on Chesapeake schooners. The one I selected was built in 1863. I enlarged  a copy of the plans and then had Staples print 3 sets of them. 


O scale hull layers
I have the drawings for laser cutting the hull from the N scale model. So I was able to scale them up and use the laser to cut parts for the basic hull using the bread and butter technique. I glued and clamped those to make the basic hull shape. Then I used my Rotex sander to get the basic shape. It took about 2 hours to cut and shape the hull.  Then it needed several coats of filler and primer. Sanding the camber on the hull top was tricky. In the future I will make laser cut parts for the camber like I used on Passaic.


Once I had the basic hull shape I laser cut the deck planking. I used the laser to engrave the planks, the joggled planks around the perimeter, and  the treenails/wooden nail plugs. By the time of the ACW, ship builders used nails and wood plugs instead of treenails. But in scale, the wood plugs almost look like treenails. They are only 0.015 inches in diameter. So the engraver could handle them and allowed me to avoid a tedious task. 

Here is a shot showing the pungy next to the Miss Merritt Marie. Although not as long, the pungy's masts are nearly as tall as the bigger schooner.  Pungies were known for fast sailing partly due to the huge sails. 

Next I need to add the low railing around the hull. Pungies did not have a large bulwark. There was also monkey rail around the cockpit area, but it was not very tall. They must have been wet sailers in a rough sea.. 


In other news, I replaced the trucks on box car 1344. It was intermittently derailing when running in a train. I suspected the cast metal trucks were the culprit. So I replaced them with the new 3D printed resin ones. We'll see if that fixed the issue. 


October 31, 2022

A Forest of Masts and Stacks


Brion Boyles delivered the completed model of the schooner today. This model started out as the Smuggler Kit by Bluejacket Ship Crafters in Maine. The kit comes with a carved solid hull. My brother Rob cut it on his bandsaw to convert it to a waterline model.

It sat for several years as I worked on other parts of the layout. About 18 months ago, I asked Brion Boyles if he was interested in building the kit as a commission. He said yes. He worked on the kit on and off for the next 18 months. He made some modifications to make it into a cargo vice fishing schooner. I really liked how he did the sails. They are much more accurate than the other schooner model I have.  He rigged one of the booms so that it can be used to unload cargo. I need to add that cargo detail. I also need to make a name plate. I plan to name it after my granddaughter, so it will be Miss Merritt or Lady Merritt.

I would like to populate the harbor with several ships to create the forest of masts and smoke stacks you see in the prototype photos. This will include more ship models and others painted on the backdrop.


October 16, 2022

MARPM 2022

Jessie Smith built this HO scale model of a C&O railroad car ferry


Whew! What a weekend! MARPM 2022 is over and it was great. We had more people and models than we expected.  We plan to do it again next year. Make plans to be there.

Dave Vaughn had this famous model on display

There were about 350 HO scale models on display including a 5 foot long HO Scale C&O railroad car ferry built by Jessie Smith. 

There were about 50 N scale models including an N Scale coke works by Scott Wahl and an urban yard module by John Steitz. Dave Vaughn and his crew set up a 36-ft long O Scale layout that was originally built by Tony Koester but modified and extended by them.

NYCRRHS recruiting members

There were 33 clinics on various subjects. We had about a dozen layouts open for inspection too. 

On Sunday I hosted an open house. I had about 25 people show up. 


Mike Hart's wonderful palm trees
Brion Boyles also stopped by the open house to show his work-in-progress on the schooner he is building for my layout. It looks really impressive. It should be done is a week or so.

Seeing the schooner that Brion is building is getting me psyched to finish the paddle wheel steamer and other ships too. Aquia Landing will be the highlight of the layout.


Brion showing Dwin the model


November 14, 2019

Not again!

Current state of our dining room


Last week we had an unfortunate plumbing incident that resulted in water damage to our master bathroom and dining room downstairs. A toilet leak developed while we were sleeping. Because the water was from a toilet, the flood repair folks treated it as biohazard, so all the wet stuff had to be removed.

The short version is that we have to get new floors in the master bath, and new sheet rock in the dining room. The demolition and repair work is underway. Since some of the upstairs carpet had to be removed, we took this opportunity to install hardwood floors on the whole upstairs level.

Events like this are very disruptive. We have spent a large portion of our time moving and covering furniture, organizing  clean up crews, finding contractors, selecting materials, purchasing supplies, waiting for insurance adjusters, etc. I had to cancel an op session last weekend because the house is in disarray as furniture is either moved or covered to prevent dust.

The basement has proven to be the one place where we can find relative peace and a sense of normalcy. A small amount of water reached the basement, but did not cause any damage as it went to the drain in the utility space without touching anything that could be damaged. The layout was not damaged at all.

I am using the "free time" I have in this period to work on the large side wheel steam ship kit. I have discussed this kit before. As I have stated before, the kit is spectacularly bad. It is so bad, that each time I start work on it, I get demotivated, and I look for something else to do.  The kit is oriented toward building a pond model so the level of detail and construction techniques tend more to robust toy versus fine scale model. The instructions in particular are very poor, despite being voluminous. So I am discarding most of the kit and making my own parts to better match photos of paddle wheelers that were at Aquia Landing or in use in the ACW.  It remains to be seen how it all comes out.

I also built some new paint racks for my model work bench to try to get a handle on the myriad bottles of paint, washes and weathering powders I have accumulated.


Hopefully by next week, the house will be put back in normal operation and I can prepare for visitors for North East Interchange.