A journal following the history, design, construction and operation of Bernard Kempinski's O Scale model railroad depicting the U. S. Military Railroad (USMRR) Aquia-Falmouth line in 1863, and other model railroad projects.
©Bernard Kempinski All text and images, except as noted, on this blog are copyrighted by the author and may not be used without permission.
-----------------------------------------------------------------------------------------------------------------------------------------------------------------
Showing posts with label Track. Show all posts

May 7, 2023

Pig Pen Palace

Eclipse stands ready while a gun boat comes to shore to get resupplies.

Improvements to the pig pen
The farms boys suggested that I make the dirt in the pig pen darker to reflect the typical mix of mud and manure found there. They also suggested some type of shelter for the pigs to get away from the weather.  

So I painted the soil with a dark umber color acrylic wash that I stippled on to the existing scenery. I made a small lean-to shed and placed it in the corner.  I put some straw on the ground so the pigs have a nice resting place. I also added boards to the lower edge of the pig pen to help keep the little porkies in the pen. 

Meanwhile, I noticed that the Eclipse headlight was not working. A brief investigation revealed that one of the CVs controlling the head light was somehow set to 63 vice 2 that it was. I don't know how it changed.

But the Eclipse was not done with me yet. As I was test running it, it started stuttering and growling. The source of the problem was the lead weights in the tender. The CAA joint where I glued them to the tender had failed. Some off the weights came loose and were interfering with the drive shaft to the rear truck. So I had to disassemble the tender once again. In the process, the red and black power wires broke off at the plug connection to the engine. So I had to resolder those. Good news,  all is back together and seems to be running well.  

Finally, I did some tuning of the double slip stub turnout in Falmouth. I noticed that the switch stand was not tightly mounted to the extended tie. So I used some 5-minute epoxy (which is really 30 minute epoxy) to reinforce the base. Once that was cured, the switch stand was solidly mounted, 

March 12, 2023

Switch Stand Repairs and New Photos

Troops envy the conductor as he rides past.


Replacement switch stand at Falmouth
I replaced the three-way switch stand at Falmouth. During yesterday's  op session I observed that the throw was not symmetrical. The stands are supposed to have symmetrical rotation in each direction. As I inspected it and operated it I realized that the axle, which acts as the pivot point for the throw rod had popped loose on one side of the stand. Thus the pivot axle was only supported on one side. So it was basically wiggling inside the switch stand. This created uneven rotation and a lot of slop.  The easiest way to fix it was to replace it. 


So I built a new switch stand with a much beefier pivot axle. I originally designed the switch stand throw rod  to use a 0.010 pivot axle and a 0.032 in connection to the rails. But for this one, I drilled out the pivot holes to 0.025 inches to accept a beefier pivot rod.  I also left a bit more of the pivots rods stand proud of the stand surface. That way if there is any deflection in the stand as the operators work it, it will be less likely to pop out.  

I installed the new switch stand and it works like it is supposed to. So all is good. The old switch stand went in the junk pile by the engine terminal.

The new guard rail

I also noticed that the switch leading to the engine service and turntable was missing one of its guard rails. I suppose that is a good sign that the switch operated well without the guard rail. But, I added it tonight so it should run more reliably  in the future. 

I have been working on my presentation for the RPM East 2023 in a few weeks. I took some new photos to freshen up my presentation. One is shown above. 


September 21, 2022

The Golden Spike

Haupt and a few USMRR officials watch the crews drive the last spike on the Aquia Line extension

What it really looked like

I drove the last spike on the Aquia Line extension today. I got into a rhythm and the last  18 feet went fairly quickly. 

There was considerably less fanfare when the last spike went in  than would happen at Promontory a few years later. Nonetheless, it is a nice milestone. 

I am sure my helpers are glad that the tedious task is done. I did notice a distinct lack of enthusiasm among them when I asked for help with driving the spikes. Thanks for Jack Thompson for his help in driving in some of the last batch of spikes. 

I did a rough estimate. The total distance of mainline on the layout is about 165 feet, which is about 1.5 scale miles.  Counting sidings and mainline there are 225 feet of track, or just over 2 scale miles. There are on average about 25 ties and 100 spikes per foot of track on my layout. That works out to  5,625 ties and 22,500 spikes.  Whew! That's a lot of spikes.

I am happy to also report that Paul Dolkos visited today and had a chance to run an engine and switch Falmouth. Every thing worked well. 


September 20, 2022

The Joys of Wiring

Haupt negotiating  the dip

 We finished wiring the layout today with frog juicers, feeders and the auto-reverse on the turntable. 

Amby spent the afternoon installing 4 frog juicers. The task was a little more complicated than usual since the rails on the frogs on my hand-laid turnouts are not all electrically connected. The easiest way to connect them is to solder a jumper across all the rails and then use the extension of that wire as the feeder wire  to the frog.  See the yellow circle the photo to see the jumper under the frog rails.  That jumper is part of the wire to the frog juicer. 


The red circle show how I use pieces of dark gray styrene to seal the gaps in the rails so that the will not close and cause shorts or other electrical problems.

While Amby was working on the frogs, I put a base layer of scenery on the Stares Tunnel section.

After dinner, I finished wiring the last frog juicer. Then I filled all the gaps with styrene and filed them smooth to the rail.  I also added jumpers from the all the stock rails to the closure rails.

The last under table wiring task was to connect the auto reverse circuit on the turntable. That worked as soon as I hooked it up. That was a pleasant surprise.

Amby and I did some test running. If you want to find track problems, run one of the Masons. Sure enough Haupt was derailing when backing over the south abutment. After a lot of gauge checking and test running I determined that rear rail by the abutment had a dip. I was able to fix it by levering the rail up a few thousands with a  small screwdriver. It now works without problems. 

I ran Haupt and Osceola up and down the tracks to test  the track, gaps and feeders. and all seemed to be working pretty well.  The wiring is done, but I still need to paint and ballast the track. I also need to do some tidying up of the wires under the layout so that they do not interfere with removing the books.


Base coat of scenery on Stares Tunnel


Doing scenery and backdrops and all the other work is fun, but when the trains move across the layout it really comes to life.


September 8, 2022

Back to Spiking Time


Forty two and a half pounds of weight to hold the trestle while the glue dries


I finished installing and carving rock faces by the bridge site and balloon camp. 

Black base coat on rocks

Next I painted the rocks. I use Durham's Water Putty for my rock carving material. It has a yellow color. So I add brown acrylic paint to the putty mix. But once the putty is dry I paint the whole rock face black. Then I dry brush white from above to create the zenith highlights. At this point the rocks look like a black and white image.


Color Palette

Next, I take dark brown, burnt sienna, medium gray, white, and tan acrylic paint. I brush the rocks lightly with these colors on a wet brush to catch the high points. The brush is not so wet as to run and puddle paint in the crevices. It's a like a dry brush technique but with a loaded wet brush. 

I did a quick job of painting the creek bed. This will be covered with layers of other scenic material so the paint wasn't critical, but it will look like a acceptable before I get to that.

Once the rocks and creek were painted, I inserted the bridge into position. I adjusted the fit slightly by cleaning away any stray bits of putty. Then I glued it with carpenter's yellow glue. I put 42.5 pounds of weight to hold it it position.

Zenithal highlights with white paint


I didn't finish the terrain over the tunnel. That will have to wait until the rails are spike down. 


September 2, 2022

Decisions, Decisions?

I installed the ties leading from the tunnel to the bridge and on the far side of the bridge. The overhead view shows how the track pops out of the tunnel, crosses the trestle and then begins the curve by the balloon camp to Falmouth.

I had to remove a section of O scale flex track. The nail nippers were incapable of making the cut and I accidentally pulled some to the rail out of the cast in spikes. Arrg. I was able to fix the damaged track with CAA. 

Next I started extending the terrain formers from the bridge site toward the tunnel. As I laid it out, I began to think that I have the tunnel recessed too far into the hill. The two pictures below show the original design with the deep cut, and a revised design where the tunnel portal is moved forward creating a more shallow cut. The more I think about it the shallow cut looks better.  Instead of moving the tunnel forward, I could cut the slope of the hill and stick with the original portal location with a shallow cut but further back. But the idea is this is a steep ridge that caused the creek to make a sharp turn, so the steep hill works better for that.  I have a few days to decide as I have to spike the rail before I finish the formers.

I used my Festool Rotex 90 with 60 grit coarse paper to reshape the hill under the trestle to remove the deep holes for some of the sills. The dust extractor really cuts down on the mess. It is a great way to shape foam terrain. 


ANOTHER EXPANSION?

As I was gluing down the ties I had mixed feelings. Is this truly the last ties I will be gluing on the Aquia Line? Probably, but there is a slim chance I might do another expansion. What that would look like is show in the track plan below, which I labeled version 40 thought it's probably more like version 200. 

The big draw back is the very reduced crew lounge. The location of Burnside's Wharf is also an issue. Option A has it in the office space accessed by a section of hidden track, which can be access from below if necessary.  Option B has it on the wall above my work bench and accessed by a removable section. That is an interesting use of that space, but I would lose the overhead clearance I need for my 3D printer.  So I would probably move the 3D printer work station under the peninsula and place it on castors so I can roll it out when I need it. 

What does the decision matrix say? Burnside Plan A is tied with the current Plan in  sum of ratings. Burnside Plan B is a close second but loses points for the removable section that can result in a duck under during operations, while Burnside Plan A has a bit more hidden track. The current plan wins on Sum of Ratings weighted by Priority due to the crew lounge priority but only by on point.

Locating Burnside Wharf in the office is both good and bad. Crews switching Burnside wharf will interfere with the dispatcher. But the longer run to Burnside Wharf captures the prototype better.

Aquia Yard limits would extend all the way around the new peninsula to the switch to Burnside Wharf. That is where the telegraph station is now, so that works.


Decision Matrix for the expanded plan versus current plan

The numbers show what I expected, the expansion trades the crew lounge space for more main line running but it is very close.

 Now to convince Alicia (and myself) that this is good idea.


August 10, 2022

Time for a big push

Figures painted by Jack Thompson

I restarted work on the Aquia Line after a long break. I am scheduled to host op sessions for the ACWRRHS and an open house in October for MARPM. So I need to get the track finished and operational before then.  Hopefully I can get some scenery and the bridge built by then too.

The long sidings at Falmouth take a lot of spikes!

I have been spiking track over the past 4 days. I have just one turnout and the turntable to go before all the track is laid. I don't spike every tie as I am initially laying the track in case I need to adjust things. Once the track is operating satisfactorily, then I go back and drive 4 spikes in every tie. 

On Saturday Jack Thompson stopped by to do exactly that. He spiked about 3 feet of track by the balloon camp. He also dropped off some figures he painted for me.  Jack is an excellent figure painter. He is also a model railroader and a dedicated re-enactor. I met him through my association with the National Capitol Model Soldier Society. I was a member many years ago and recently restarted attending the meetings.

He was the one that suggested another file of men in the squad by Brooke. ACW units usually marched in files of 4. I have my other units on the layout in 4 files, but I didn't have enough figures painted to do that here.  Thanks to Jack for volunteering to paint the figures to bring them back into regulation. Plus he did a great job.

I was a little rusty in installing the turnouts. Plus I restarted with a double slip. But I got it working OK with just a few foul words. Hopefully the last turnout will go smoothly.

I plan to reuse the turntable from the previous Falmouth, so hopefully that will also go smoothly.  Fingers crossed.

This is the squad Jack's figures will join.


The vultures are waiting.....


December 9, 2021

I'm ready for second breakfast

Mock up of the new engine terminal - very similar to the old version
Track laying continues on Falmouth. I decided to install the tracks from the rear to the front. So the stub siding to the freight house and most of the passing siding are now installed.  Two mroe turnouts to go.

I have also been rethinking the engine terminal. After several changes of mind, I am going back to what I originally planned, which is very similar to how I had it in the other room.

Meanwhile, I have been getting ready for the holidays. My niece is a Lord of the Rings fanatic, so may wife suggested a present that includes the hobbit meal times. The idea morphed into a clock that displays the meal times instead of the hours. I made it in my shop using the laser to cut some of the pieces. It was fun to make the hobbit home on top. 


November 27, 2021

First Frogs at Falmouth

Some of Scott's gear for the video shoot


Hope everybody had a happy Thanksgiving. On the day before the holiday, Scott Wahl visited the Aquia Line to shoot video. He is taking a class in film production. He needs to make a 5-10 minute film as the final project for the class. He asked if he could shoot a feature on my layout and I agreed.

The video and audio set up was quite impressive
Scott had done video production for a true crime podcast in the past, so he had a complete array of professional level video equipment. The video format was an interview with me that will be intercut with scenes from the model railroad.  It will be interesting to see how it turns out. 


Scott has a very professional tavel rig

On Thanksgiving morning before helping cook the meal, I started working on laying the rest of the track at Falmouth. The first step was to make the switch stands and bridles for the stub turnouts.  I needed three 2-way and one 3-way switch stands. These are photo etched kits made with stainless steel. They are a bit tricky to assemble. You must use silver solder and flux for stainless steel. Regular rosin core solder will not work. I set my soldier station to 400 degrees as that helps melt the silver solder. Once the kits were assembled, I scrubbed them with soap and scouring powder. Then waited overnight to let them dry. 

I primed them with self etching metal primer. After a few hours, they got the final coat of black paint. The targets will get red once they are installed. 

I have some of the main track in Falmouth and one and half turnouts done so far. I do like the Ess-curve that the track makes as it flows through Falmouth. I think it will look nice when it is finished.

Switch stands and bridles before priming and painting


March 19, 2021

It's back!

I am continue to lay the track at Falmouth. Tonight I installed most of the ties. 
I made a few adjustments to the track plan, including bringing back the infamous double slip stub switch.  Why? My operators just love it!  Plus, it actually will save some work as one switch stand can serve two turnouts.  It's odd to realize that there will only be 5 turnouts at Falmouth plus the turntable. 


The arrival track is long enough to comfortably hold a 10-car train and a engine. Now, to lay the rail and install the spikes. I hope I have enough.


March 18, 2021

Track laying started


 I did a short video update on the start of laying track on Phase II of the layout expansion. I posted it below. 

March 13, 2021

Time to cut ties


No, I am not leaving, quitting my blog, or getting divorced. I mean this literally, it is time to cut the ties I will need for the new track.

It took about 2 hours of laser time and 7 sheets of 4 inches by 24 inches by 1/8th inch basswood to make a decent pile of ties. I like to use the laser to cut the ties with slight wobbly edges so they look like they were hand hewn. But I do not make the tops and bottoms rough in the interest of smooth and reliable running.

I stained the ties in batches with each batch using a slightly different color stain. I use alcohol and acrylic stain by Liquitex or artists inks.

Next is to start laying track. I think I  will start at the south end of the bridge so I can utilize the flex track I have already installed. I will remove the flex track when I build the bridge.


"If I had a dollar bill for every tie I cut, 

there'd be  a mountain of money piled up to my gut," with apologies to Annie 


April 18, 2020

The Gandy Dancers Have Been Busy

The rail and track arrived today, a few days later than normal. I think the USPS is getting slammed these days, so that might account for the delay. At least it made it through.

So after we had a on-line yoga lesson this morning that my daughter taught from her home in Alabama, I got to work on the track. I paid particular attention to the easements for the straight track that connects the two big curves. They came out nice and the trains roll smoothly thorough those curves.  Here is a short clip showing a train heading into the tunnel.


I think the rebuild is going to prove  worthwhile. The smoother operation,  longer run with longer trains is going to improve the operations experience on the layout.

I've been thinking about the plan for the next room. I like the idea of a trestle, but I don't want the benchwork to be too deep. So, I think a possible solution is a low trestle across a swampy area. The trestle I am thinking about would be something like this one on the City Point Line. We know there was a long, low trestle at Accokeek Creek, so this is not too far from the realm of possibility.


I had some folks ask about the access in the closet. As these photos show, the access is not bad. I can get past the wide point of the curve easily. The hardboard channels also  provide a nice smooth, protective surface if I rub it as I walk in and out.

April 16, 2020

The curve is dead, long live the curve.

I began spiking the new track. I started at Clairborne Creek and proceeded as far as the rail I had  on hand would allow. I installed about 8 feet of track around the new turn back curve. This location used to host the tightest curve on the railroad. With unbridled and ill-advised enthusiasm, I had built a curved turnout in that curve, which never functioned reliably. The new track has a wider radius by 2 or so inches, has better easements, no curved turnout, and fewer kinks. I hope it provides reliable operation.   This video shows a short train testing out the new curve.  So far so good.


I am looking forward to getting a delivery of rail and spikes soon to allow me to continue with track laying. In the meantime, I am preparing the materials for the new benchwork in the crew lounge. 


April 15, 2020

Another 10,000 spikes!


I started installing the road bed, ties and rail in the past two days. I used a layer of 1/8th inch basswood for the road bed. To that I glued the ties. That makes about ¼ thick layer of basswood that easily accepts the spikes.

It turns out my supply of code 100 rail and spikes was very low. Luckily Mainline Hobbies had some to ship to me today.  I frequently get stuff I ordered from them the next day. Can't beat that with a stick. 

I glued a layer of basswood to the road bed. The basswood
accepts spikes easily. I had to staple the basswood along the edges
to prevent warping as the glued dried. 


Painting the basswood roadbed before adding the ties.


I pre-stained the ties, but once the glue dried,  I sanded them too level their tops,
so I will have to re-stain them.  I used a turnout  template to space the ties
Ties are installed and waiting for rail.

First section of code 100 rail installed and being tested.

March 22, 2018

March Madness - a Snow Storm on the First Day of Spring

They say March comes in like a lion and goes out like a lamb. Well the lion got in a late roar and dumped abut 6 inches of heavy wet snow on our area. Late snow is unusual for Northern Virginia, but recall that there was a heavy snow storm storm when President Abraham Lincoln made his Easter visit to the Aquia Line in 1863, as well as several other storms that winter.

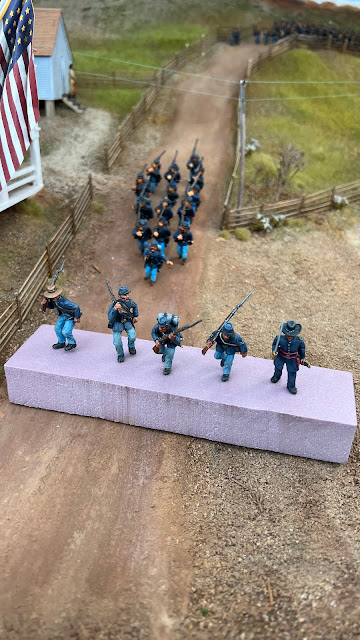
Of course the snow caused the local schools, many businesses, and the Federal Government offices to close down. With an unexpected day off, I tackled several miscellaneous tasks on the Aquia Line. Most of the tasks were in the maintenance and rebuilding category.

First, I tuned up several freight cars. Through test operation I found several cars that were derailing in various places. I discovered that some of my cast metal trucks did not have the king pin hole exactly on the center line. This caused the couplers to be offset too much on certain curves. The offset couplers then jam the links and caused derailments by lifting the car and wheels off the rails.

The off center problem  was due to the rubber mold wearing as I cast the metal parts for the trucks. To fix that problem, I cracked open  the offending trucks and replaced the bolster beam with new laser cut parts that had the king pin hole precisely centered. They also had consistent tabs to fit in the slots of the cast metal truck side frames. With these changes, those cars performed much better.

While I was doing freight cars, I also finished up the decals for a new box car. This is now the 28th car on the RR. I also built two more sets of trucks for cars 29 and 30.

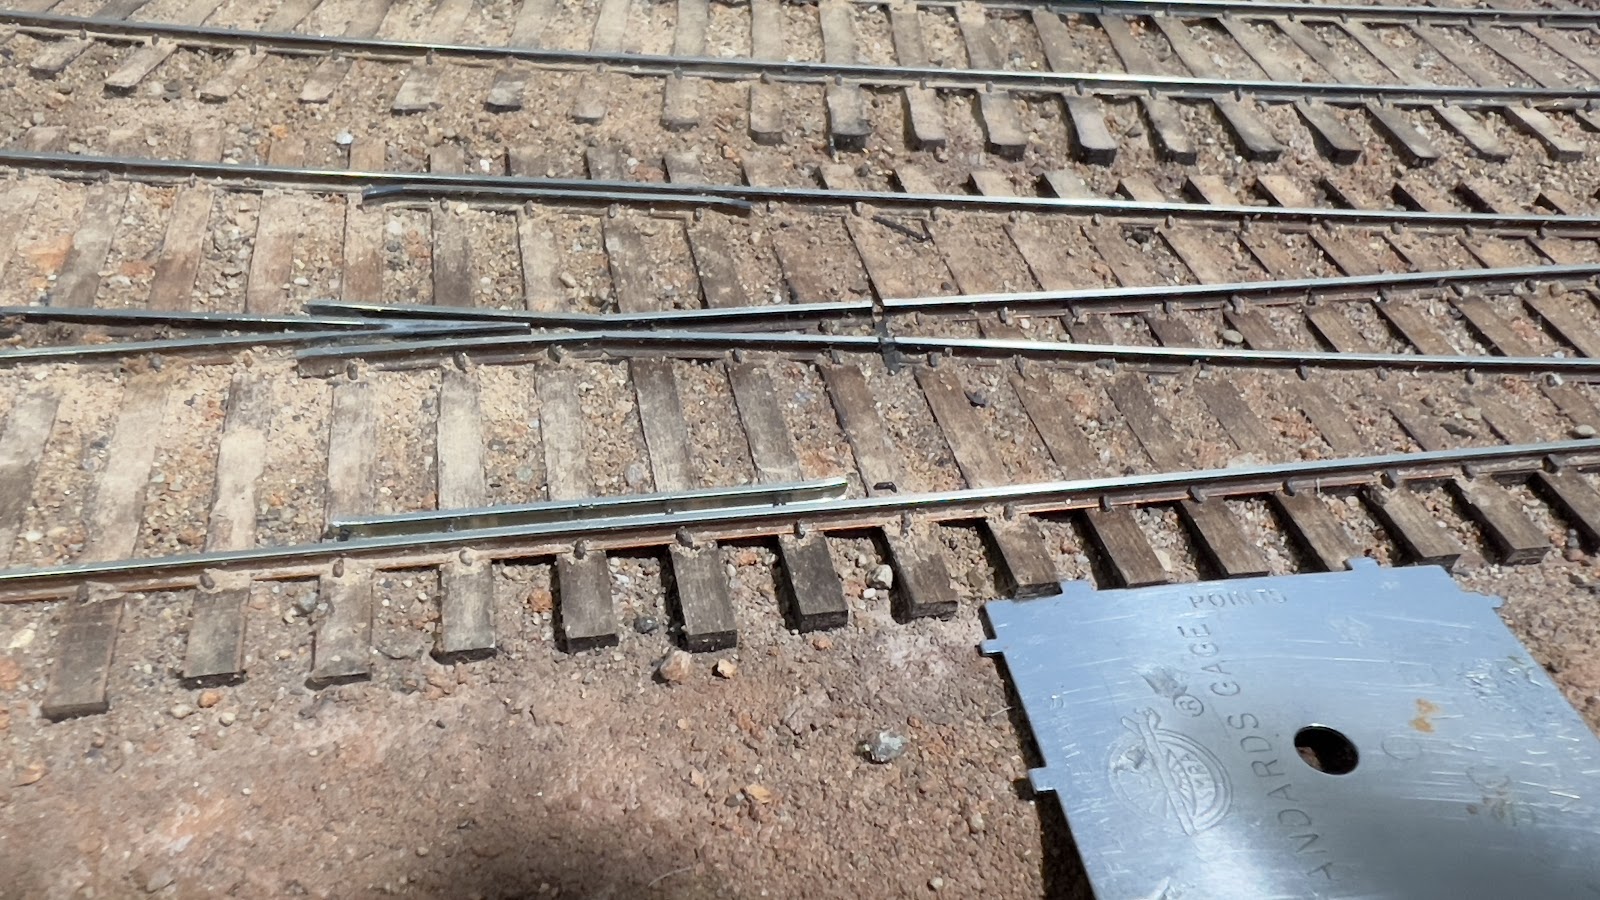
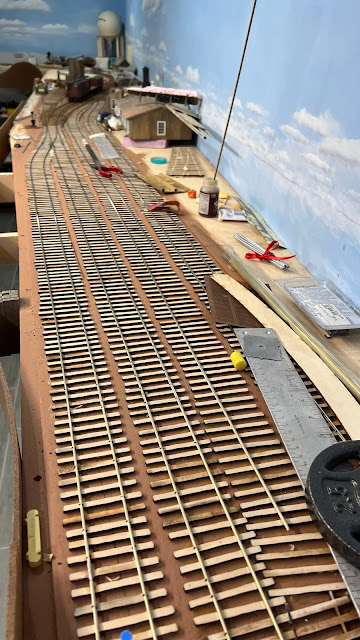
But I still had some derailment trouble. All three turnouts to the wye at Aquia had problems. These are key turnouts and must work reliably. The easiest to fix was the switch on the Burnside Wharf side of the wye. My operators from last week reported that the stubs were not clearing the stock rails. Sure enough, one stock rail was too long. That was easy to trim.

The center wye switch had become tight in gauge after I ballasted the track, probably because I was too enthusiastic with dilute glue and wet-water  when I applied the ballast. The excess water caused some of the ties to wrap a little bit. However, I was able to salvage the turnout by slightly re-gauging the track without having to pull the ties and totally re-lay it.

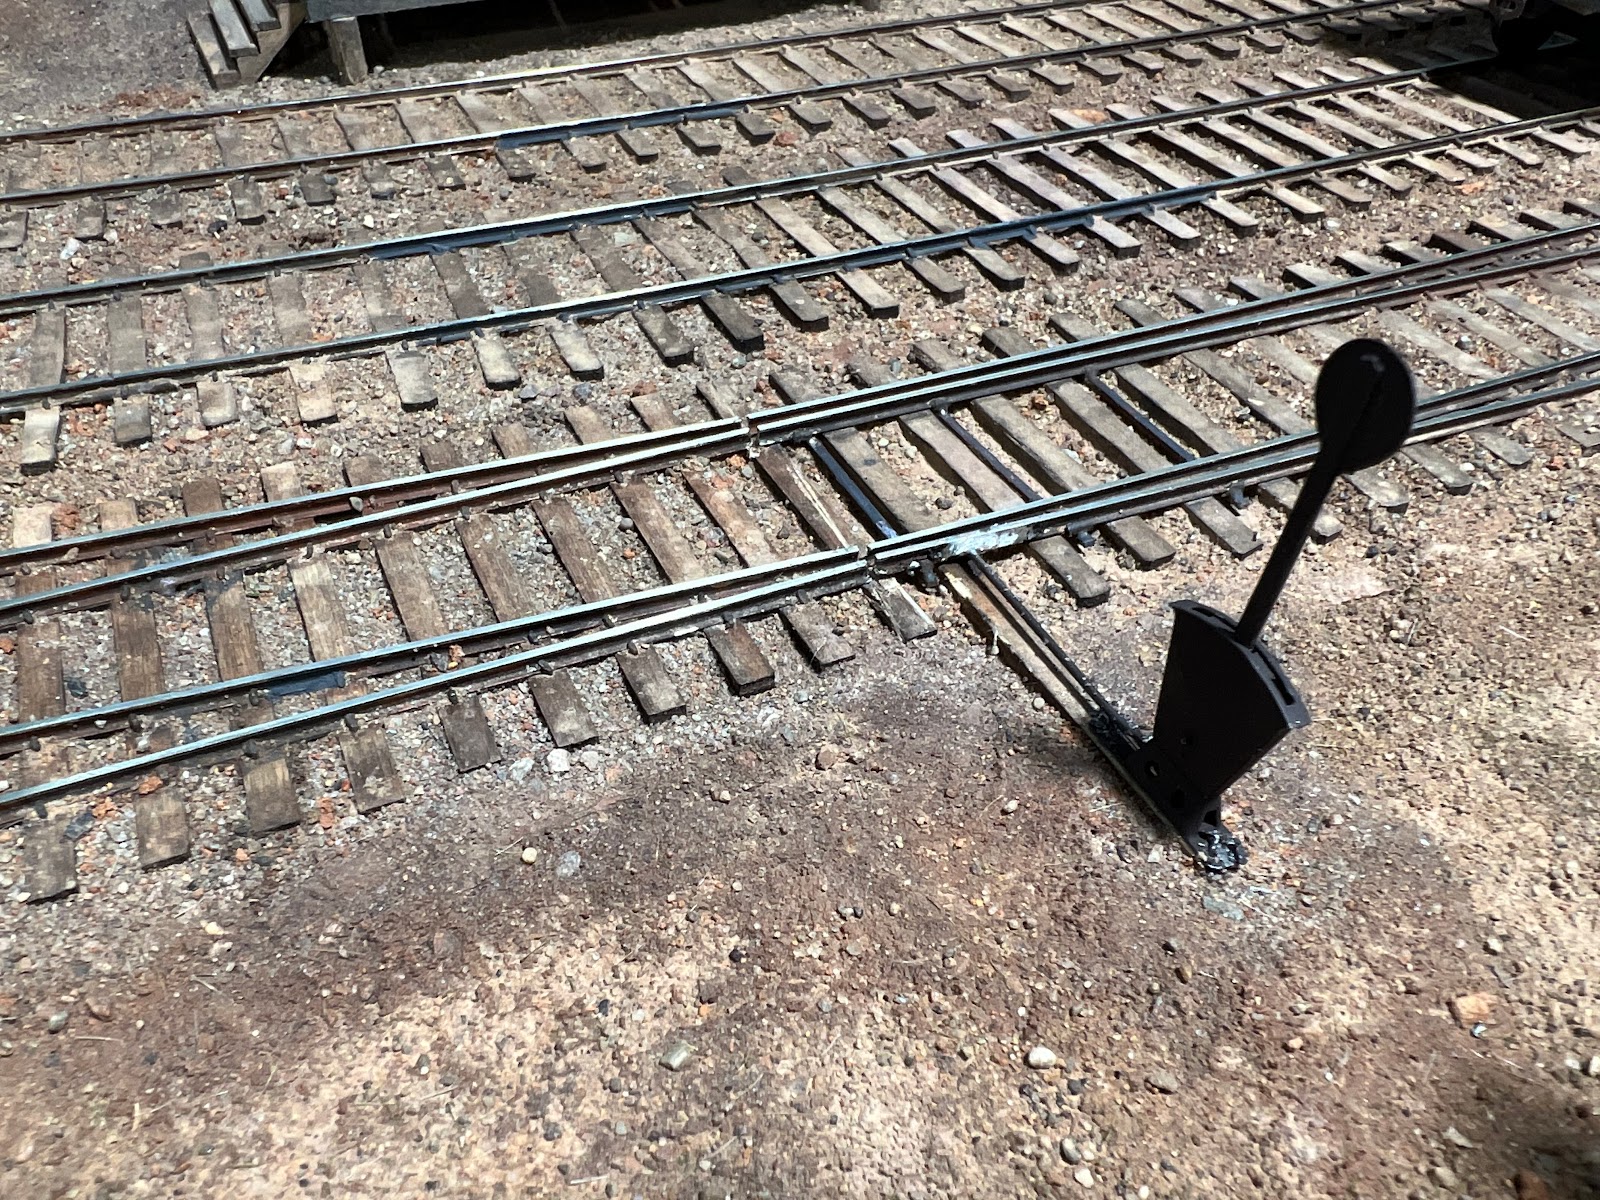
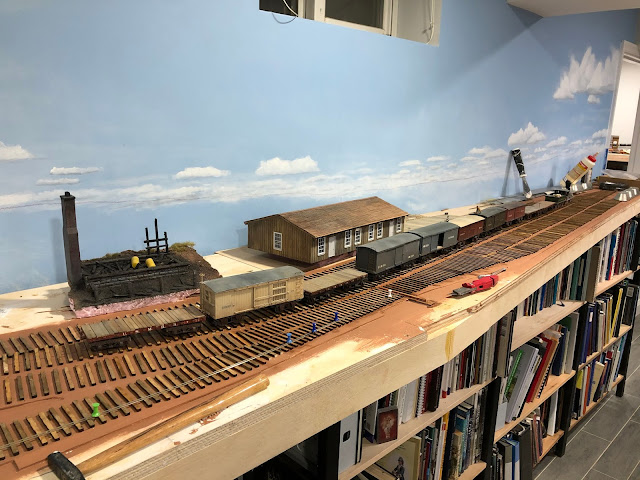
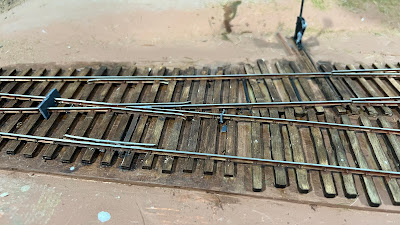
New extended lead and switch stand WIP
The biggest problem was in the south end of the wye. The lead to the turnout was too sharp. While it worked most of the time, certain car-coupler combos still had trouble. The frog was ok, but the lead in the stock rails was the problem.

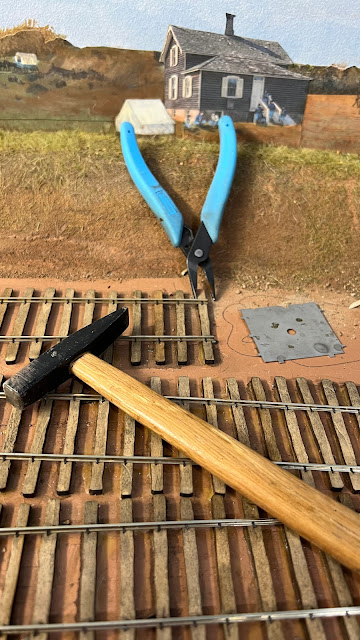
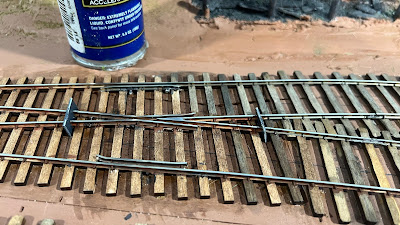
To fix it, I pulled up  the stock rails, added three inches  to the lead and and re-spiked the track. In the process, I was able to move the switch stand to the foreground, where is it much easier to access. It all works much better now.

One other niggling problem we had was that certain freight cars interfered with the transfer bridge on the car float. I was able to sand the transfer bridge post in the center that was causing the problem. Most cars now fit, except two flat cars with home made stake pockets. I was able to use my new Proxxon disk sander to take off about .040 inches off each side of the cars. They now fit and the cars still look fine.

I recently purchased the Proxxon sander. It has proven itself to be one of the most useful tools in my shop.  How I got along without it for so long is a mystery.  It's for sale direct from their website with feee shipping. And their price is lower than most discounters, like Amazon.

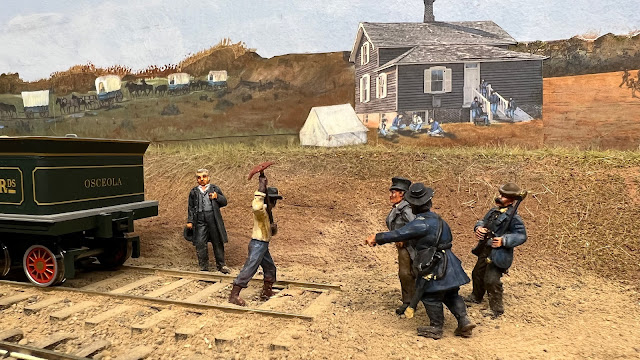
Finally, the USPS brought a package. I guess the, "Neither snow nor rain nor heat nor gloom of night stays these couriers from the swift completion of their appointed rounds" is true. Anyway, the package contained an O scale 2-8-0 2-rail locomotive that Jeremy Drummler purchased for me at the 2018 National O scale Show in Chicago last weekend. Thanks Jeremy!

It is shocking to feel how heavy this loco is and how much bigger it is compared to a ACW 4-4-0. The engine weighs 4.1 pounds and the tender is another.  Wow.  The loco is for a new layout project for my next book. More on that later.