A journal following the history, design, construction and operation of Bernard Kempinski's O Scale model railroad depicting the U. S. Military Railroad (USMRR) Aquia-Falmouth line in 1863, and other model railroad projects.
©Bernard Kempinski All text and images, except as noted, on this blog are copyrighted by the author and may not be used without permission.
-----------------------------------------------------------------------------------------------------------------------------------------------------------------

April 30, 2018

ProRail 2018 Finale

Bob and Kai on the morning train out of Aquia Landing
The last sessions for ProRail concluded today. Bob Willer, Kai Slovei, Don Ball and Don Wetmore arrived to operate. Thomas Pierpoint also stopped by to help out.  The sessions went extremely well. After a brief introduction to the layout, they went to work. They hardly had any questions and did extremely well. In fact, I was able to take a nap and prepare lunch since they were working so well.

The Dons, Ball and Wetmore, pull into Aquia Landing
Bob and Thomas were still running trains about 1610, making them the last operators on duty for ProRail 2018.

Thomas and Bob were the last crew members on duty for ProRail 2018. 


Overall, ProRail 2018 was a great event. It really was fun to host everyone.

However there is hardly time to reflect on it, as Alicia and I are heading to Vancouver to attend the Railway Modelers Meet of British Columbia where I will be the Special Guest Speaker.  Vancouver is one of the most beautiful cities in North America and we are excited to be going. Yes, we will sneak in some rounds of golf and garden tours in addition to an op session on Mark Dance's railroad (yes, the inventor of the "Pole Dance") and the rest of the meet. If you are in the area, please come to the meet to say, "hello."


April 29, 2018

ProRail 2018 Update

The first visitors 
ProRail 2018 is almost over. Most layout hosts are done, but a few of us are hosting one last session on Monday morning. Over the last three days the USMRR and PoLA each hosted 4 operating sessions and one open house where we had 50 visitors.

Operators having fun
While it is not yet over,  I can say that this has been the highlight of my model railroading hobby experience. Over the past 3 days some of the most experienced model railroaders from the United States, Canada and Norway visited and or operated my layouts. Just about everything went well. Two crews reported zero derailments throughout the whole session.

Watching the operating sessions come to life with such experienced crews was a joy to behold. They even discovered new techniques, such as poling cars to extricate from a tough spot. We will now call this technique "Pole Dancing" in honor of Mark Dance, the first person to try it on the railroad.

Photo Line
Nearly everyone had positive things to say about the railroads and encouraged to me keep at it. Overall, I'd say that the Aquia Line was the railroad that really captured everyone's imagination. One said, "PoLA is nice, but the Aquia Line is art." Another said, "The Aquia Line is a unique railroad." "Beyond expectations," said one operator.  It is truly satisfying to hear your peers say such nice things about your work.

Special thanks to Michael Spoor, Joel Salmons, John Drye, Marty McGuirk, Doug Gurin and Tom Pierpoint for helping me out.


Pole Dance
I put together a video summary of some of the action for the first 3 days.

April 25, 2018

GICOD


I have reached GICOD*. Prorail 2018 officially starts Friday, but I will be having some visitors tomorrow. So it's time to stop working on the layout and prepare for 4 days of back-to-back op sessions

I installed the small shack next to the Provost Marshal building. The actual PM building is not permanently glued down yet, as I plan to add interior detail to the top floor.

I also added a couple building flats to the rear wall including two warehouses and sutler's row.

 The large brick warehouse was actually pretty simple. The small shack took almost as long to make as it did.


Brick Warehouse building flat


The passenger track next to the Provost Marshal has some scenery now
Madame Violets Fruit and Oyster House
I  added a sutler's row to the back wall.  Two of these buildings are recycled from the McCook's Landing layout, but they work well as flats on the layout here.  The Post Office is based on a prototype in Cairo, IL, while the Graham building was in Chattanooga.

I know there was a restaurant at Aquia Landing, but I don't know what  the name of it was, or what it looked like. So I borrowed ideas from several sources. The building is similar to one in Chattanooga, the "Fruit and Oyster House" name came from an actual sutler restaurant near Petersburg, VA. The "Madame Violet" borrows from a 19th century restaurant in New York, but I used my mom's name instead, since she loves to cook for  my crew.

Another milestone achieved was that I finished all the ballasting of track. That was a big job.

Check back in 5 days to see if I am still sane, which assumes I was sane at the start.


* " GICOD"  = Good Idea Cut Off Date.

April 22, 2018

The USMRR Flag at Aquia Landing

 Several years ago I found a letter at the National Archives from W.W. Wright to Ada Anderson describing a flag and pole the USMRR wanted to erect at Aquia Landing. I blogged about it here.

Today, I decided to build it. I started with the flag. Due to a math error, I made the flag about half as big as the letter specified. But I got the math right and made the pole the full 100 feet tall and configured as a ship's mast.

It took a surprising long time to get all the parts made, the lines run and the flag installed. In looking at it, the flag seemed out of proportion. Then I realized that I had made an error with the flag. It was too small by 50 percent!

 A 30 foot flag is larger than a box car. I had to print it as separate sheets and glue them together. I used a 30 percent  cotton rag paper as it holds up better in handling and folding. I used spray adhesive to glue the two halves. Then I spayed the ink with Matte Clear acrylic to seal the colors, in case I needed to wet the paper to better shape it, which I didn't need to do in this case.

The trick to making a paper flag hang more realistically is to make it a parallelogram and not a rectangle. Paper flags are too thick and stiff to hang like a real cloth flag. By making it a parallelogram you can better simulate the way an actual flag hangs. In a real flag the fabric distorts on the bias.

For woven textiles,  the bias is at 45 degrees to its warp and weft threads. Every piece of woven fabric has two biases, perpendicular to each other. Woven fabric is more elastic as well as more fluid in the bias direction, compared to the straight and cross threads. This property facilitates garments and garment details that require extra elasticity, drapability or flexibility, such as bias-cut skirts and dresses, neckties, piping trims and decorations, bound seams, etc. It also helps determine how a flag drapes from a pole when there is little breeze.

I decided to embellish the flag with the text "United States Military Railroad" since many flags in that era were customized in some way or another.


The flag dominates the wye at Aquia Landing. 

As printed and before shaping. Note, it is not a rectangle. 

April 21, 2018

Provost Marshal Building


I am almost finished with the Provost Marshal building. This was a fun structure to build. I need to add the smoke stacks for the stoves.  I used the actual signs from the prototype image to make the signs for the model. I also built the model so that the roof can be removed to allow a look at the upper floor. I think this will be the Provost Marshall's office and perhaps living quarters.

However, it is possible that the small shack next door is the PM's actual living quarters.

April 20, 2018

The Florida Connection

Dead Bonsai Society
Sam Ogranaja, from Ft Meyers, Florida, visited the Aquia Line today. Sam (aka Saimir - his Albanian and much cooler name) is a professional photographer who specializes in architectural and interior photography. He was in Virginia to shoot photos for a hotel. Sam is also a bonsai artist and friends with my brother, Rob. When coordinating the visit beforehand, Sam asked if there was any thing he could bring. I asked for dead bonsai trees. He scoured his local network and brought a nice assortment of dead trees with him that can be used as armatures for trees on my  layout.

Sam was also very interested in learning about how I shoot videos and photos of miniature scenes. Most professional photographers that don't shoot model railroad shots are surprised to learn of the myriad tricks and tips we employ to get realistic images. He also wanted to test out my Rhino slider. So we ran trains, shot video,  and generally had a great time.


  The mail also brought my new Civil War era flag. This is a replica of  the Ft Sumpter flag with 34 stars. West Virginia entered the Union in June of 1863 and became the 35th state, so this is the correct flag for my time period.

War on several fronts

New ship visits Burnside's Wharf
 Work progresses on parallel fronts.

The scenery at Burnside Wharf is almost done. This includes a new ship that I painted on the backdrop.  This took about 3 hours to paint, proving the adage that the easiest way to have a ship on your layout  is on the backdrop. I plan to add a few more ships to the scene on the backdrop.

I also started building the Provost Marshall's Office. This small building acts as the station for Aquia Landing. Any person that wants to ride the train needs a pass from the Provost Marshall.

I decided to place this building next to the wye turnout at the base of the Aquia  Landing wharf. This will allow me to replicate the scene in the prototype image fairly closely, even though I don't copy the track and building arrangement at Aquia Landing exactly.

I had to remove a few inches from the siding behind the PM building to make room, but that track is still long enough for several cars. This will be the track where the passenger cars are spotted.


April 18, 2018

New Tunnel Scenery

Here is a shot showing the static grass scenery around the new tunnel portal. I plan to add trees to the hill in the rear later.

A shot like this shows off the crisp detail available in O scale.

Now here is the same shot with a photo backdrop for the tree line. I also did a little color tweaking to make the grass a bit less green and less saturated.


And here is the night version - converted using Photoshop

April 17, 2018

Burnside's Wharf Completed

Switching cars on Burnside's Wharf


Some of Brian's figures
The people have spoken! The warehouse was voted off the wharf. Tonight I finished the planking and added a few details, including some figures from  Brian Kammerer's artwork.

For now, I can declare victory on this part of the project and move on to the next job. I can come back later and add more details, such as more figures, lines, additional ships in the background, chocks etc.


April 16, 2018

Decisions, decisions!


I was adding the decking to Burnside Wharf when Alicia took a look at the work in progress.  She said she thought the scene looked better without the warehouse on the wharf.   The actual Burnside Wharf did not have any warehouses on the pier. Omitting the warehouse would be more prototypical.

So, I thought I'd give it a try. I first finished painting the portions of the ship that were hidden by the warehouse.  Then, I took two comparison photos. What do you think -  with the warehouse or without?

If I don't place the warehouse on the wharf, I do have another place on the layout where I can use it.


A Taxing Work session

We had a work session on the Aquia Line today, April 15. If you are in the USA, this is normally the day that income tax is due, but since it was the weekend, we get a few days reprieve.  To escape tax preparation, Joel and John Salmons, Doug Gurin and Michael Spoor arrived to work on the Aquia Line. It was a very productive session.

Joel working on hay bales
Big pile of hay bales
First Joel got to work baling hay. He was eminently qualified for this as he spent his teenage years baling hay in New Mexico.  While he was wrapping bales with twine, Michael assembling the bales into a large pile. This pile will reside on the wharf at Aquia landing to designate the forage loading area. Way bills for empty cars will direct cars to the forage track at Aquia Landing.

John working on roof battens
Since he is an architect in training, John got the windows and roof assignment. He installed the last 16 windows on the wharf structures and then started detailing the roofs.

Doug got the  assignment to start the  Burnside Wharf. He cut away some of the foam and prepared the bottom surface for conversion to water.

Swamp scenery is drying
While they were working, I adding scenery and ballast to the narrow shelf where the Aquia Landing yard tracks are. This area depicts a narrow  spit of sand that is surrounded by grassy marsh. I used static grass and some paint to depict the swamp grass.  I am almost done with all the ballast for the railroad.

My mom and Alicia provided the snacks and then dinner of home made ravioli.

Painted schooner at Burnside's Wharf


After dinner, I continued to work on the Burnside Wharf area. I painted a schooner on the back drop. Since the majority of the schooner is hidden behind the wharf shed, I only need to paint the masts and some of the rigging.

Once the blue paint dries, I'll add pilings and beams to depict a wharf.

April 12, 2018

A Second Opinion


 My wife is brilliant! (She said I am allowed to say that). Why? You'll see soon enough.

I decided to finish the scenery at the north end of Clozet Tunnel. I had originally planned to use some structures to block the view of this portion of Clozet Tunnel, which is a fairly large hole in the wall, instead of a tunnel portal.

After several years of delaying work on this area, mostly because I couldn't make a structure view block work, I decided to go with a normal tunnel portal.

The first step was to make the tunnel portal. I used the drawing I had for Crozet Tunnel, I just slightly modified it. I cut the parts on the laser and assembled the tunnel portal with about 12 inches of brick lining. Placed in site, the tunnel sure is a deep dark hole.

Next I mocked up a piece of hardboard against  the existing fascia and laid out a cut line. I used my Festool Carvex jig saw to cut the profile (BTW the Carvex is rapidly becoming my favorite tool.)  I glued the fascia in place and started using card board strips, foam pieces, and rosin paper to build up the hill.

Next I started the rock carvings for the portal. That took the better part of a day. With the rocks installed and rough painted, I asked my wife to look it over and get her feedback. She looked at the tunnel for about 30 seconds and suggested that I trim back the fascia to allow a better view of the tunnel. Wow, she was right. There was something I didn't like about the hill side and she nailed it. The fascia was too overpowering for the scene. See, I told you she is brilliant! The animated gif above shows the difference.

So the next day, I got out the Carvex again and trimmed the fascia back so that the slope of the hill was consistent. By removing this section of the fascia, the area is more open. Since my workbench is immediately to the right of the tunnel, the more open fascia is much less claustrophobic.

That rock facing needed some patching, but that was an easy task.

With the tunnel portal, the backdrop required some rework, which I enjoyed immensely. I painted some large trees as I plan to trees on the top of the tunnel.

With the backdrop painted, I gave the terrain a base coat of scenery. Once that is dry I'll add static grass and other details.


Panorama of the scene with wet base coat of scenery. Masking tape protects the track.

  While I was working on the tunnel, some contractors arrived and installed new carpet in the stairs to the layout room. With fresh paint and new carpet, the entrance to the layout is much nicer, though some of my model railroad friends claim they can't tell the difference. Oh well, I can.

April 7, 2018

Tsunami2 Steam Decoder

I installed a new Soundtrax Tsunami TSU-2200 Steam Decoder with current keeper in Engine Haupt this evening. If you are keeping score, this is the third decoder I have installed in this loco. The previous Soundtrax Tsunami decoder and current keeper started having trouble that seemed to get progressively worse.

I am happy to report that the new TSU-2200 seems to be working very well, see video below. The install was pretty easy, as I just had to cut out the old and solder in the new decoder to the existing wires. Installing the Current Keeper was really easy as it has a plug that fits the decoder. All I had to do was trim the plastic insulation on the decoder a tiny bit to allow the plug to slip in.


As usual, I couldn't get my Easy DCC to program the decoder address. So I had to get out the SPROGII. Of course it was set up for HO locos, so I had to convert the SPROGII  from HO to  O scale locos. I actually set it up so I can now do either scale without further set up. Thankfully, the SPROGII worked. While I had it on the SPROGII programming track  I did some basic programming.  Then I used Ops Mode programming to tweak some of the CVs while the engine ran on the track . The only CV I can't find is the simmer and hiss sound when the engine is idling. All my other steamers make noise when they idle. This one doesn't. Anyone know what CV controls that? I need to repair the wood pile as some of the logs fell off during the decoder swap and it will be ready to roll.

While I was playing around with locos and my iPhone, I hooked up a DC power pack to PoLA and test ran the new Key Imports HO scale PRR B6 0-6-0.  It runs well and has surprising tractive effort for such as small loco. This engine is for a project for my next book. I plan to install a sound decoder and current keeper in it too.


April 4, 2018

Infrastructure Improvements Wrap Up

I am just about finished with infrastructure improvements for the basement and the layouts. I finished repainting all the common areas that I planned to repaint. I did not target the areas with backdrops, fascia, or valances, though I did touch up a few places on the fascia. We are supposed to get new carpet for the stairwell in a week. That will be the last of the planned improvements. Hopefully it will give the overall layout room a neat and clean appearance. I also took the opportunity to reshuffle the wall hangings and swap out some of the old pieces with new.

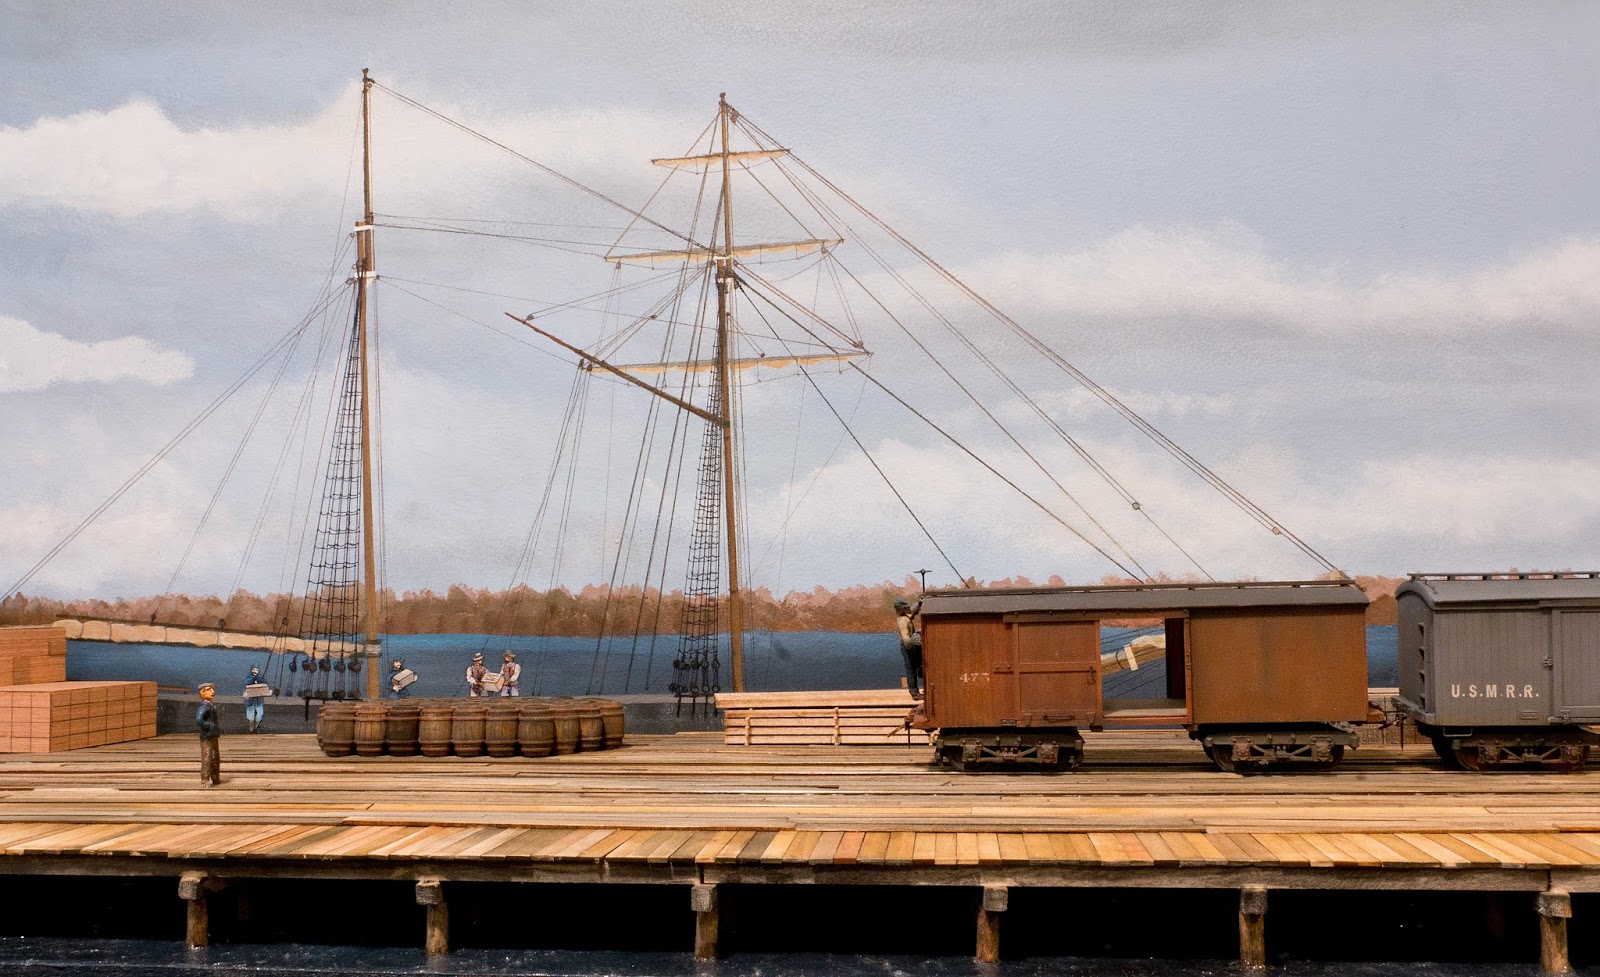
New lights eliminated back lighting at Falmouth


Next I installed new LED light strips to replace several of the problematic fluorescents lights. Thanks to a tip from Frank Hodina I ordered an 8 pack of these LED lights from Amazon (click here). Combined with some 18-inch long LED light strips I got from Home Depot I was able to greatly improve the lighting in my layout room and shop. These lights are supposed to last 50,000 hours. I hope that is true since I had bad luck with the flourescents. Nearly every one of the fluorescent lights I had in the layout room have failed over the 8-12 years they have been installed. Usually it was a bad bulb, but I also have several ballasts go out too. They were a real pain to replace.

The LEDs also use less power, create less heat, do not emit much UV, produce a consistent color light, and are linkable making wiring much simpler.  These fixtures are also very light weight. I used hot glue to install them. I was able to put them in locations that help avoid the back lighting that my existing light system created.


Like many of us, I have way too many books and magazines.  I wanted to add more book shelves to the layout.  To do it, I added a display shelf under the Borax peninsula on PoLA.  I used the same Ivar shelf system I used elsewhere in the layout. I put various models on display in this area since it is visible from and back. The shelves freed up from no longer displaying models are now holding books.

I think Ikea is discontinuing these shelves, so I was unable to order extra shelf pins. But my local hardware store had some double threaded studs that worked perfectly to secure the shelves.

During the last op session Engine Haupt was acting up again. I think the decoder and perhaps the current keeper on it are bad. So I ordered a new Tsunmai 2002 steam decoder and current keeper. George Bogatiuk at Soundtrax suggested this approach as the new decoders are more efficient. Hopefully this is the answer, as Haupt is a good runner, heavy puller, and sounds great,... when it runs.  Yes, I hate DCC.


We had a busy Easter weekend. My brother and new fiancé visited. After a triple party to celebrate their engagement, my mom's 94th birthday, and our retirement from government service, my brother did an informal op session on PoLA.
A few days later, my friend, Bayo Adedeji, stopped by with his 10-year old twins, Alexander and Ariana to run some trains. They are on spring break. This is the second time they operated the layout.  Hopefully, they will come back again.


Last but not least, Seth Neumann and Steve Williams of Model Railroad Control Systems sent me this test video showing progress on the Telegraph system.  They are nearly ready to send the Arduino systems to me for installation on the layout. I'll post more about that as it gets installed.