A journal following the history, design, construction and operation of Bernard Kempinski's O Scale model railroad depicting the U. S. Military Railroad (USMRR) Aquia-Falmouth line in 1863, and other model projects.
©Bernard Kempinski All text and images, except as noted, on this blog are copyrighted by the author and may not be used without permission.
-----------------------------------------------------------------------------------------------------------------------------------------------------------------

February 13, 2022

Rock Me Some Wagon Wheels


...with apologies to Bob Dylan, to finish up the cannon I had been working on, I drew some 14-spoke wheels. I had some artwork for wagon wheels from Gerry Dykstra, but that was not in a format I could edit.  So I decided to draw my own. To get the model as precise as I could, I went up to Fort Ward to measure the cannons they have in the restored bastion. One of their  guns is a very authentic replica of a 6 pound James Rifle. 

I was able to get detailed measurements of the wheels. The hubs in particular were quite interesting with a cove on the inside and an ogive on the outside. Also, I measured the amount of dish in the wheel. It was only 2 inches, but that is an important feature of wagon wheels from this era.

I also measured the 24 pound howitzer they have on site. It is slightly bigger that the 6-pounder but only by about 4 percent. 

While I was at Fort Ward I stopped by the Museum and visited the replica of the officer's quarters. I took a panorama of the inside of the officer's quarters. I need to recreate something similar on my layout. I plan to detail the upper story of the Provost Marshall office. So this photo will help guide me. I also had a nice chat with the museum director as she and her colleague were wondering why I was measuring their guns.

Interior of officer's quarters for detailing ideas. Looks cozy.


Telegraph System


Amby continues to make amazing progress on the telegraph system, He now has all five base stations done. 

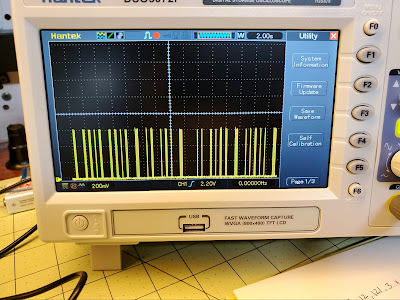
I think he has been having fun with them as he sent me this image of the dot code on his oscilloscope.  I was playing around with speeding up the code. I think it might be a tad easier to listen to at about 25% faster than what we have now.  It remains to be seen if we will be able to change that in the software.


 It is time to begin wiring the dispatcher's control station. That will be built into the cubby hole section of the dispatcher's desk. 


When I built that cubby hole I was inspired by the field desks that civil war officer's used. It happens that the museum at Fort Ward has one of those on display too.


Each individual station will be adorned with simulated brass plates that I printed on my 3D printer. I now need to finish painting them. 


February 9, 2022

Cannon Fever


It's winter and we are cooped up. I have cannon fever. So, I drew a 1/48th scale 3- inch rifle, a common Union field artillery piece in Fusion 360 today.   I left a few details off the drawing. They will be added with the photo etched parts I have on hand.


Laser cut cannon with 3D printed limber

If you recall, I already have 1/48th scale cannon made with laser cut parts, cast metal barrels and photo etched detail parts. They look good, but require some assembly. If the 3D files work out, the 3d printed cannons will have much simpler assembly. 

Combined with the 3D printed limber I made a few months ago, I will be able to begin field artillery batteries as scenery items for the layout. If the test prints work out, the Aquia Line will be brimming with cannon soon.


To answer the question in the comment below, here is a table of cannons commonly used in the civil war.


Decal artwork

Last night I did some graphics work for Brian Kelly. He lives in our area and is modeling the C&O. He wanted a decal for a milk truck on his layout. But, all he had was a rough photo of the company's logo from a cloth patch. He asked me to redraw it so he could make a decal. I am including it here in case anyone else might need it.  You can re-size it as needed when you print the decal.


February 7, 2022

New Images of, and more visitors to the Aquia Line


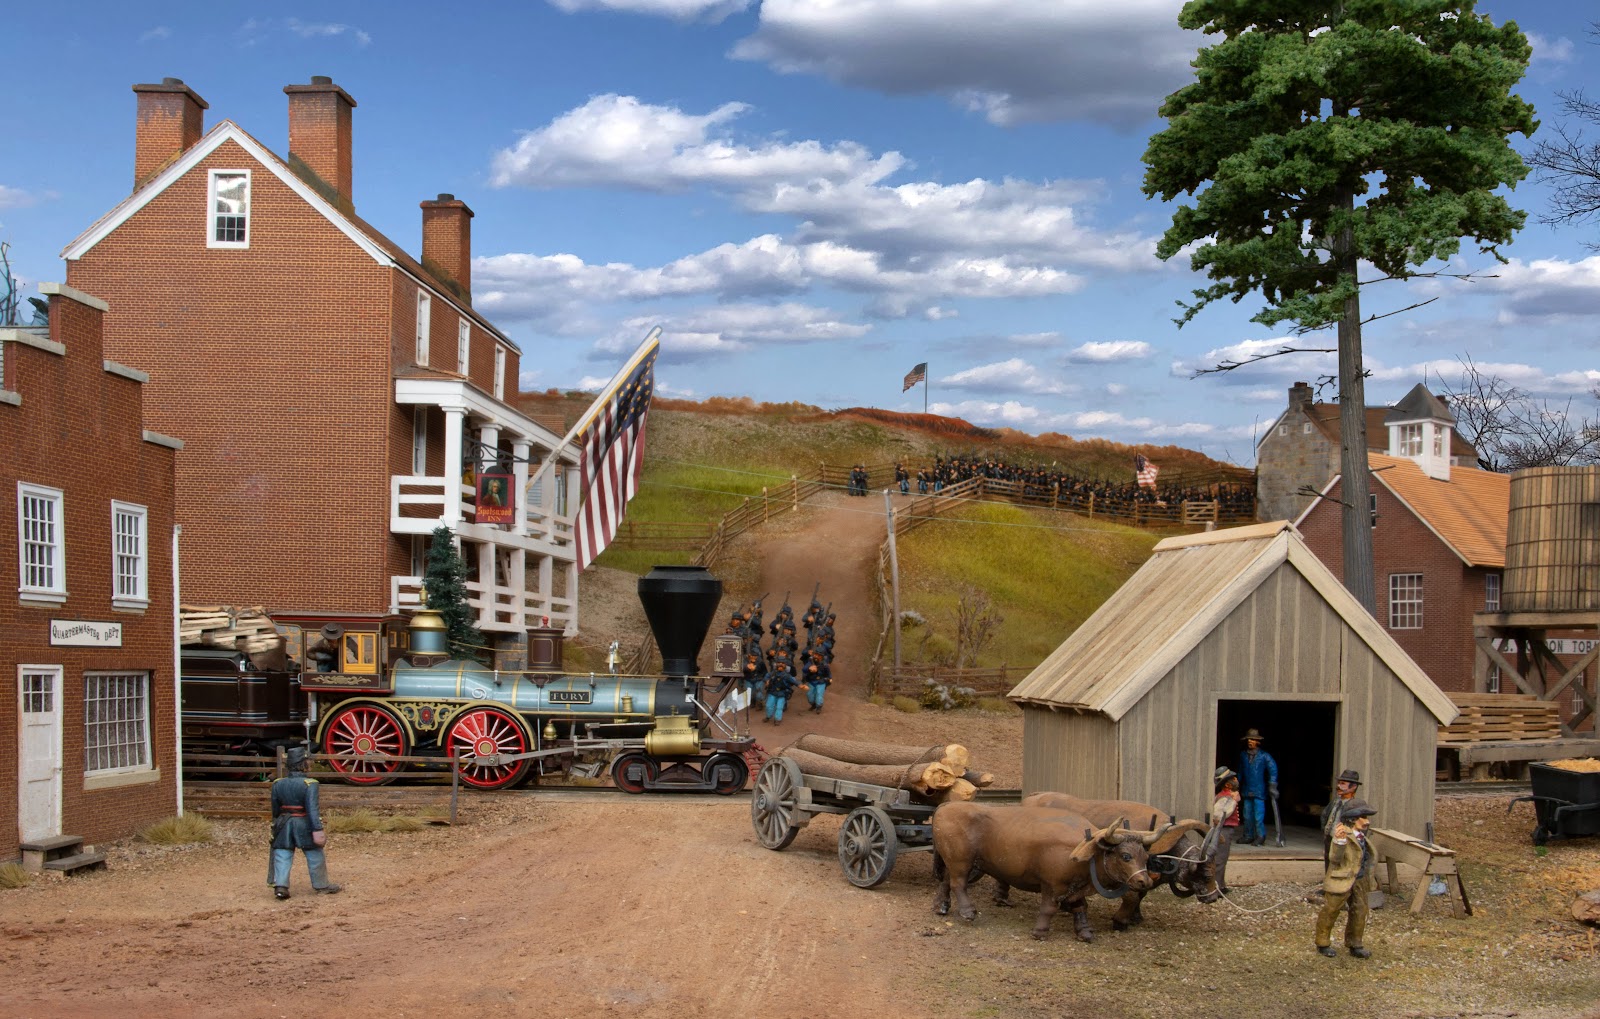
I am working on a new article that will be an overview of my layout. I decided to shoot some new photos for the article.  Despite working on the railroad and photographing it for 13 years I still can find some new photo angles. This one is a sample of what you might see in the article. The composition is difficult to shoot due to the low ceiling above it. But using some photoshop to replace the sky yields this interesting image. This is one of the deepest scenes on the layout and highlights the use of forced perspective.


Sunday evening, Gary White and his girlfriend, Dru, stopped by to visit the layout.  Gary is a narrow gauge modeler with several narrow gauge model projects in the works. He purchased from me many of the WWI models I built for my book on military railroads. I hope he puts them to good use.  Dru is a farmer from Pennsylvania and brought us a dozen eggs from her farm. 

February 6, 2022

Provost Marshal at Aquia Landing - Black History Month

A family of former African American slaves arranging transportation to the North on the Aquia Line. From here they will board a steamship to Washington, DC. 

This particular model scene is based on this prototype image taken in 1863. The prototype image shows several African Americans who are most probably former slaves now working for the USMRR. The USMRR hired hundreds of African Americans to work on the railroad. My scene depicts some of the 10,000 former slaves that used the Aquia Line to escape to freedom standing in front of the same building. 

The Provost Marshal in the civil war were the equivalent of military police of today. They controlled passenger access to the USMRR as well as performing many of the other traditional duties of the military police. 

The Aquia Landing portion of my layout is far from being complete. I still have a lot of work to do to finish it. But this image shows the potential of the area. I think it will be the signature scene on the railroad when it is finished..  

One of the biggest jobs yet remaining is completion of the several ship models that will frequent the harbor.  I have several ship models in various stages of construction.  Plus, Brion Boyles is building a schooner for me.  Hopefully, we will get a chance to finish these soon.


February 5, 2022

Telegraph Progress Continues

Amby stopped by this afternoon so we can review progress of the telegraph stations. I needed to make more base plates for him so he can continue to build the stations. He has completed one and plans to rewire the one I built as that one has some loose wires. That is probably due to my lousy soldering and its two trips across the country. 

Here you can see the two stations completed so far "talking" to each other.  The red flashing light tells the train operators that the telegraph is busy and to not try to send an OS report until that stops.  All the stations will flash a red light when a message is being sent from any one station. Amby suggested a revision to the busy  circuit so that the busy light stays on continuously while messages are being transmitted. That is probably a better way to do it as then the operators won't get fooled by halts in the flashing due to delays in between messages. 


Amby is approaching the task very methodically. He is creating circuit diagrams of the whole system so it will be easy to understand and debug. He made a spreadsheet listing all the wires and their color codes.  He also wants to dig into the Arduino code to better understand that. I am really benefiting from his experience and an EE.

Next we surveyed the locations of the telegraph stations on the model railroad. We need to find places where they will be out of the way and have sufficient room for the electronics behind the fascia. There are good places for all of them except at Aquia Landing. At the location I may have to make a separate station base plate as the fascia is only 3 inches tall.

Amby also suggested a cheat sheet with all the possible OS messages listed so that guest operators can dispatch more easily. However, he did not know about the random messages that I added to the spec and Steve Williams included in the software. There are about 10 messages that play at random. Those messages are based on actual messages I found at the National Archive. Amby told me that he had left the telegraph system hooked up at his house while he was working on something else. At one point it started to send a message. He was quite surprised by that as he did not know about the random messages. 

While Amby was wiring this week, I took a crack at making simulated brass plates using my 3D printer. I was able to use the existing 2D artwork that I generated for the laser cutter to create the STL files needed for printing. I imported 2D dxf files into Fusion 360 and made them into 3D objects. Once I converted them to STL files I printed them in resin.  I did get an estimate from Shapeways on printing these in actual brass. The cost was over $115 per plate. I would need 5 of these, and 5 smaller plates for the lights. That was too costly as I can make them in house with resin for far less.

Next I needed to paint them. It took me a few tries, but the best results came by spraying the model with flat black Vallejo acrylic. Then I carefully brush painted the raised letters and brass surround with acrylic gold craft paint. I used a dabbing motion with a nearly dry brush so the gold paint would not soak into the gaps between the numbers.  Then I gave the model a coat of clear gloss acrylic. They might look better with a matte finish. 

Visit to John Sethian's O Scale PRR layout

Action on John Sethian's PRR O Scale layout. The clock tower conceals a support post.


On Saturday Morning I had a chance to visit John Sethian's O scale 2-rail PRR layout. It is a gorgeous layout depicting Pennsy RR action in the electrified districts somewhere near Trenton, NJ. He is building catenary for his electric motors to run under. The catenary is not live on his railroad. John has very cleverly modified many 3-rail models to 2-rail to get the equipment he needs for his railroad. 

I like how he uses large urban buildings as view blocks. He also uses forced perspective on the background scenery and structures made from photo prints. His layout is full of finely detailed scenes and clever  devices. For example, he has a section of scenery that lifts out of the way using a linear actuator.

Here are examples of two finely detailed scenes. The office is based on a Edward Hopper painting. The used car lot contains models of all the cars John has owned now or in the past. He had a Porsche at one time, but he really is a Jaguar aficionado. In fact his garage has three of them, including an XKE that he purchased after it was on fire and totally rebuilt.


John posing by his Jags


Work session at Doug Gurin's layout


On Thursday, I was at Doug Gurin's house to continue to help him build benchwork. We got a tricky piece of  sky board installed on a very rough cinder block wall. Then we cut the plywood bench tops for the long wall. A few more sessions and we should have Doug's benchwork ready for him to lay track.