
 |
| 3D printed trucks |
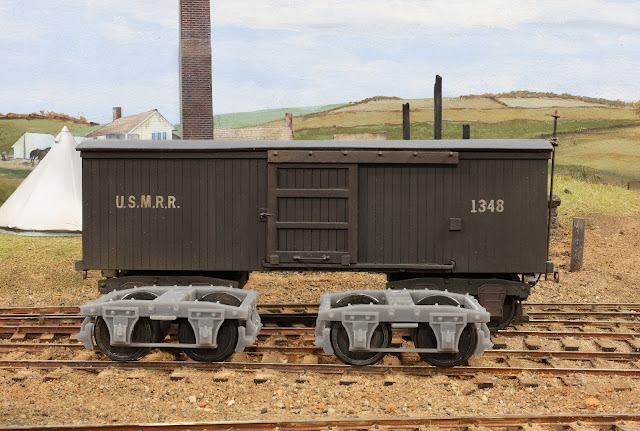
The expansion of the layout has resulted in a need for me to have more freight cars on the railroad. I haven't built any new cars for the layout for several years. I probably need to make some new flat cars, but I would also like to try some new styles of box cars. Regardless of what I build, I will need some new trucks. I decided to make them using my 3D printer.
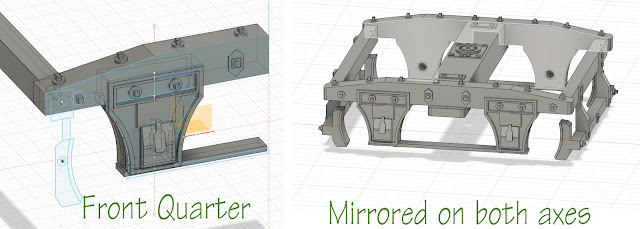
I started by just drawing one quarter of the truck since it is symmetrical about the longitudinal and lateral axes. Once I had the quarter section fully fleshed out in the drawing, I used the mirror feature in Fusions 360 to complete the truck.
These trucks are designed to accept NWSL 8248-4, O scale Wheelsets 33"/145,1/8"x1.730" shouldered axles. I have 5 sets of these on hand. Plus I have a few of my cast metal trucks that I plan to replace. I don't know if I can still get these wheelsets. If I cannot, I have a lot of Intermountain O scale wheel sets on hand. I would have to adjust the drawing to accept those wheelsets. However, I prefer the NMSL wheelsets as they have thinner treads.
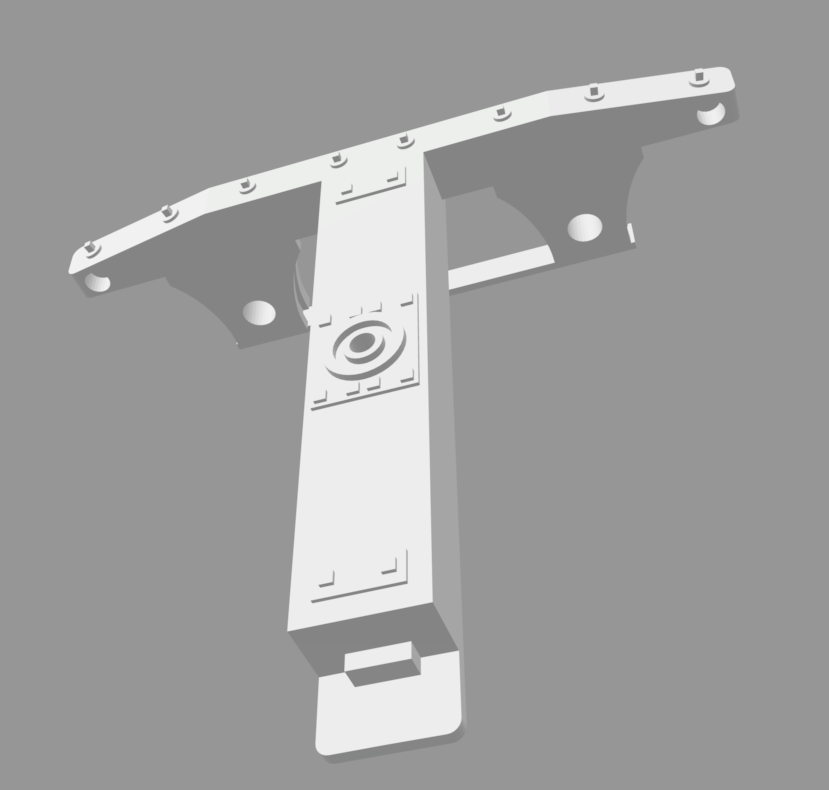
I had to design the truck in parts that must be assembled. The printed resin is too stiff to allow assembly by flexing the truck like you can do with N or HO scale plastic trucks. To ease assembly, I printed the bolster and one truck frame as single piece. Thus each truck has only 4 parts. Once the wheelsets are inserted in the holes on the truck frame, and the second side frame attached, the truck aligns itself. I apply some CAA and use a small clamp to hold the parts. While the glue is setting I insert the brake beams. On trucks without brakes, I glue those beams in place. But for trucks with brakes the beams are not glued.
 |
| You can see how the brakes beams can pivot |
I made the brake beams on pins so that they can rotate. That allows me the option to make the brakes work using my photo etched parts if desired.
I designed the bolster and brake beams to fit in slots or holes in the truck side frame. I learned that if you want to do this, you have to make the slots or holes larger than the corresponding pins by a fair amount. In this case I had to enlarge the 0.065 inch holes for the brake beams by about 25%. I had to reduce the bolster locating pin by about 50% to make them fit. I am not sure why, but holes and slots in materials print smaller than the design dimension by significant amounts.
I was very pleasantly surprised to see how smoothly these trucks roll. They have a lot less friction than my earlier versions. Printing 3D trucks will simplify my freight car construction as in the past it took me about 4 hours to build a set of trucks using my laser cut parts. These trucks also have more realistic detail, particularly in the journal cover area.
This weekend I also worked on a wargame project with John Drye. I helped him build a map for a game he plans to run at Fall In 2022. The maps depicts the area near Eindhoven and Son during the 1944 Operation Market Garden. The map is a 6' by 6' piece of felt that we painted and flocked. The graphics are designed especially for the new game called Breakthrough that Frank Chadwick is developing, and John is play testing. However, the map could be used for other game systems with a little modification. It was a fun project that came out better than we expected.
We used aerial photos as a guide but the terrain is stylized to suit the game system. I painted all of the fields, canals, and roads with spray can colors using soft masks. Then we embellished the edges of the fields with acrylic paints to show tree breaks.
 |
| John is painting some details to help delineate the fields and roads. |
Interesting to see if new truck cures boxcar 1334 (right number???). Nice detail and design.
ReplyDeleteLove it! I've been designing trucks and having Shapeways print them for a number of years. They roll well and allow for such a nice level of detail. The first pair I created were 3 parts= bolster + sideframes. Then, I did passenger car trucks with separate journal boxes and variants with/without springs. I found the real springs to be a pain. I settled on 1-piece trucks as much as possible and do what I can to minimize the truck flexing when inserting the axles.
ReplyDeleteThe reason 3D holes are too small is the pixels bleed light into the surrounding pixels. So parts tend to grow just a hair.
ReplyDeleteThose trucks are awesome!!!
ReplyDeleteI'm modeling the lee brooke rail gun in o gauge. For the life of me I can't figure out the brake system you modeled. Your build (2012) was incredible! Please, help me.
ReplyDelete